So you’ve all seen that mosaic tile table I built earlier this week sitting in the courtyard seating area. This was one of those “couldn’t find exactly what I was looking for so I’ll built it” DIY projects coupled with a “make it up as I go along” strategy. I knew how wide, long, and tall I wanted it to be and I also wanted it to be unique and snazzy, but beyond that, I just got creative and went with what came up inside my head.
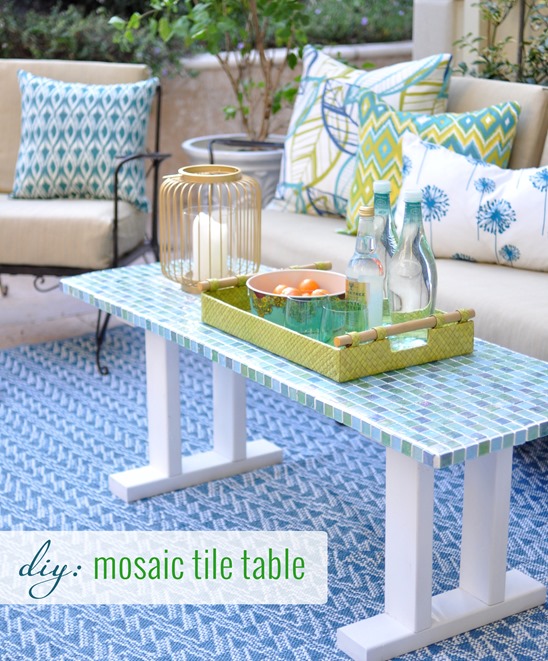
I call it a coffee table but the design works just as well as a bench and you can embellish the basic frame as you please, with tile or reclaimed wood on top, whatever suits your style. The benefit of building something yourself is that get the exact dimensions you want and you get something totally unique too.
I built, painted, and tiled this table in a day starting with stock lumber from Lowe’s. I combined pine and redwood, not for any other reason except that I was in a hurry and since Lowe’s has a great selection I just grabbed the sizes I needed.

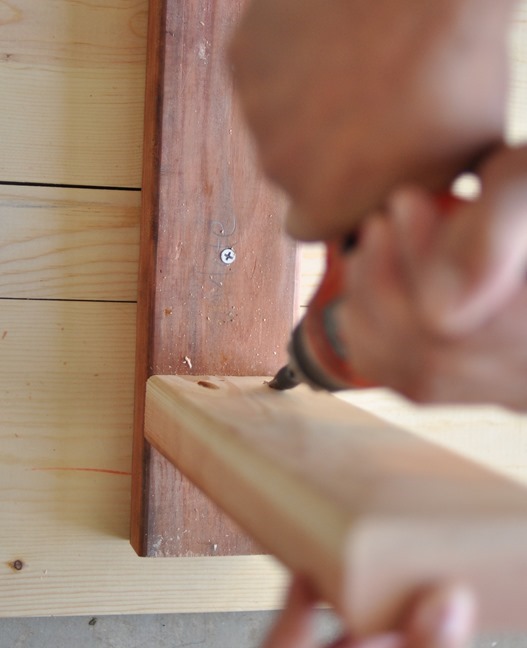
Wood Supplies for a 18” x 50” x 18” tall table: Two 7.5” x 50” pine boards; one 2.5” x 50” pine board; two 8’ lengths of of 2×4” cut to: 14” long top x 2; 13” leg x 4; 15” base x 2. I used my miter saw to cut the boards then wood screws to fasten it all together (seen above).
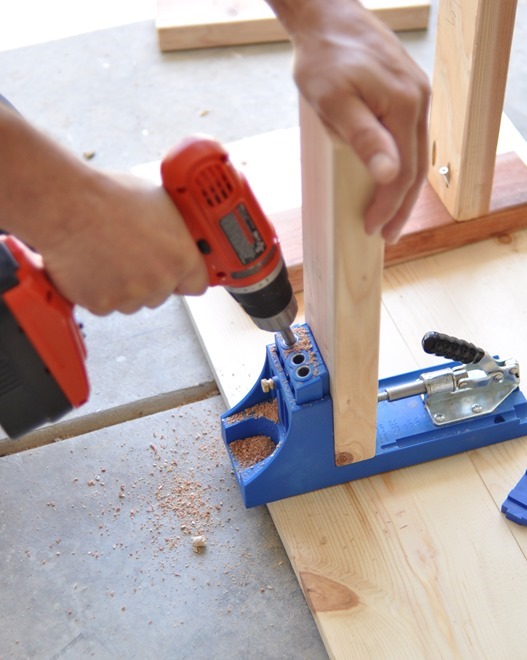
Next came the legs – I wanted it to be stable and contemplated an X base like we made with this table, but opted for a simpler “Roman numeral” design with 2x4s. To be 18” tall I subtracted the height of the leg top and bottom and the table top to arrive at a 13” leg, secured to the top 2×4 by Matt with a Kreg Jig and wood screws.
This is what the basic wood table/bench looked like after construction. You can see it’s a very simple design: planks fastened together to form the top and supported by legs made of 2x4s.
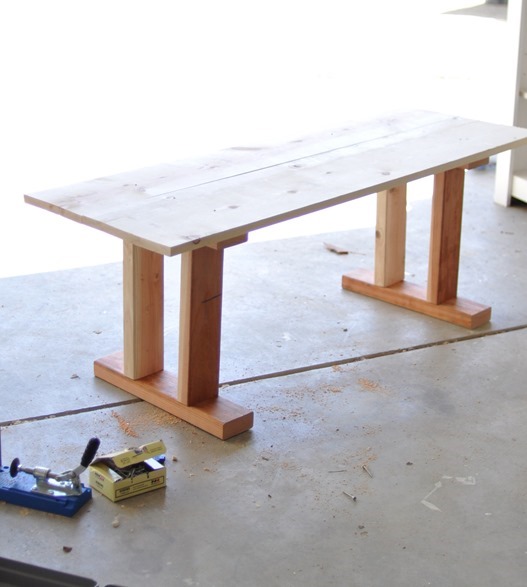
We didn’t use a stabilizer board on the inside since this is a smaller piece and of solid construction, but if you’re making anything longer consider including a board secured between the legs for maximum stability.
If you’re adding mosaic tile, make sure you construct your table/bench surface so that the tile will fit without having to use or cut it with a tile saw. I found this blue/green tile blend at Lowes for $9 a sheet and premeasured my cuts of wood knowing in advance the width and length of the tile sections and the fact I could fill in small gaps with grout.
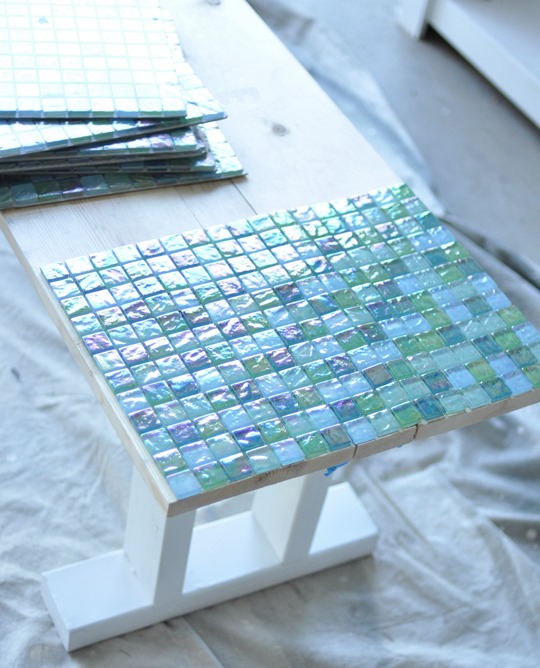
You can see I also spray primed the legs with Bullseye 1-2-3 Primer (like with these DIY outdoor planters) and then added a coat of the same white outdoor paint.
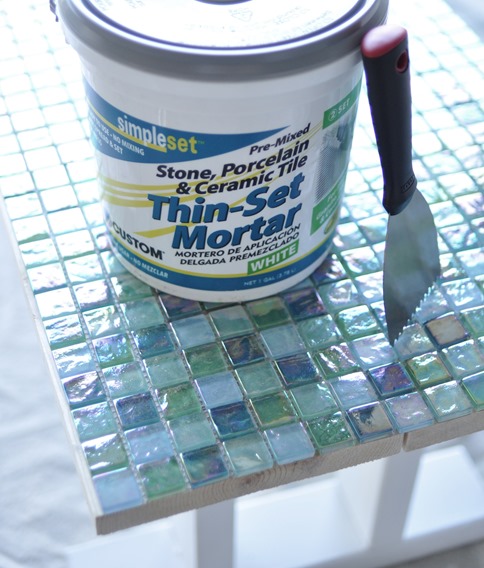
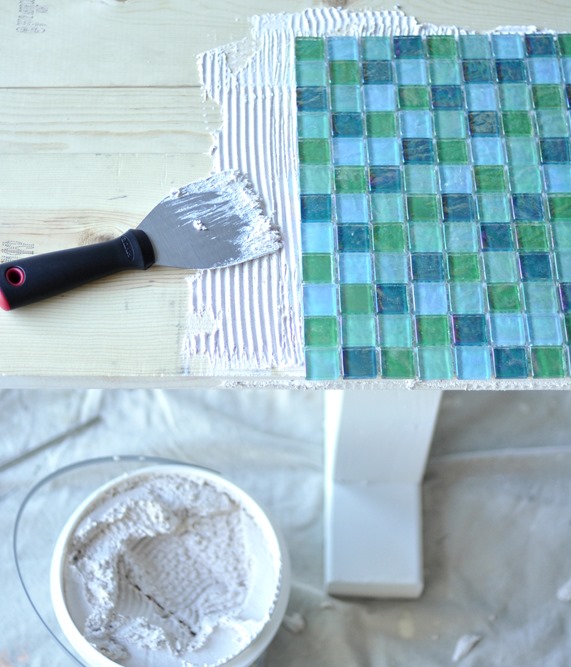
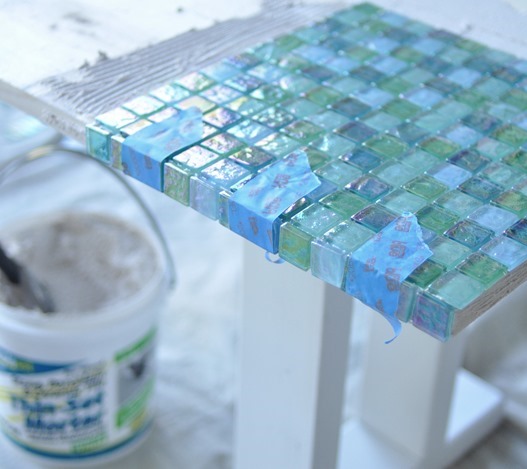
I’ve gone over the step by step for tiling surfaces with mosaic tile on a bunch of occasions (look here andhere and here and here) but basically it’s this: first secure the tile with a thin set mortar applied with a trowel. Sometimes I buy in ready to mix larger bags but this time I used the premixed kind for convenience.
And since knowing how to tile is a good life skill, I brought in my apprentice. :)
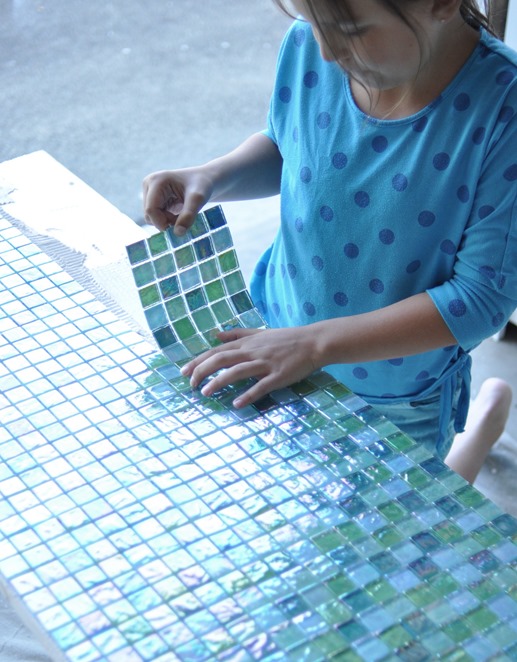
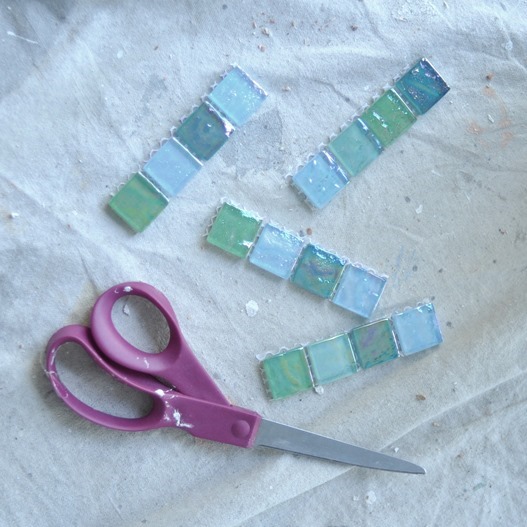
An additional strip of tile hides the rough edges and painter’s tape holds it in place. (Tip: Instead of long 12 piece strips, I trimmed them to four pieces so the lighter weight strips wouldn’t slide or move.)
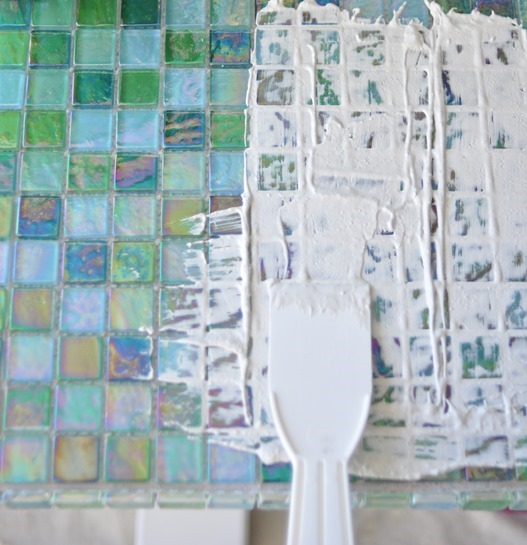
Once the mortar is dry, apply grout with a grout float (or I use a putty knife with smaller projects).
Sponge off excess grout from tile surface and allow grout to dry.
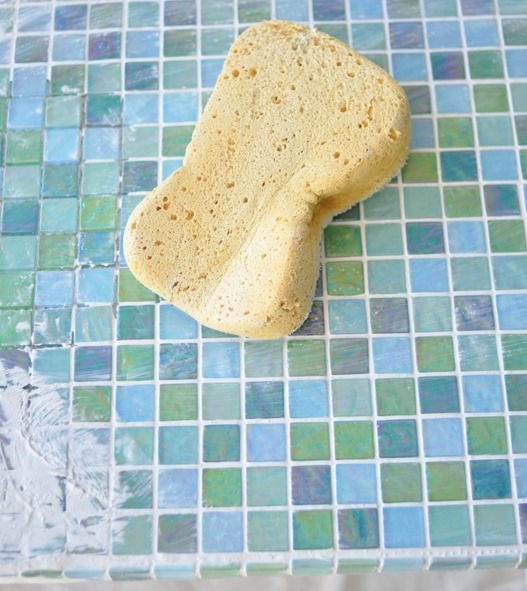
I love the combination of color and iridescent reflection brought into the sitting space by this one-of-a-kind piece.
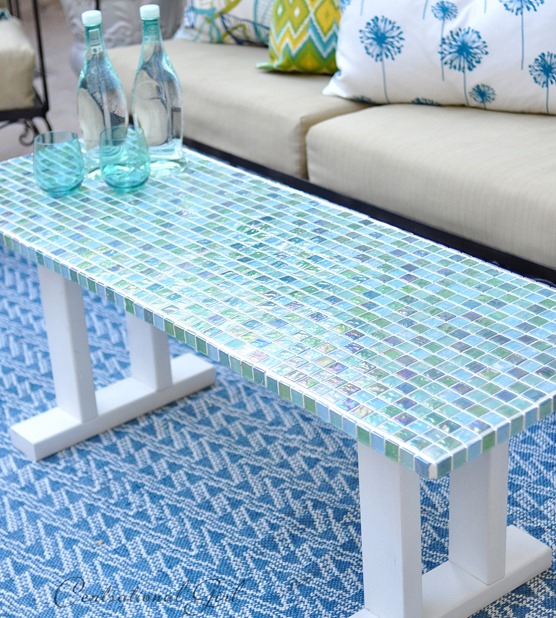
And that’s how the “make it up as we go along” design turned out to be a fun and colorful tile table in our courtyard!
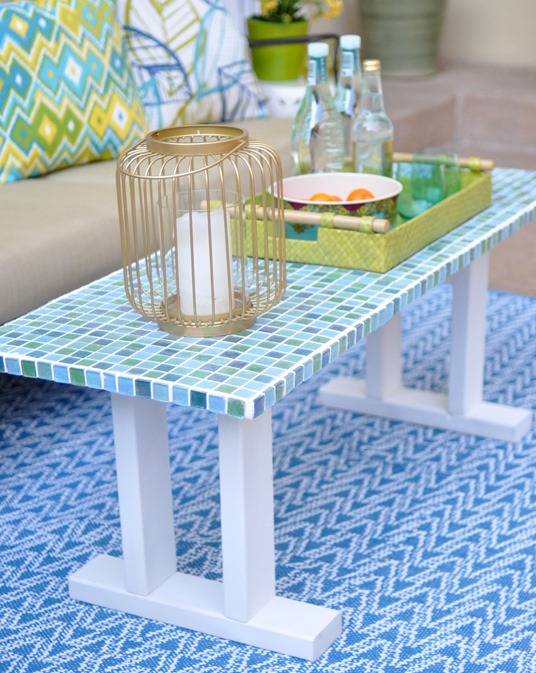

.

gorgeous!
That is just beautiful and similar to an idea I had for my patio. My question is – how well will the tile and grout hold up to the elements? Is some additional finish required? I’m in Michigan so we get a fair amount of rain. I can bring it in for the winter but would want to leave it out for the other three seasons. Thanks!
I am a self taught mosaic artist. One of the first things I made was a wooden out door table. When wood gets wet, it swells. I thought the grout made it waterproof. It doesn’t Even sealed, it eventually will break off if left outside. I would suggest a sub layer of Hardee board, like they use in showers. And seal seal seal.
That table is gorgeous! I am completely inspired!
This is absolutely beautiful. Thank you for sharing.
Nice work!
Can you give a link to that particular tile? I just painted my kitchen with a grey/blue color (same one as your small kitchen) and am thinking that tile would make for a good backsplash, or at least as part of the accent of a white backsplash.
What are your thoughts?
Thanks so much, love your work.
Vanna.
Sure Vanna, it’s the Coral Reef in Mint, link here!
http://www.lowes.com/pd_304880-87523-CHIGLABPHT808_0__?productId=3056291&Ntt=elida+glass+
Kate
Absolutely gorgeous! Copying your table is on the top of my to do list now.
Its beautiful. I just used mosaic tile for my kitchen backsplash and I used “simplemat” instead of mortar. Have you ever tried that? Its like double sided extremely sticky tape. You can grout right away, no need to wait for anything to dry.
Hi Allison, yep I’ve tried it, I have had some difficulty trying to reset tile after one application, it’s so sticky it’s hard to peel it up and move it if necessary, did you have that experience? I guess I’m just old school! With mortar you’ve got time to move it around before it dries :)
Hi Kate!
I just found you on pinterest last night (caring for Hydrangeas). I am TOTALLY inspired! I too made a round table similar years ago. I need to get back to my creative self. Thank you for sharing!!
Just wanted to let you know that I love this project so much that I tweeted about it. :)
I love the simplicity of the design and the fact that you were smart enough to plan it out so you didn’t need to cut any tile.
I’m definitely going to steel this idea to use as a bench in my entryway.
Thanks for sharing!
That turned out great. I love the colors. My dad used tile for an outside table and it has held up great with weather. Glad you mentioned the simplemat I was thinking of trying it but I like the extra time to move.
It turned out so pretty! It’s definitely inspiring me to go ahead with some building projects I’ve put on the back burner. Sometimes we make it so much harder in our heads, but half the battle is just getting started. Thanks for sharing!
Hi Kate, I LOVE this table! I don’t know if I am as skilled as you to build my own, but I am definitely inspired to tile my own table top now! Thanks for sharing this. AWESOME job.
I thought your just tiled a table you had, then realized you also MADE the table!
Awesome!
Absolutely love it! Definitely going to be making one!
Wow that turned out so pretty. Thank you for posting this. It looks like I will be stopping by Home Depot this weekend!
I just love the table, and I think I should try to make one myself. I need furniture for the back deck, but can’t afford a new set. If I can find some used wicker chairs, it will be great.
Love love love this! I was wondering if you had an approximate cost of this project that you can share?
Hi Tara, thanks! The tile was the most expensive part, $9 a sheet for 7 sheets. The lumber wasn’t that expensive, I think around $20, then there is the cost for mortar and grout, so maybe just under $100?
I love this. Awesome idea and craftsmanship. I could also see this idea applied to an old piano bench.
I am thinking of turning this idea into an outside dining table. Thanks so much for the inspiration and definitely for the tips about a stabilizing board. When done I will try to remember and come back and post pictures.
Beautiful! :)
What a beautiful piece! Love the clean crisp look of the white with those gorgeous tiles. Good job!
What a great table and thanks for the tutorial! I might even be able to do that!
Leslie
This is a wonderful tutorial. The table turned out great and I really want to tackle this job.
I love it, Kate! I’m soooooo coveting your Kreg Jig!
It reminds me of sea glass. Beautiful!
Obsessed! Who wouldn’t pay top dollar for that table?? Amazing work, as always!
xo Cindy
When you spoke about reclaimed wood, my eye lit up. I know exact;y where I want this idea to go…a kitchen bar that will most likely be made with pallet wood! FABULOUS idea KATE and Thank YOU!!!
What a gorgeous table! I love the green serving basket/tray, too. Where did you find it? I’d love one for my outdoor eating area.
Kate, that is so beautiful! I had to pin it!
Great tutorial Kate. The colors pop nicely with the rest of your accents. Nice tip on using the painter’s tape to hold the tile in place :)
Very pretty and unique! One tip, to protect the table from cupping and warping: be sure to coat all surfaces, especially the the underside, with a weatherproof sealant. Sealing only one side of a wood surface forces moisture to migrate toward the porous side and will cause shrinkage, warping and twisting after a while. This is true even for furniture built for the indoors. Found this out the hard way — lol! Beautiful job, as always, Kate!
I would recommend going one step further for making this project last even longer and I’d screw on 1/4″ Hardi board on the wood so that the tile adheres and stays on properly. Also, you don’t want to leave the table outside during the winter months because it will not last.
Thanks for mentioning this. Would you also use a sealant of some kind?
Yes it’s a good idea!
That table is gorgeous! Now I want one for our back patio!
What a beautiful table. And everything else looks fantastic also. You rock!
Warmly, Michelle
PS – Have I told you how much I enjoyed your class at SNAP this year?
Your table is BEAUTIFUL! Thanks for sharing. I’m curious as to what tool u used to perfectly angle the screws. :-)
Just BEAUTIFUL! You made it look so easy! Definitely Pin Worthy! Thanks for sharing! Blessings ~ Judy
This is absolutely awesome and the instructions are so thorough. Hope to try it tomorrow. Thanks for sharing!
table is beautiful but i also wonder about how it will hold up to the elements outside. I want to make one of these as a gift for my sister but im concerned after a few rainy days or hot 100 days it will start to fall apart or have the tiles falling off. What should i do to prevent this. All polyurethanes made for outdoors that resist sun and rain have a color to them and would destroy the beautiful colors of the tiles. What do you suggest i use to coat and protect it?
Thanks christina
Ours has held up well in the sun but I do tuck it away in winter the moisture will harm the wood over time. You can use a tile sealant on top if you wish
Instead of a grout sealant I’d recommend using Fusion grout (Home Depot brand pre-mixed grout) that way you don’t have to worry about sealing, staining, or mold/mildew.
I absolutely love your table colors and great directions of supplies to use! In 2003 I landed a really nice sturdy rod iron bistro set at a store for about $129.00, it came with a plastic insert table top that I had my eyes on to make a mosaic. Since thenI have taken care of the set by sanding and painting almost yearly to preserve as they don’t make this nice anymore. I also purchased a cover . Anyway, soon I’ll be making the table top. I’ve been researching and you have had one the best instructions showing what to buy and how to! Thank you for sharing!