Hey there, hope you had a great weekend! We did some organizing and gardening and had a big birthday party for both the kids at the local park – it was a lot of fun and also relaxing too! I can feel summer coming with the warmer weather and everything in bloom, and we’re loving spending more time outdoors in the sunshine, aren’t you?
Last week I mentioned I came up with a few creative ideas for container gardening for a Home Depot workshop, the first was the wood shim planter, the second was this mosaic tile window planter box seen below. I’ve got a third project to share with you later this month, but before I do, here’s an example of how you can use mosaic tile to dress up an ordinary redwood planter.

Any small scale mosaic tile you find will do and there are so many available to choose from. This project can be done without the use of a tile cutting saw if you stick to the mesh grid square mosaics like the one seen above instead of an offset or brick pattern tile. I chose white because the planter was destined to be part of a raffle at the Home Depot presentation and because basic white would be at home in any backyard.
If you’ve never tiled anything before, this is a good place to start! It’s a small enough project for you to get your feet wet with a tiling, and you’ll be so excited you did it! To recreate your own mosaic tile planter, here are the basic supplies: wood planter box, thin set mortar, mosaic tile of choice, grout, stain or outdoor latex paint (optional), polyurethane (if staining), sponge brush, large sponge, grout float or spackle/putty knife, and painter’s tape.

Since I was working with white tile I wanted to make is stand out with a dark contrast so I stained the top and bottom wood trim which wouldn’t get covered in tile in ‘English Chestnut’ by Minwax, which removed the reddish tones and deepened the wood to a darker espresso stained finish.
Use a sponge brush to apply one (or two) coats to achieve the color you’re looking for. You could also paint the trim too, but be sure to prime first with a stain blocking primer.

To adhere the tile to the wood, you need a thin set mortar, I chose the one below since it came in a smaller box, but you can use any that will work with the tile you’ve chosen, be sure to read the label.

Apply the mortar to the sides of your window box, I used a wide putty knife to apply it.

Next, trim your mosaic tile to fit and set it in the mortar. Be sure to check your tile measurements first since tile varies in size to make sure your tile will fit the length and width of the planter box. It’s okay to have small gaps above or off to the side since you can fill that with grout later.


Here’s a view from the side, you can see there is a small gap above the mosaic tile and also along the sides, but that gets filled with grout later so no worries!

Allow the mortar to dry for 24 hours, then mix your grout as directed and use a grout float or other tool (I used a putty knife!) to fill with grout in between the tiles. Taping off your stained or painted trim helps, since grouting can get a little sloppy.


With a sponge, gently wipe away any excess grout from the surface of the tile, and allow to dry for another 24 hours. That’s it!

If you’ve stained your trim, you can give it a coat of polyurethane to protect it. After your efforts, you’ll have a beautifully tiled planter box!


With this same process, you can choose any tile in any color you like, or even choose paint instead of stain for the trim – here are two more ideas I created with Photoshop – one with green glass tile and the other with painted trim and blue glass tile. The possibilities are endless!


This project makes a great gift, but if you create one for yourself, it will certainly be a beautiful focal point and conversation piece in your yard!
The ‘Look What I Planted’ Link Party starts tomorrow morning at 6 a.m. PST, link up all your garden ideas, see you then!
.


The tile adds so much to the planter–from plain to fantastic! Adding this one to my to-do list :)
I love it! All your versions look terrific, and I’m inspired to try. I’ve always wanted to tile something, but it’s a little intimidating, but this seems like a good first project. Thanks!
Gorgeous Kate, just gorgeous!!! I love it. I would love to try something like this one day. But I have way too many projects on my to-do list right now, so it will have to get added to my “maybe in the future” to-do list. ;)
Cute project! I love the tiles you used! It makes me wish I had grabbed the 5 clearanced marble mosaic sheets at Lowe’s the other day. Thanks for sharing.
WOW! That planter turned out SO gorgeous!!! I’m definitely pinning it to make at some point!!!
Great idea…and looks fantastic! This is definitely the time of year to be sprucing up the yard…and this project adds a ton of style and interest to a plain planter box. Love it!
Sorry I missed your visit to the Roseville Home Depot. I used to live up that way…looking forward to a possible Bay Area vist? Love all of your creative and inspiring projects…thanks for sharing!
totally awesome!! Great idea!
I love the white tile on the planter and it looks like a very expensive piece once it is finished. So did you make one for yourself to keep or only one to give away. It is so pretty I would have had to have made one for me to keep.
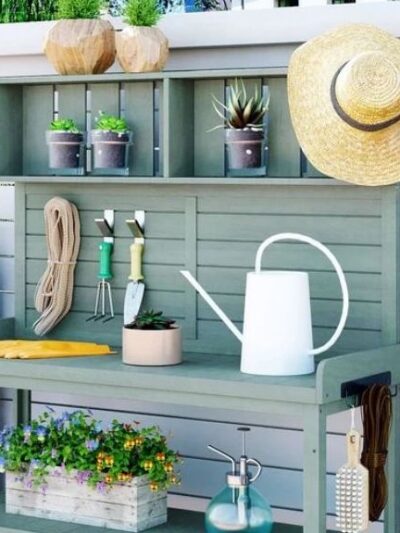
wow, thanks for the inspiration! quick question, where’s the table that the planter is on from? it looks familiar but i can’t quite place it.
Hi Lane, that’s a bench from West Elm!
Kate
OMG..I love all of them…such a brilliant idea.
I really love this and the wood shim planter from last week. I’m keeping these in mind for when we do boxes on our front porch!
Thank you for the inspiration!
I LOVE it when gorgeous and easy come together! I am headed out to HD to purchase some glass tile! You never cease to inspire me!
I love this idea! Thanks for sharing!
your planter is a beauty!
laura
LOVE this idea!
My next home improvement project will be some landscaping in our yard. We’re getting married in 2 months and we’re hosting our rehearsal dinner. We need some pretty in our backyard.
-Sarah
Hi, Kate,
This is a cool project! But, I have a question about durability. Won’t moisture be a problem? I thought tile substrate, in general, can’t move at all (which is why we use concrete board for floors and walls instead of wood). I would be concerned about grout cracking/tile popping. Did you line your planter with something waterproof? Can this be left out in the rain?
Thanks,
Amy
Wow, I love that! I never would have thought of putting tile on a planter – very pretty.
Love this tiled planter Kate! We have some new neighbors. I think I’ll try my hand at this planter and give it to them as a welcome to the neighborhood gift. Might need to make two….one for myself, too.
OMG I love it , What a great idea for MOM…I am going to show DH maybe he good make one for his Mom.
Have a good one Ann/alba
Beautifully done! I’m a little intimidated by tile, but you make it look very very easy!
Wow, I love this. Thank you for photoshopping the different looks you can make. It really makes such a statement in a yard. Pinning this! Vicky from http://www.messforless.net
The window box transformation if beautiful. I’m going to show some of mine soon..come see. Thanks, Mary
Bellissima idea, complimenti!
Kate your creativity is endless! Love the one you made and it was fun to see the photoshopped versions too!
x
maria
Love it, especially the blue glass tile! And lavender is one of my faves!
FABuously exquisite
I love the look. I have a bunch of blue, aqua and robin’s egg blue jewels I got on line that I used to refinished the cement birdbath. I think I’ll make a planter to match. How does it stay on the wood. I’ve always thought the wood shrinks and swells so it won’t support the thin-set over time. Did you find a secret?? Please share.
Helen
Hi Helen, yes it’s true wood can shrink and expand, it definitely depends on the climate! We don’t experience it much here, but it can happen. With such a small project and one that can be pulled indoors in wet weather, the tile should be fine, but for a larger project that will sit outside and through rainy seasons, there should be some backerboard to stabilize the tile over the years. That’s what’s used in high moisture areas.
Kate
Your last photoshopped version with the glass tile would look great in a bathroom, too.
I really like this-and can see myself doing it, thanks to your instructions!
The planter is beautiful! I’m surprised you didn’t have to seal the wood….I tried a mosaic on a round wood table top using a box of broken Vietri china…it came out beautiful and I was so proud but the next morning the table top was warped! I cried my eyes out but there was no fixing it…..I was told it was because I didn’t seal the wood and it absorbed too much moisture. Anyway, so glad it worked for you!
This is gorgeous!!!
Love it! Where did you get the planter box? Thanks!
THanks Kate for the Info – I live in Minnesota so the backer board is a must. I’m thinking that the Big Guy can make a planter with backboard and we can line it. Thanks for the great idea as usual. I can see it now.]
DO you know if it would work with Plastic planters? I have 2 enormous ones that I want to change-up.. You read my mind! Every time I do a google search of a project, “Centsational girl” has done it for me whoo!
Hi Kristen, great question! I don’t think it would work on plastic, I don’t know of any mortar that actually does stick to plastic very well, but I’ll do a little research…
That is so cool. I could do that (I could!).
I was just wondering where you got that planter box? I am looking for somewhere to get some cheap ones!! I can’t wait to try some of your stuff out!!
Thanks!!
Thanks Lindsey, the planter was from Home Depot.
Kate
I jut made one of these planters as a gift for Mother’s Day using your instructions. I couldn’t believe how easy it was! The box I used was 12 x 24 x 12 (found at Lowes), cost $46 and 4 sheets of stock glass tile covered it. The tiles lined up perfectly with a box this size. Thank you so much!!!