I’m so sorry I missed a weekend link roundup for you all, I barely sat down this weekend, there were so many activities on my plate. I’ll be back to that regular post next weekend, pinkie swear. One thing I did accomplish was finishing up a project I’ve had on the back burner, this one was a learning process with a great end result!
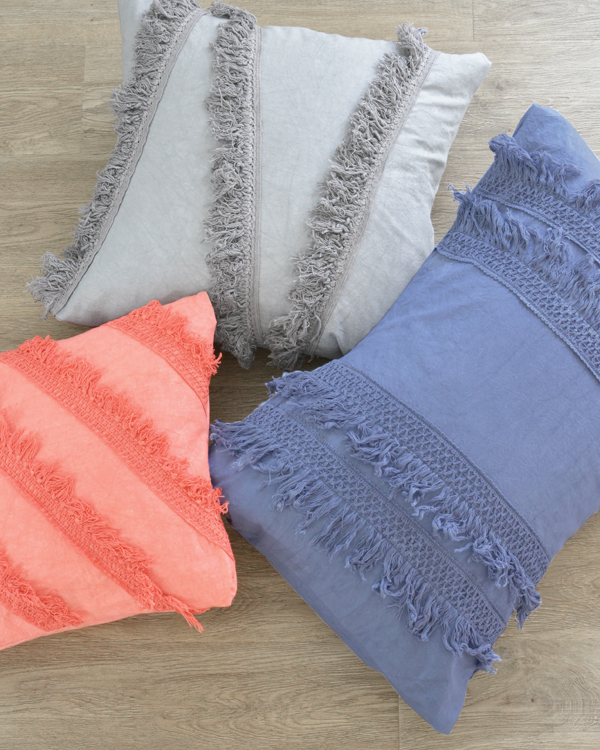
I spied these tassel pillows at Urban Outfitters and loved the look of the dyed cloth with matching tassel fringe so I set out to recreate a DIY version.
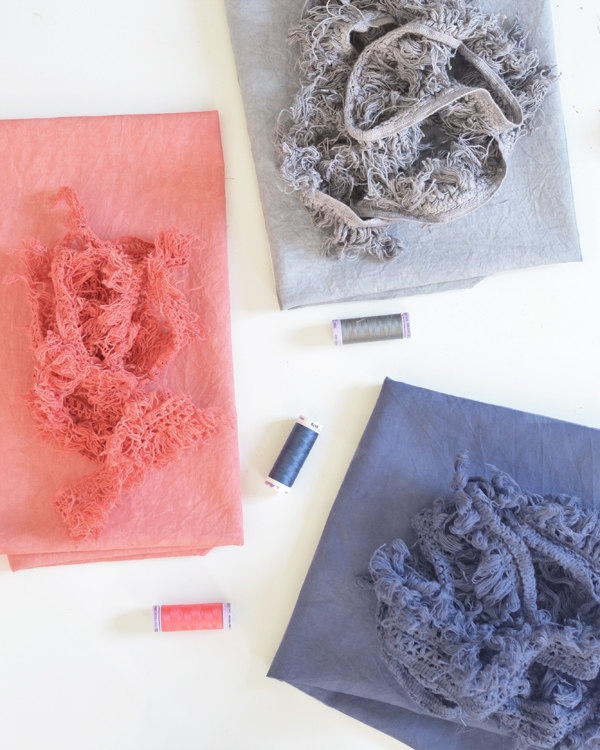
I had to prep for this project ahead of time by purchasing liquid dye at my local craft store, and also ordering three varieties of cotton fringe from this Etsy shop.

This was my first time dyeing fabric and it was a success! I bought my thread after I dyed my fabric and let it dry. There’s really no knowing exactly what shade you’ll get in the beginning so I waited until my dyed fabrics were dry to color match the thread for this project.
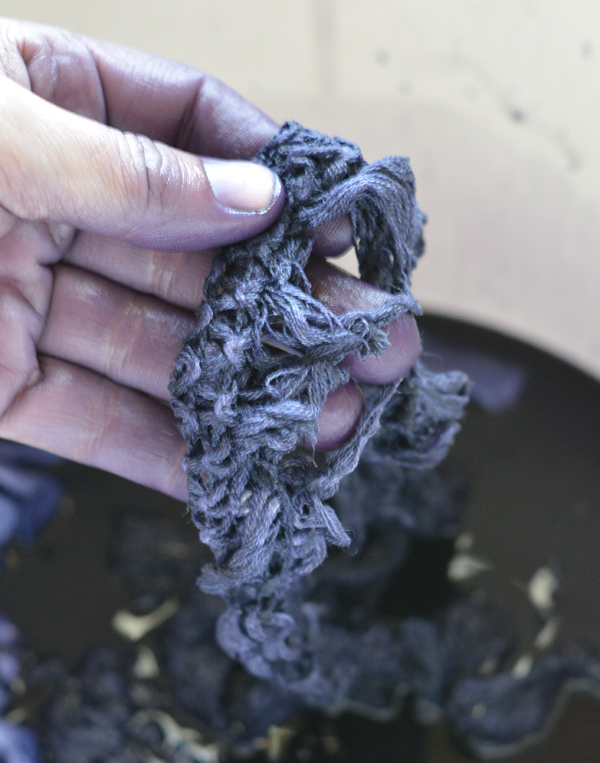
Dyeing fabric isn’t complicated, one thing you do want to do is use a cloth made of natural fibers like cotton or linen since artificial fibers don’t absorb dye. I used an inexpensive $4 a yard linen/cotton blend which worked fine. During the dyeing process, I repeatedly pulled out the fabric to avoid the dye collecting in wrinkles or creases and for more even coloring.
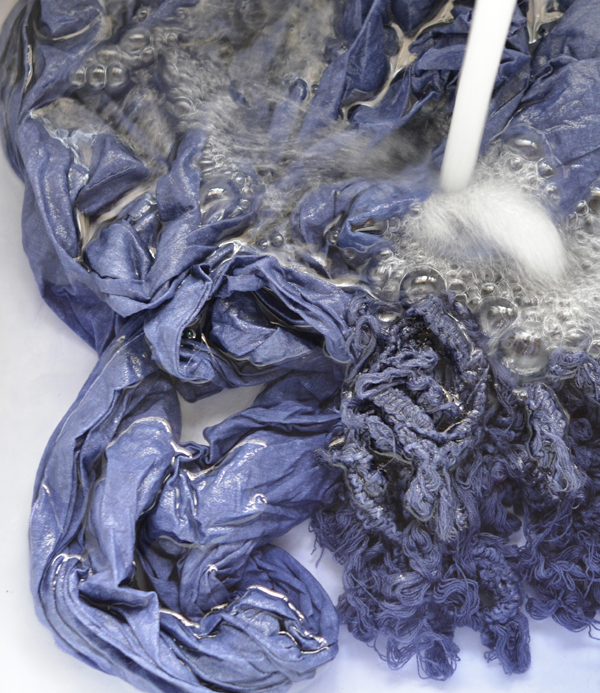
I probably should have worn gloves since the dye stayed on my fingers for two days but it does come off, just be careful your wet fabric doesn’t drip on any other fabrics, it can stain. I dyed my pieces of fabric in a bucket of hot water and dye and rinsed it off in the sink.

I discovered the cotton fringe absorbed the dye quicker than the fabric did so I pulled the fringe out first and a few minutes early while the fabric continued to sit in the dye.
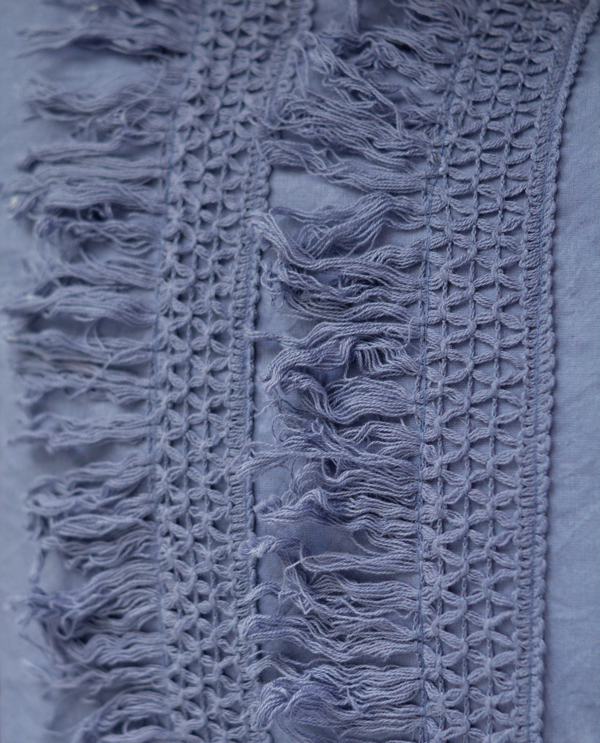
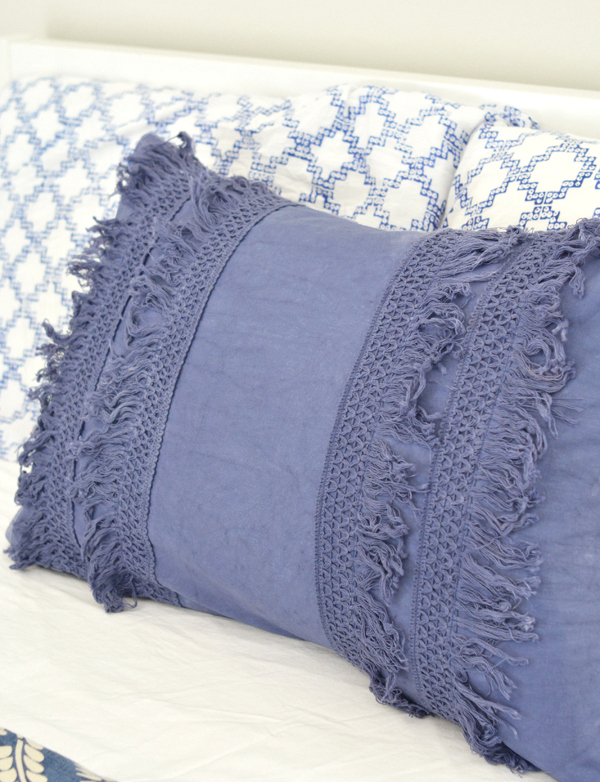
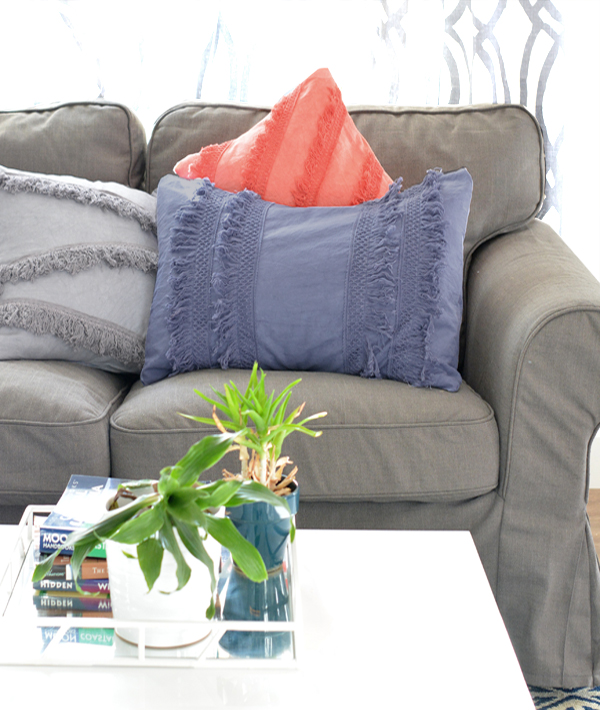
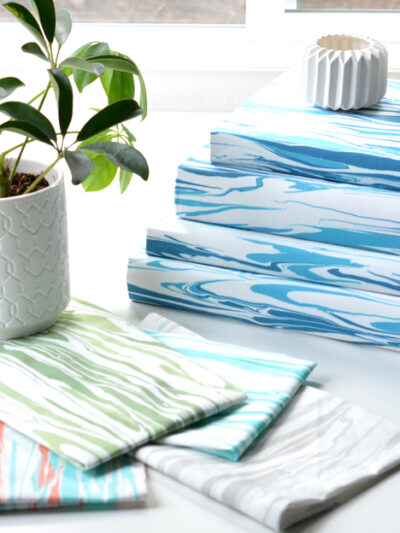
This color is the result of dyeing my linen/cotton blend fabric in Navy Blue dye. The Rit Dye directions state to wait at least 30 minutes but I only waited 10 for the fringe and 15 for the fabric since I wanted a lighter more watered down color. I rinsed both in cold water until the water ran mostly clear then hung it up to dry for a full day.
I made simple envelope enclosure pillows for all three, you can find my simple tutorial here from a few years ago.
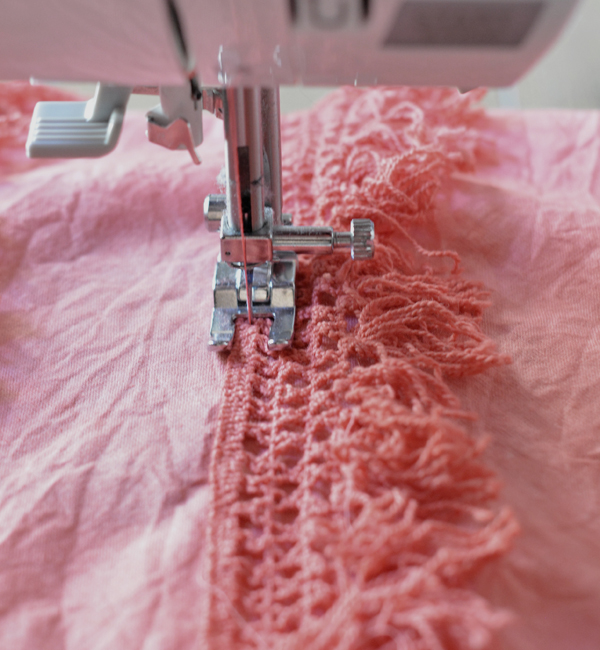
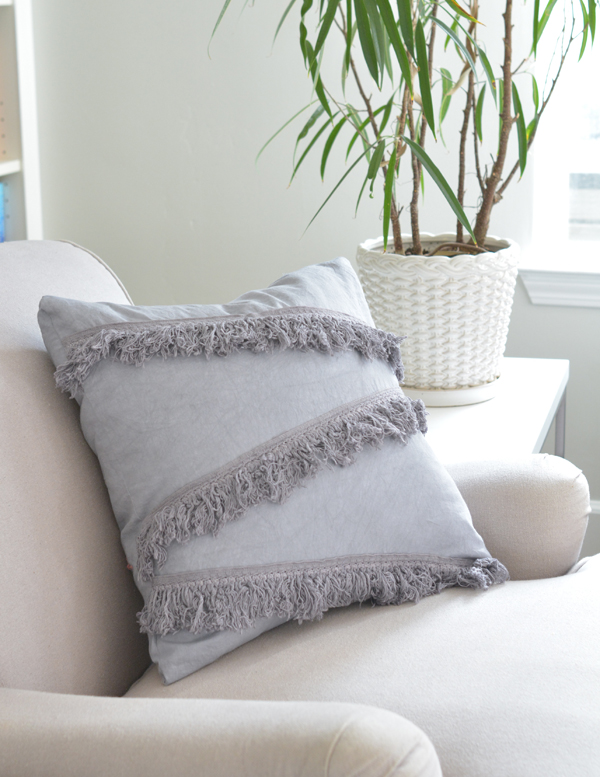
I used pins to secure the fringe to the front piece of the pillow in the desired pattern and stitched it to the fabric with my sewing machine. For fringe with a wider band, it’s good to attach the fringe to your fabric on both sides of the band, at the top and again just above the tassel fringe.
With the blue dyed fabric, I made a bolster pillow similar to the pillows that inspired the project.
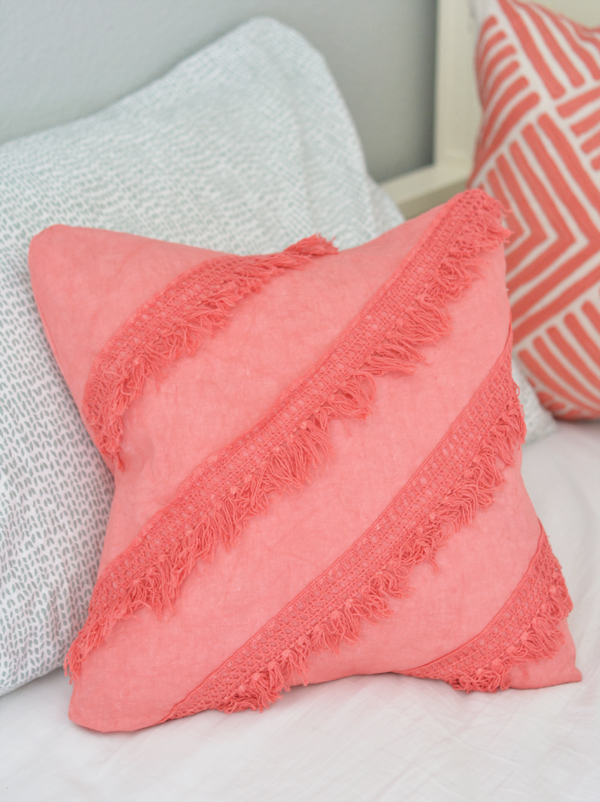
This coral color came from a mix of Fuchsia and Tangerine Rit Dye, for this one I experimented by sewing the dyed fringe on the diagonal.
This color comes from the Pearl Grey, with this dyed fabric I made a zig zag pattern pillow.
There’s a few steps involved, the dyeing and the sewing, but it’s worth the effort to get a unique fringe tassel pillow in your color of choice!
.

Great post – such a timeless look!
Rachael xox
http://gatsbyandglamour.blogspot.com
thanks !!
I reallllllllly like the grey one. So cute!
We’ve been doing free or nearly free stuff at our house.
I like the pink/coral one best.
Those pillows came out great! Thanks for the tutorial. I wanted to try fabric dye, and that is just the inspiration I needed. :)
I like your pillows more than the urban outfitter pillows. Great job!
Kate, I LOVE these so MUCH! I have such a hard time affordable pillows in colors and styles I love; these are the answer! ;)