I’ve been living in my pajamas for over a week, I ate and drank too much between Christmas and New Year’s and only exercised once. I slept in late and spent time with favorite cousins, we played games and laughed, and it was just what I needed to end a really good year.
2015 was good for me, it was last year that I found something that I’d been chasing in my personal life: real balance. I’ll write up a more detailed post on it soon, but I will say this, most of what gave me balance came from first making an active lifestyle a priority. So much goodness stems from taking care of your body and this year I’m repeating the habits I maintained in 2015, so this morning it was back to a regular exercise routine and the fitness kickboxing classes I love so much.
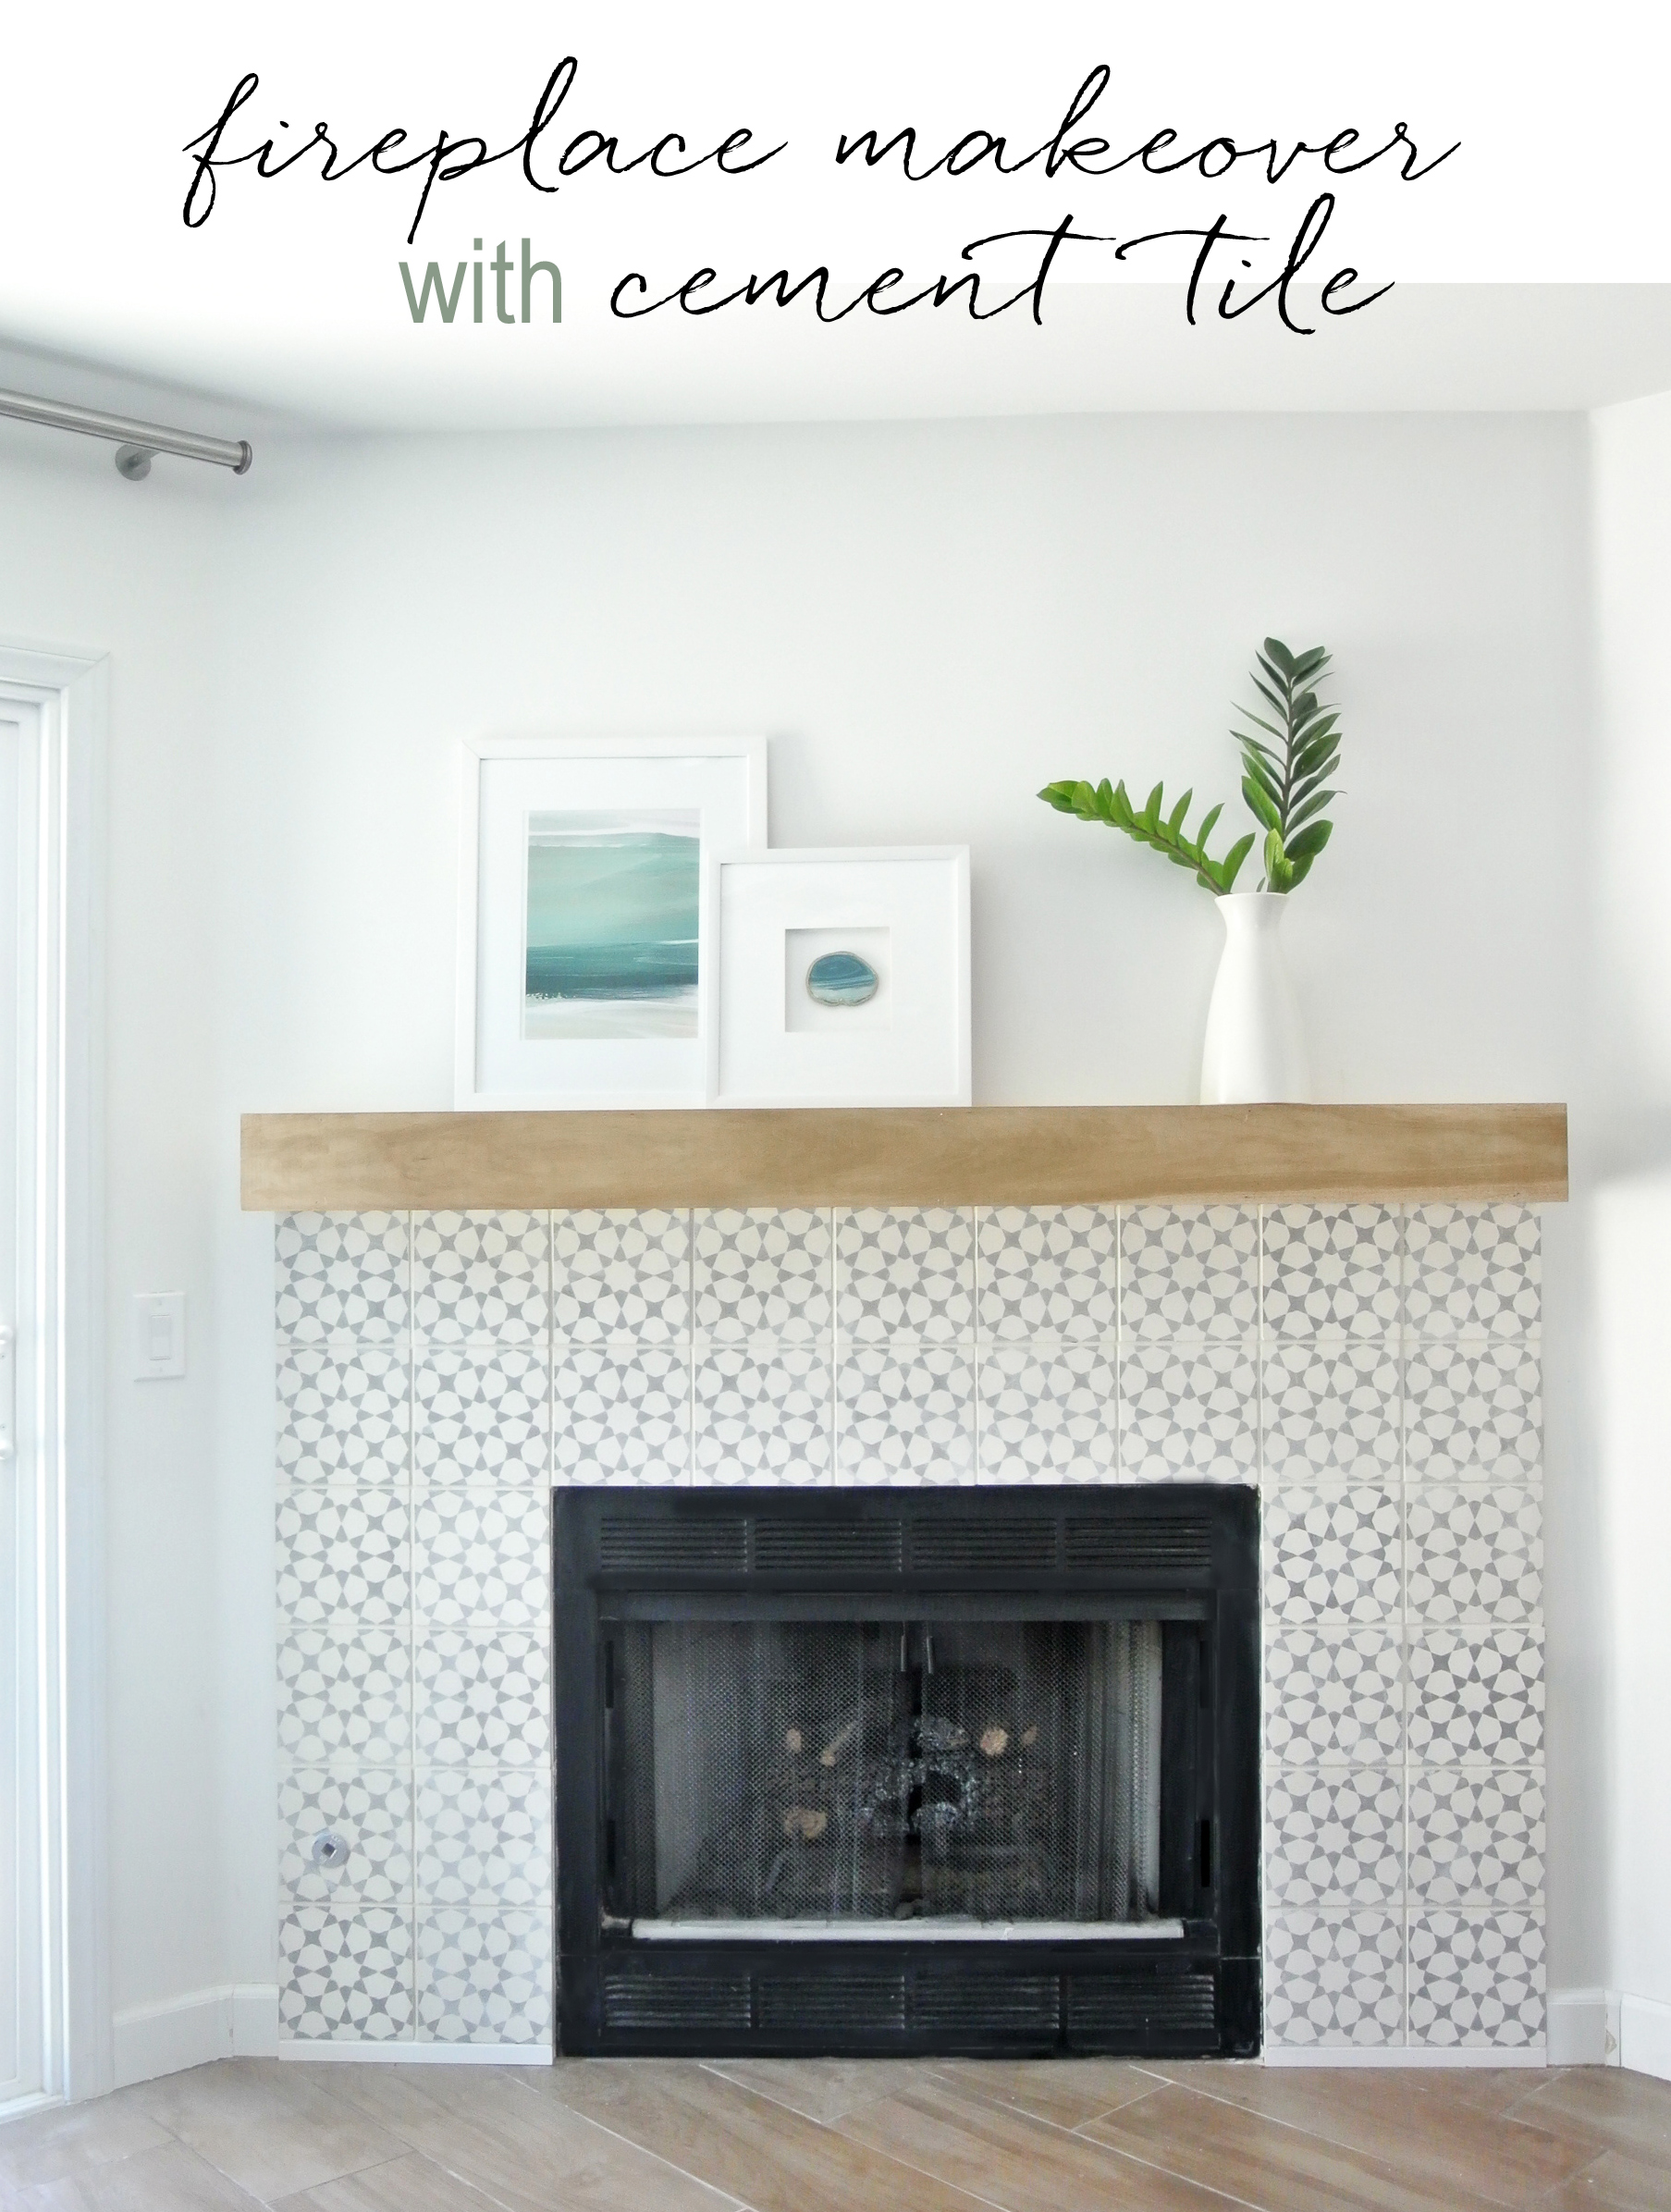
Anyhoo. I spent last week in Las Vegas at the home we remodeled and finished up one last project so the home is at last ready to rent. We’re moving on to another house project soon so the plan is to move the furniture out and rent the refurbished home to a tenant long term. The final project that remained was to add tile and a mantel to the fireplace and I’m very pleased with the result!
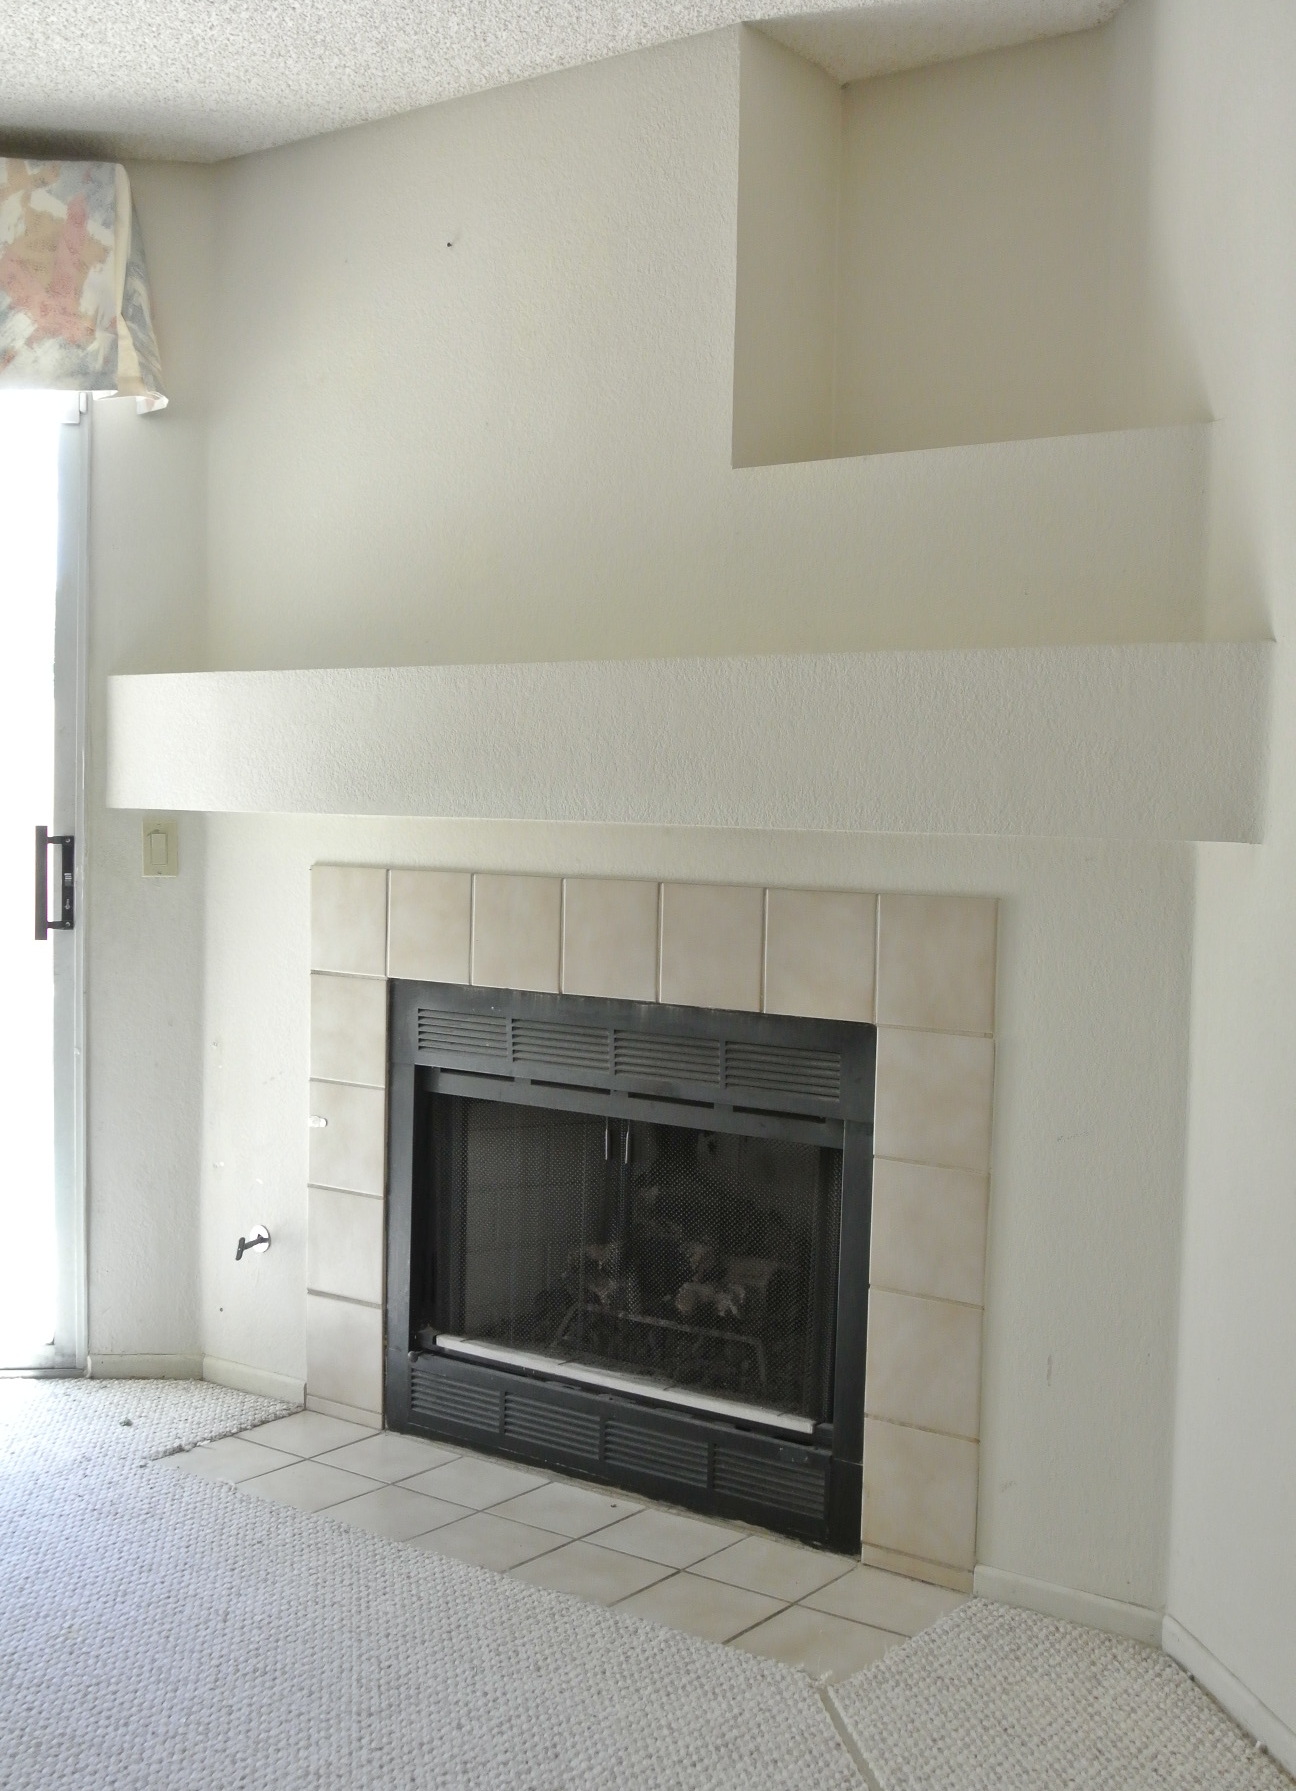
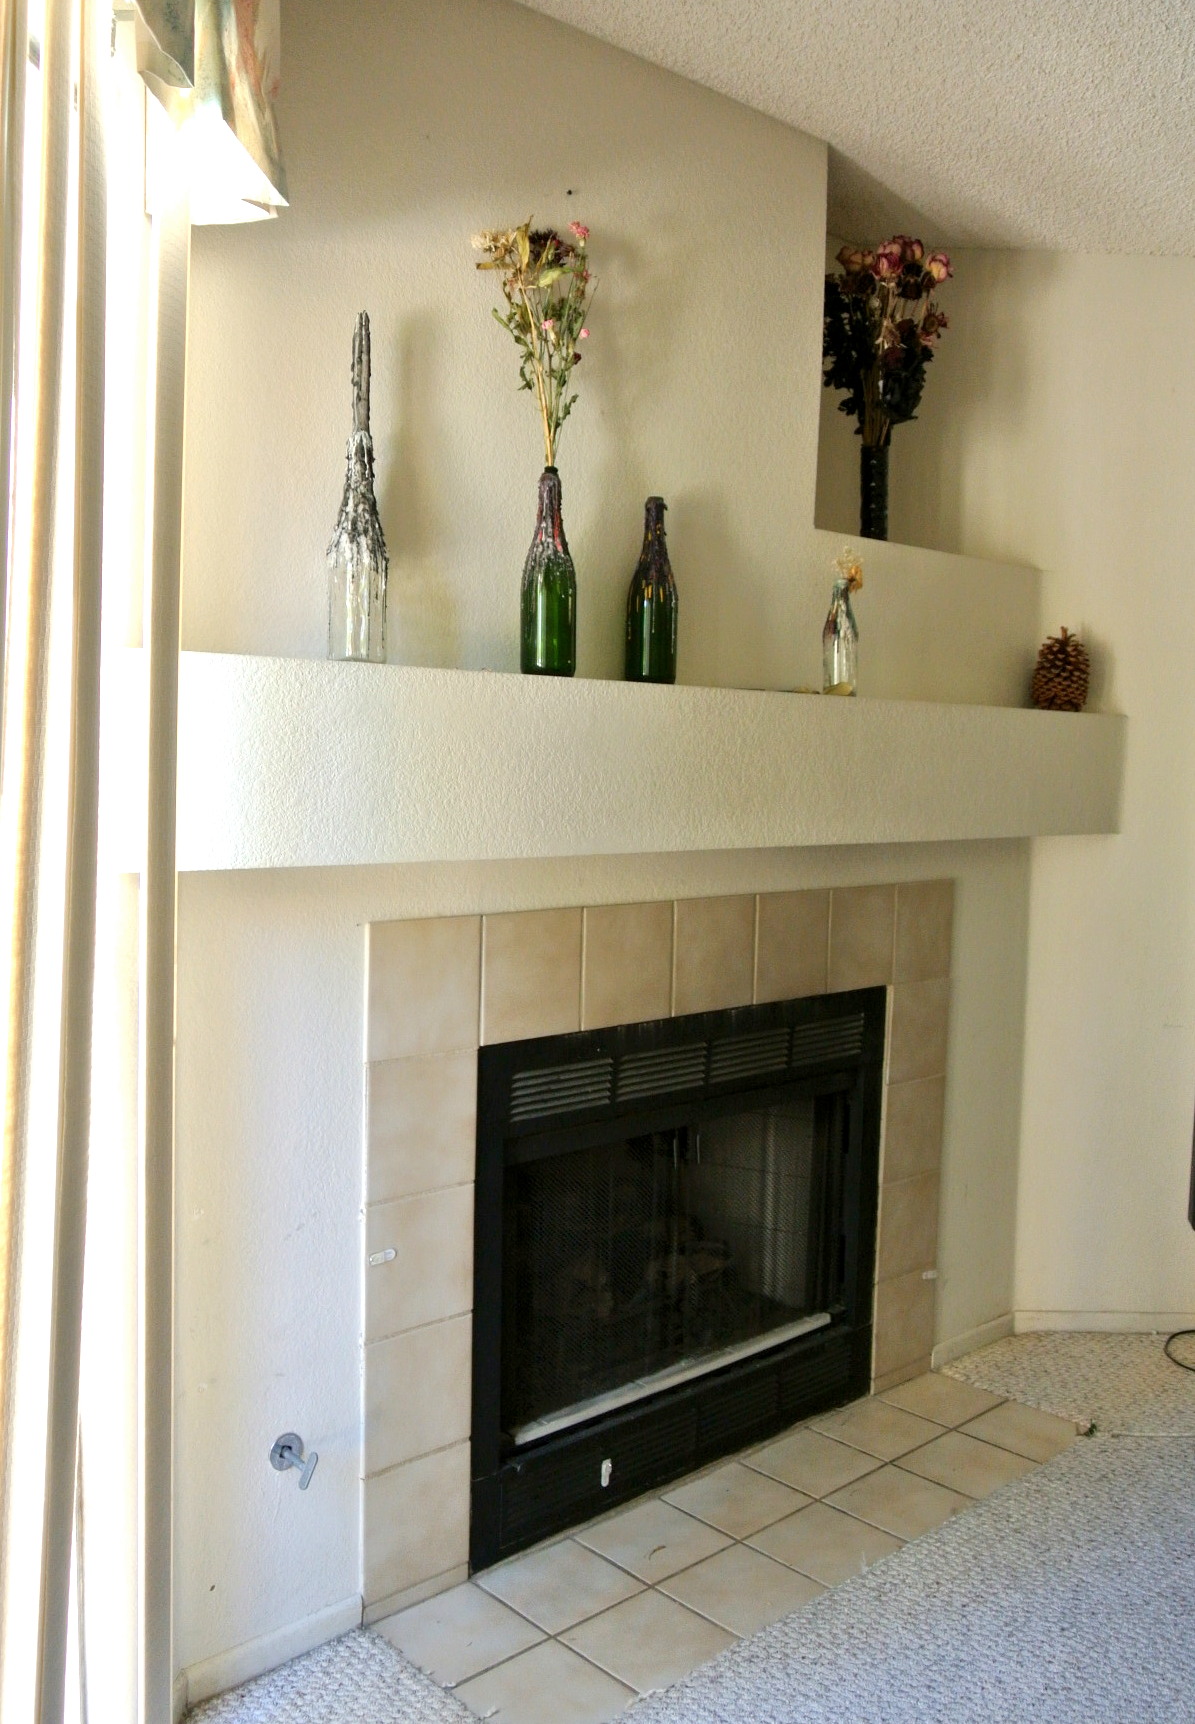
I’ve longed to work with patterned cement tile, I had thought my first use of it would be a bathroom floor but it turns out that it was the perfect size and pattern for a dramatic fireplace focal point. Let’s go back in time, let me remind you of what I started with many moons ago, this was the dated corner fireplace that existed when we bought the house, note the odd niche and boring tile.
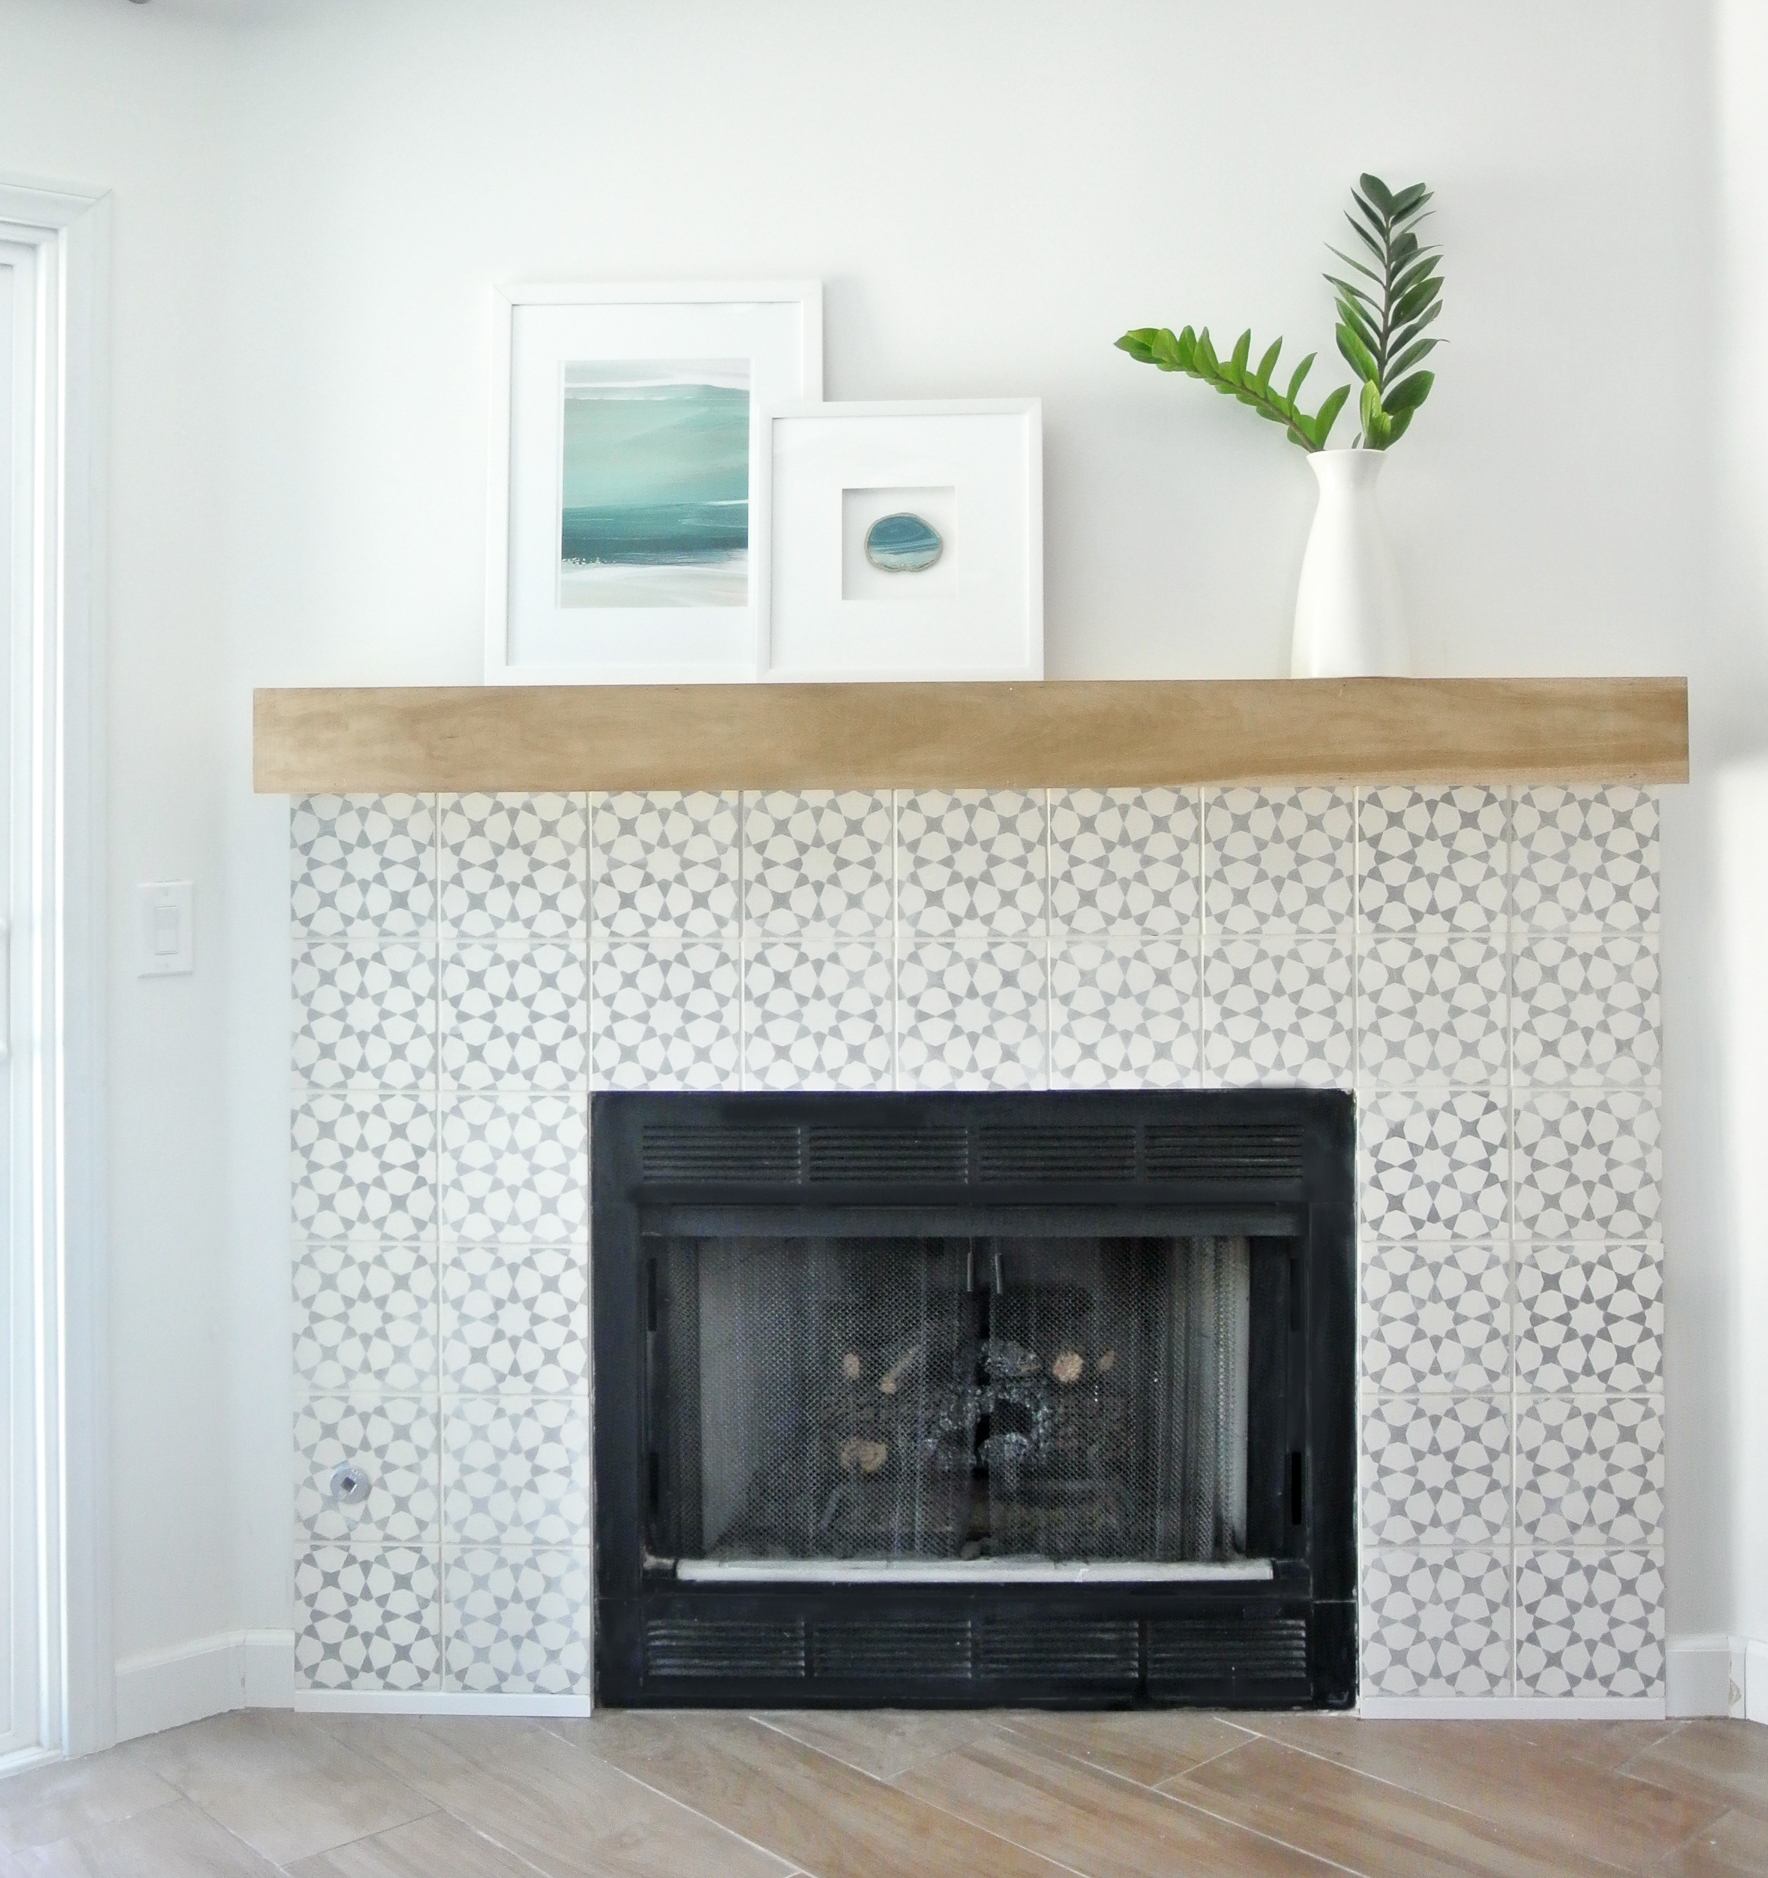
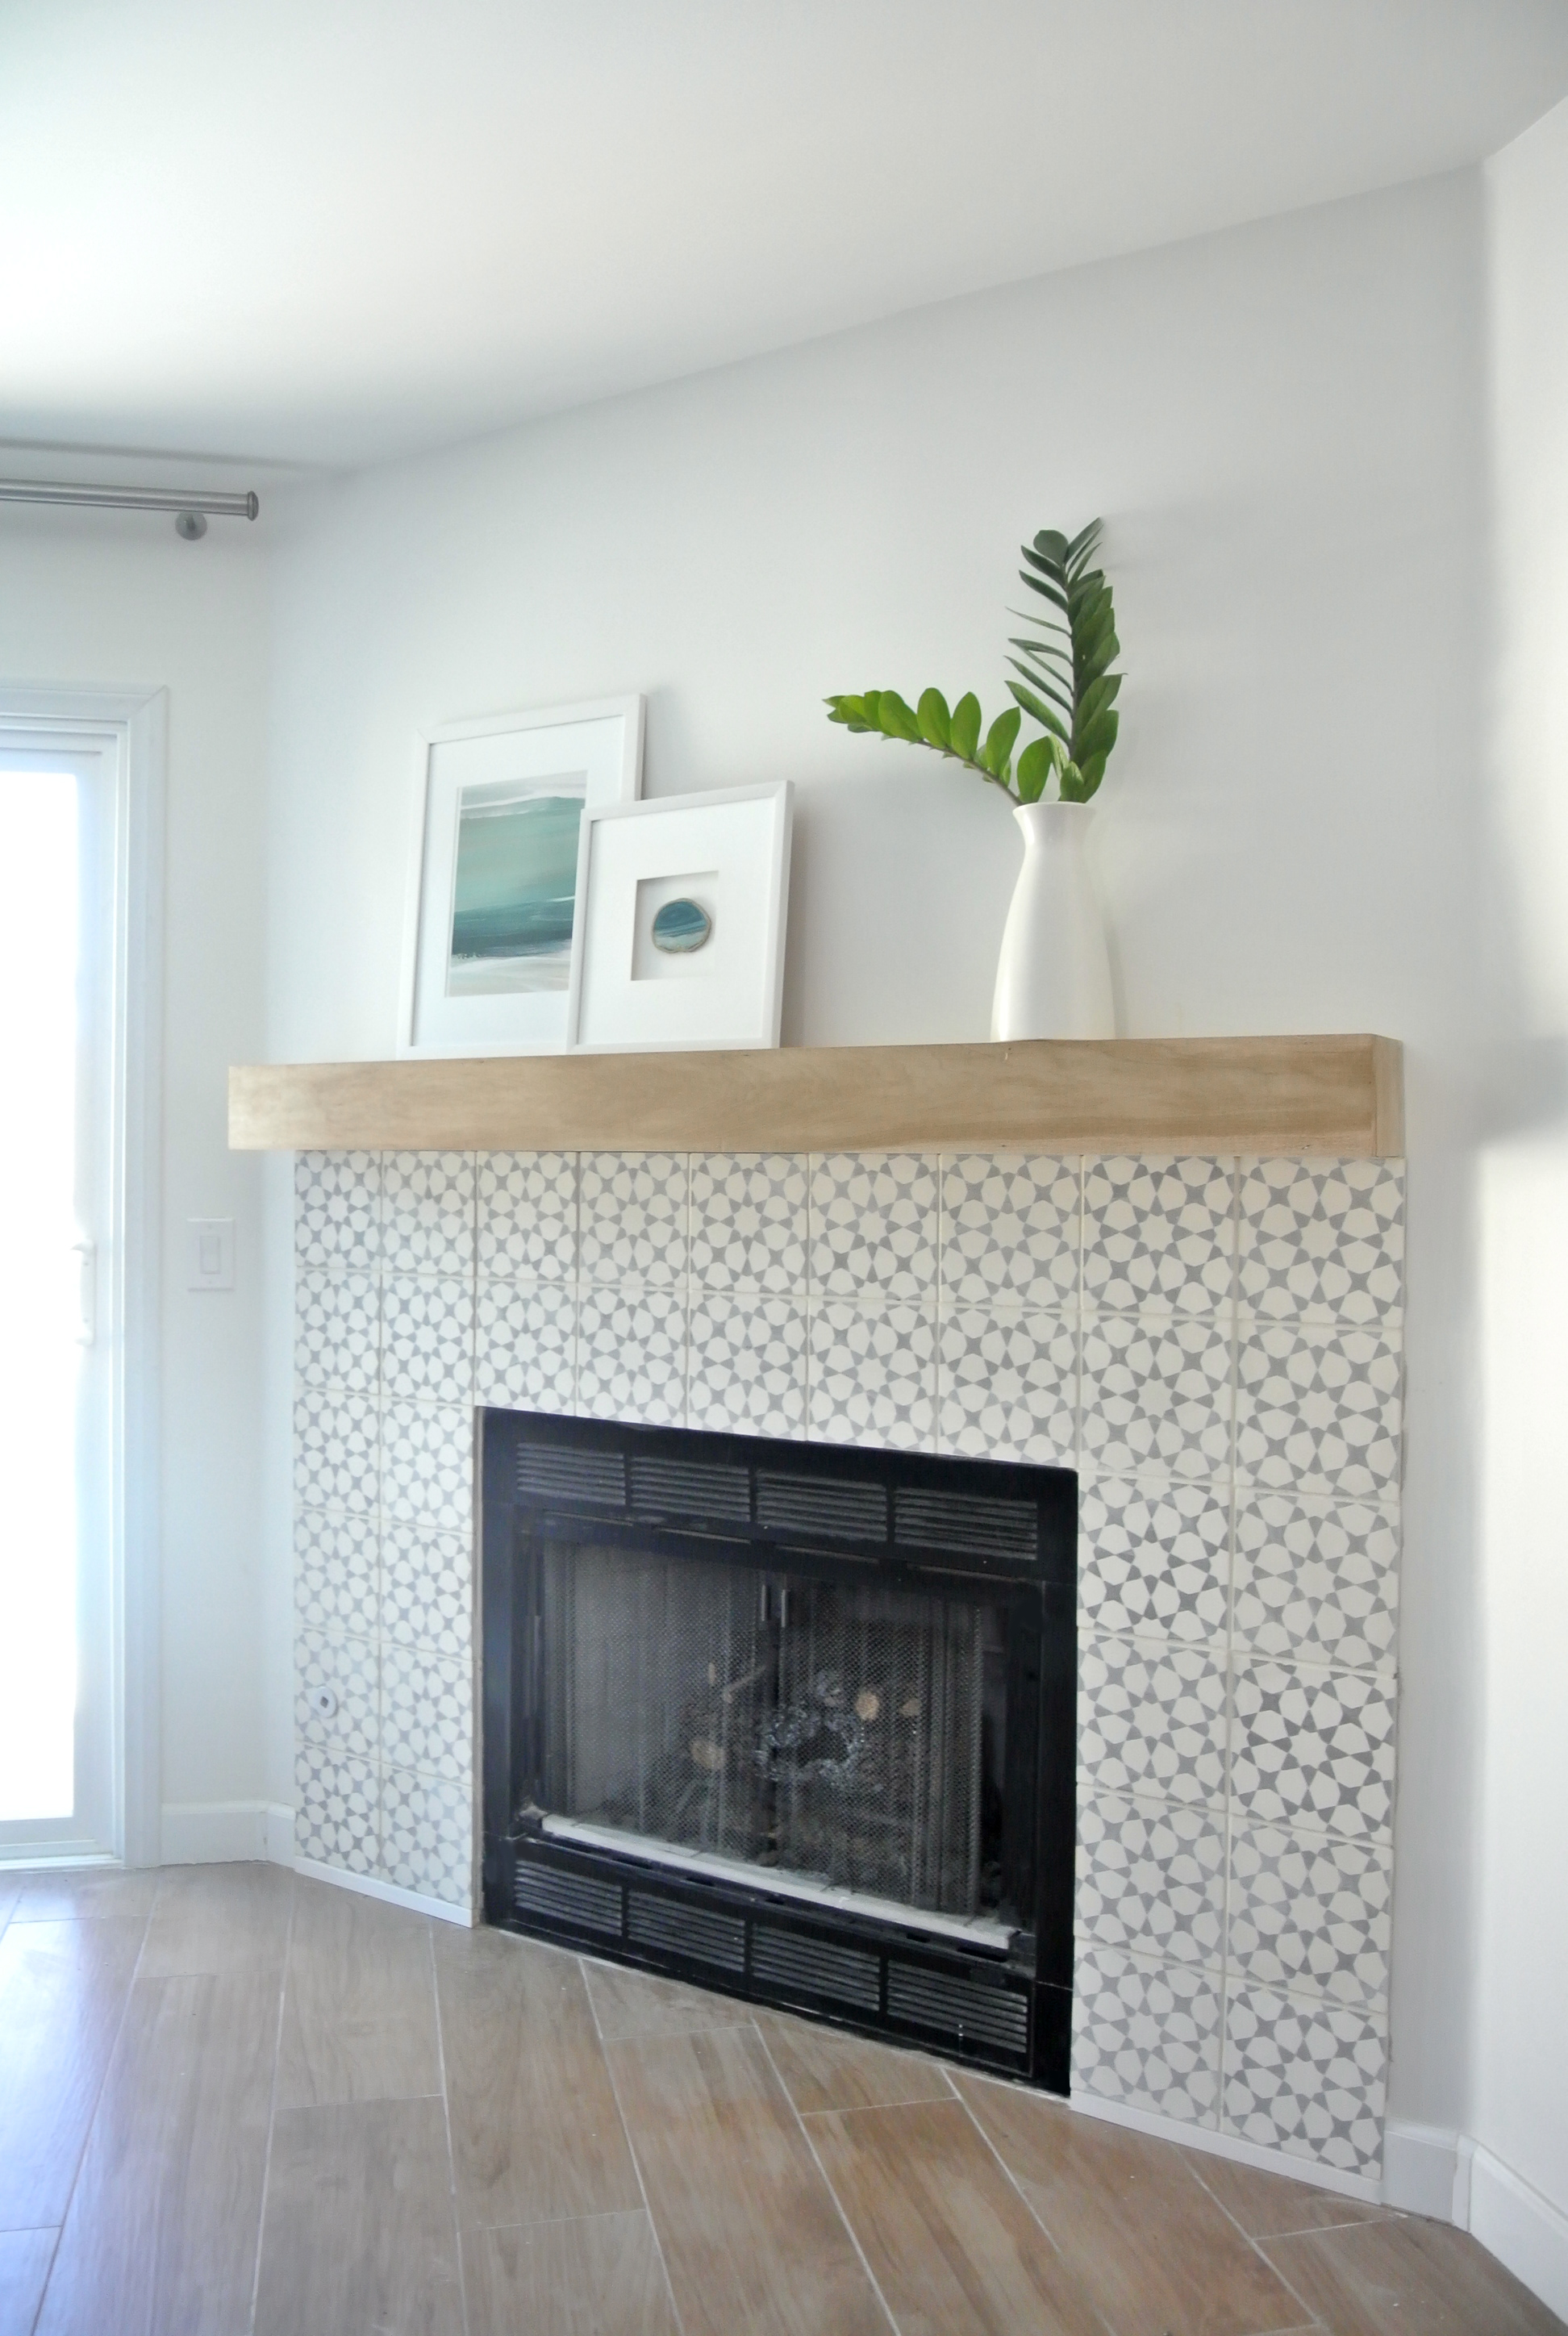
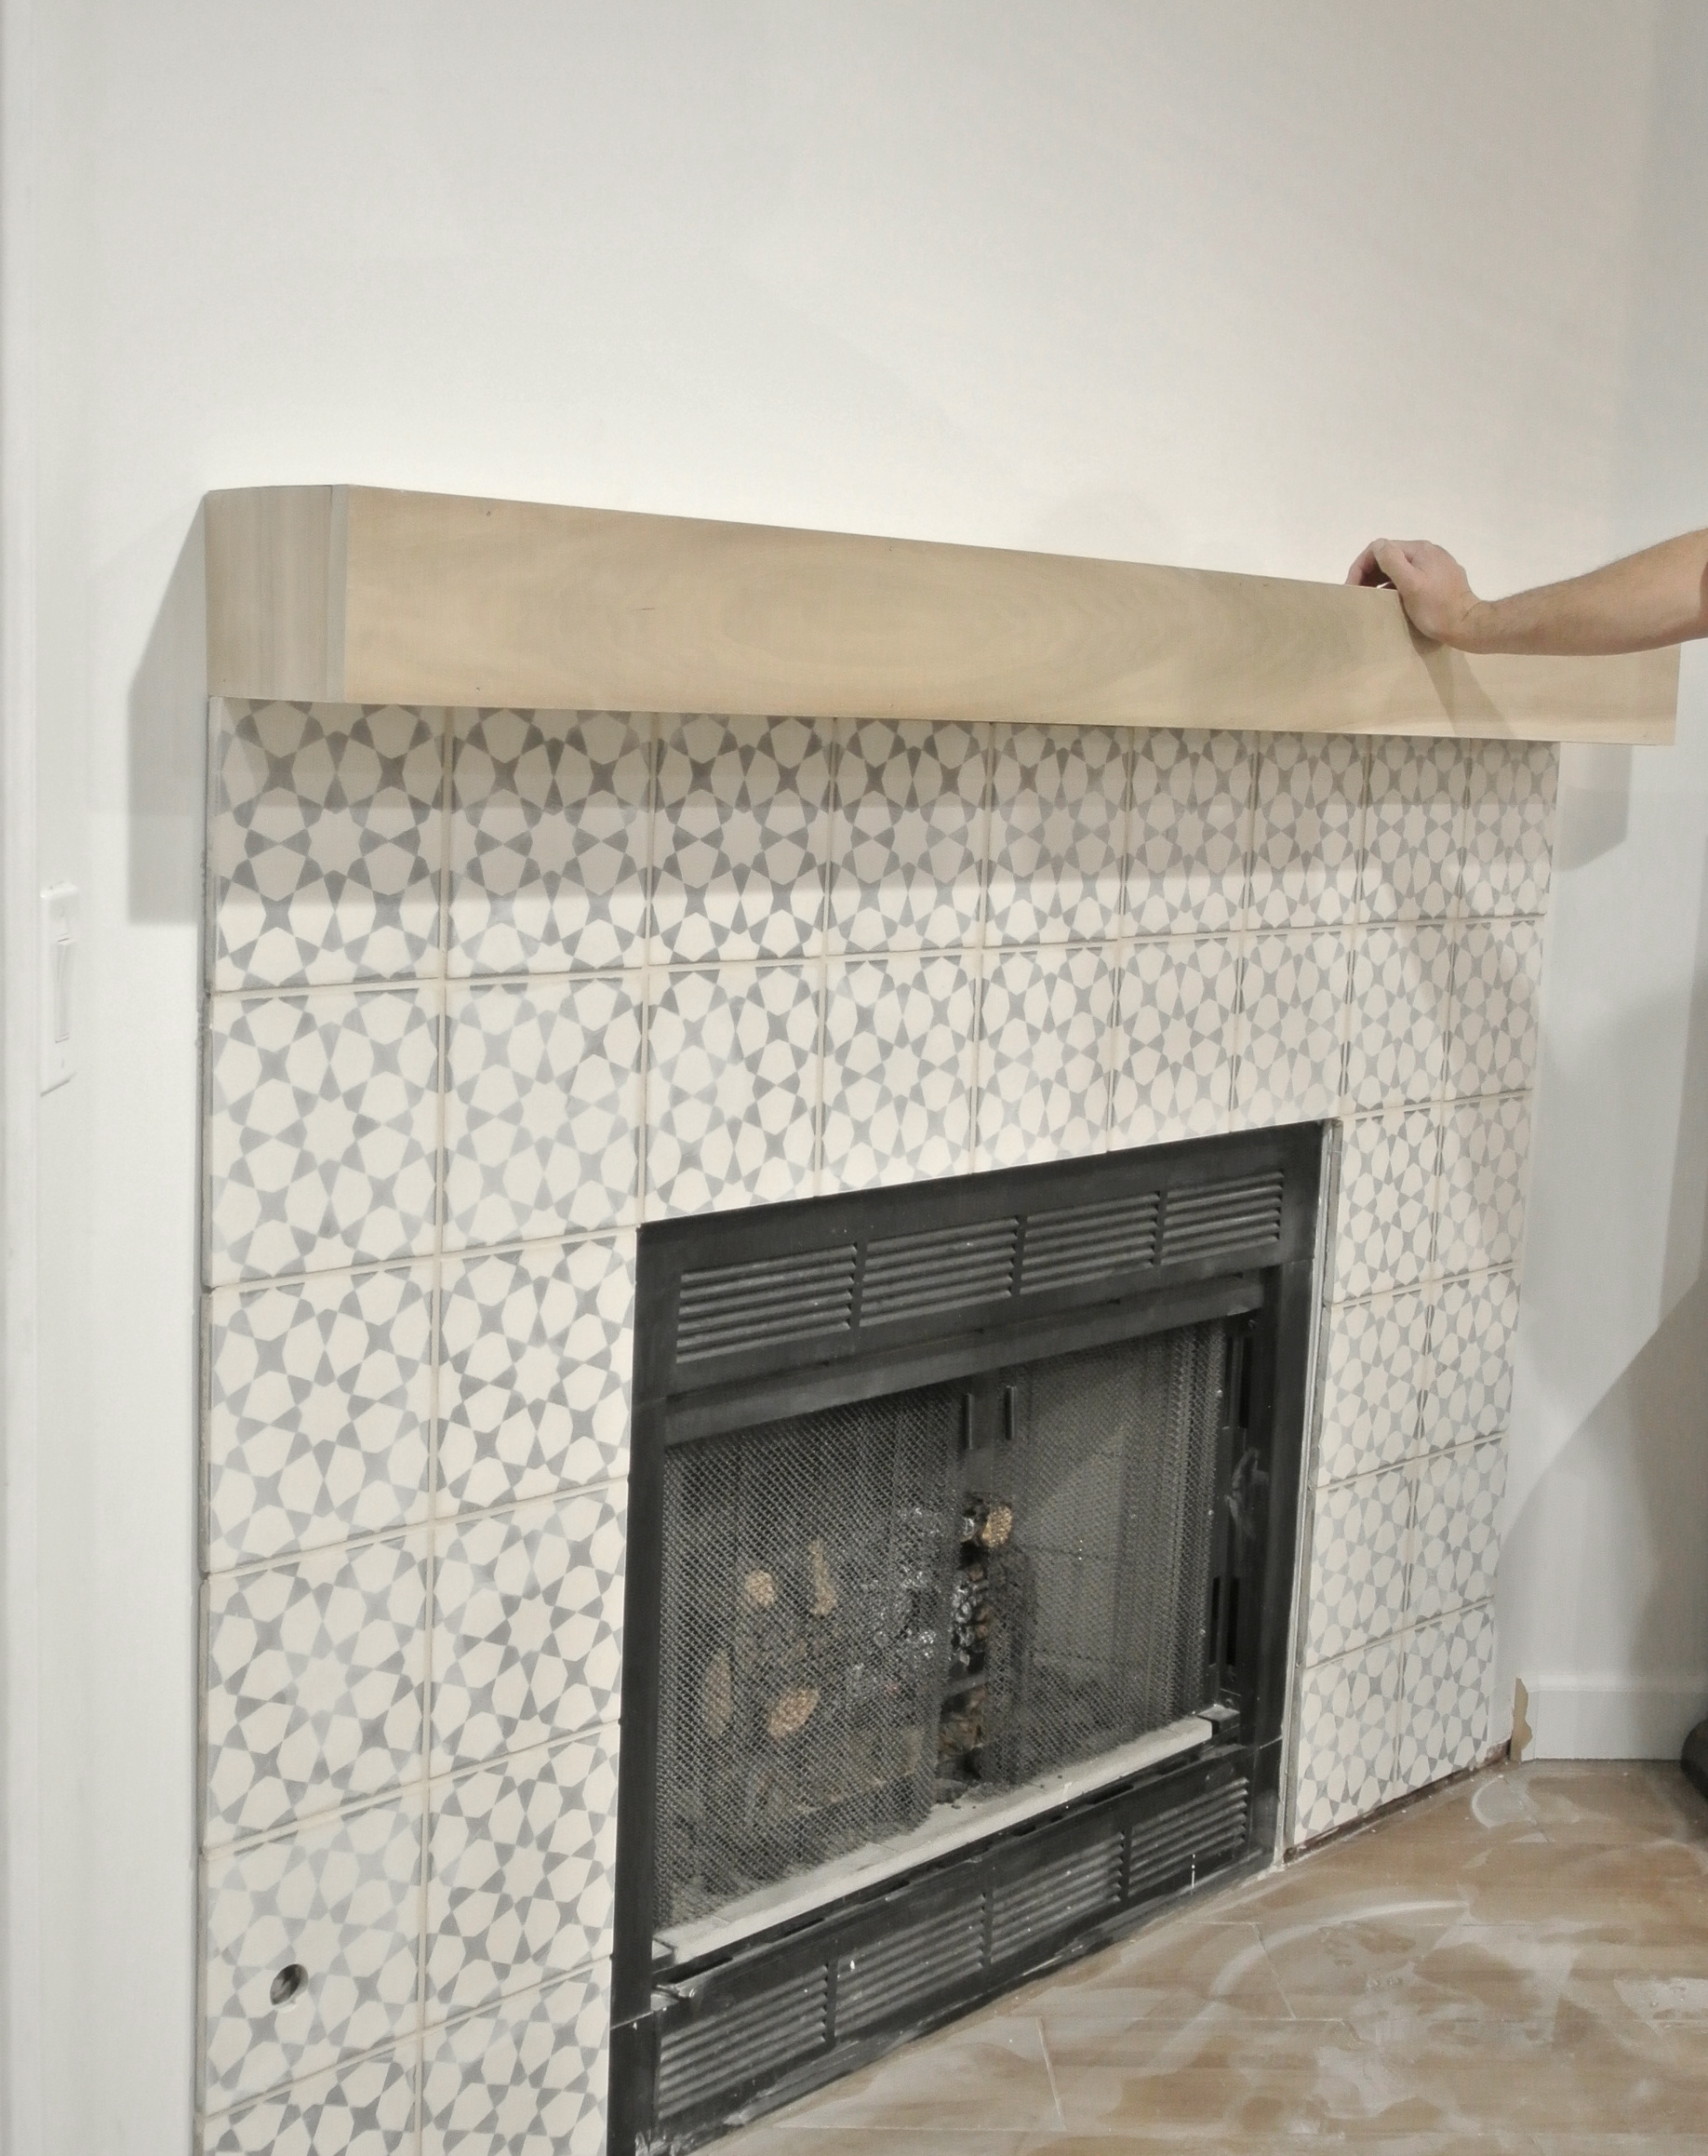
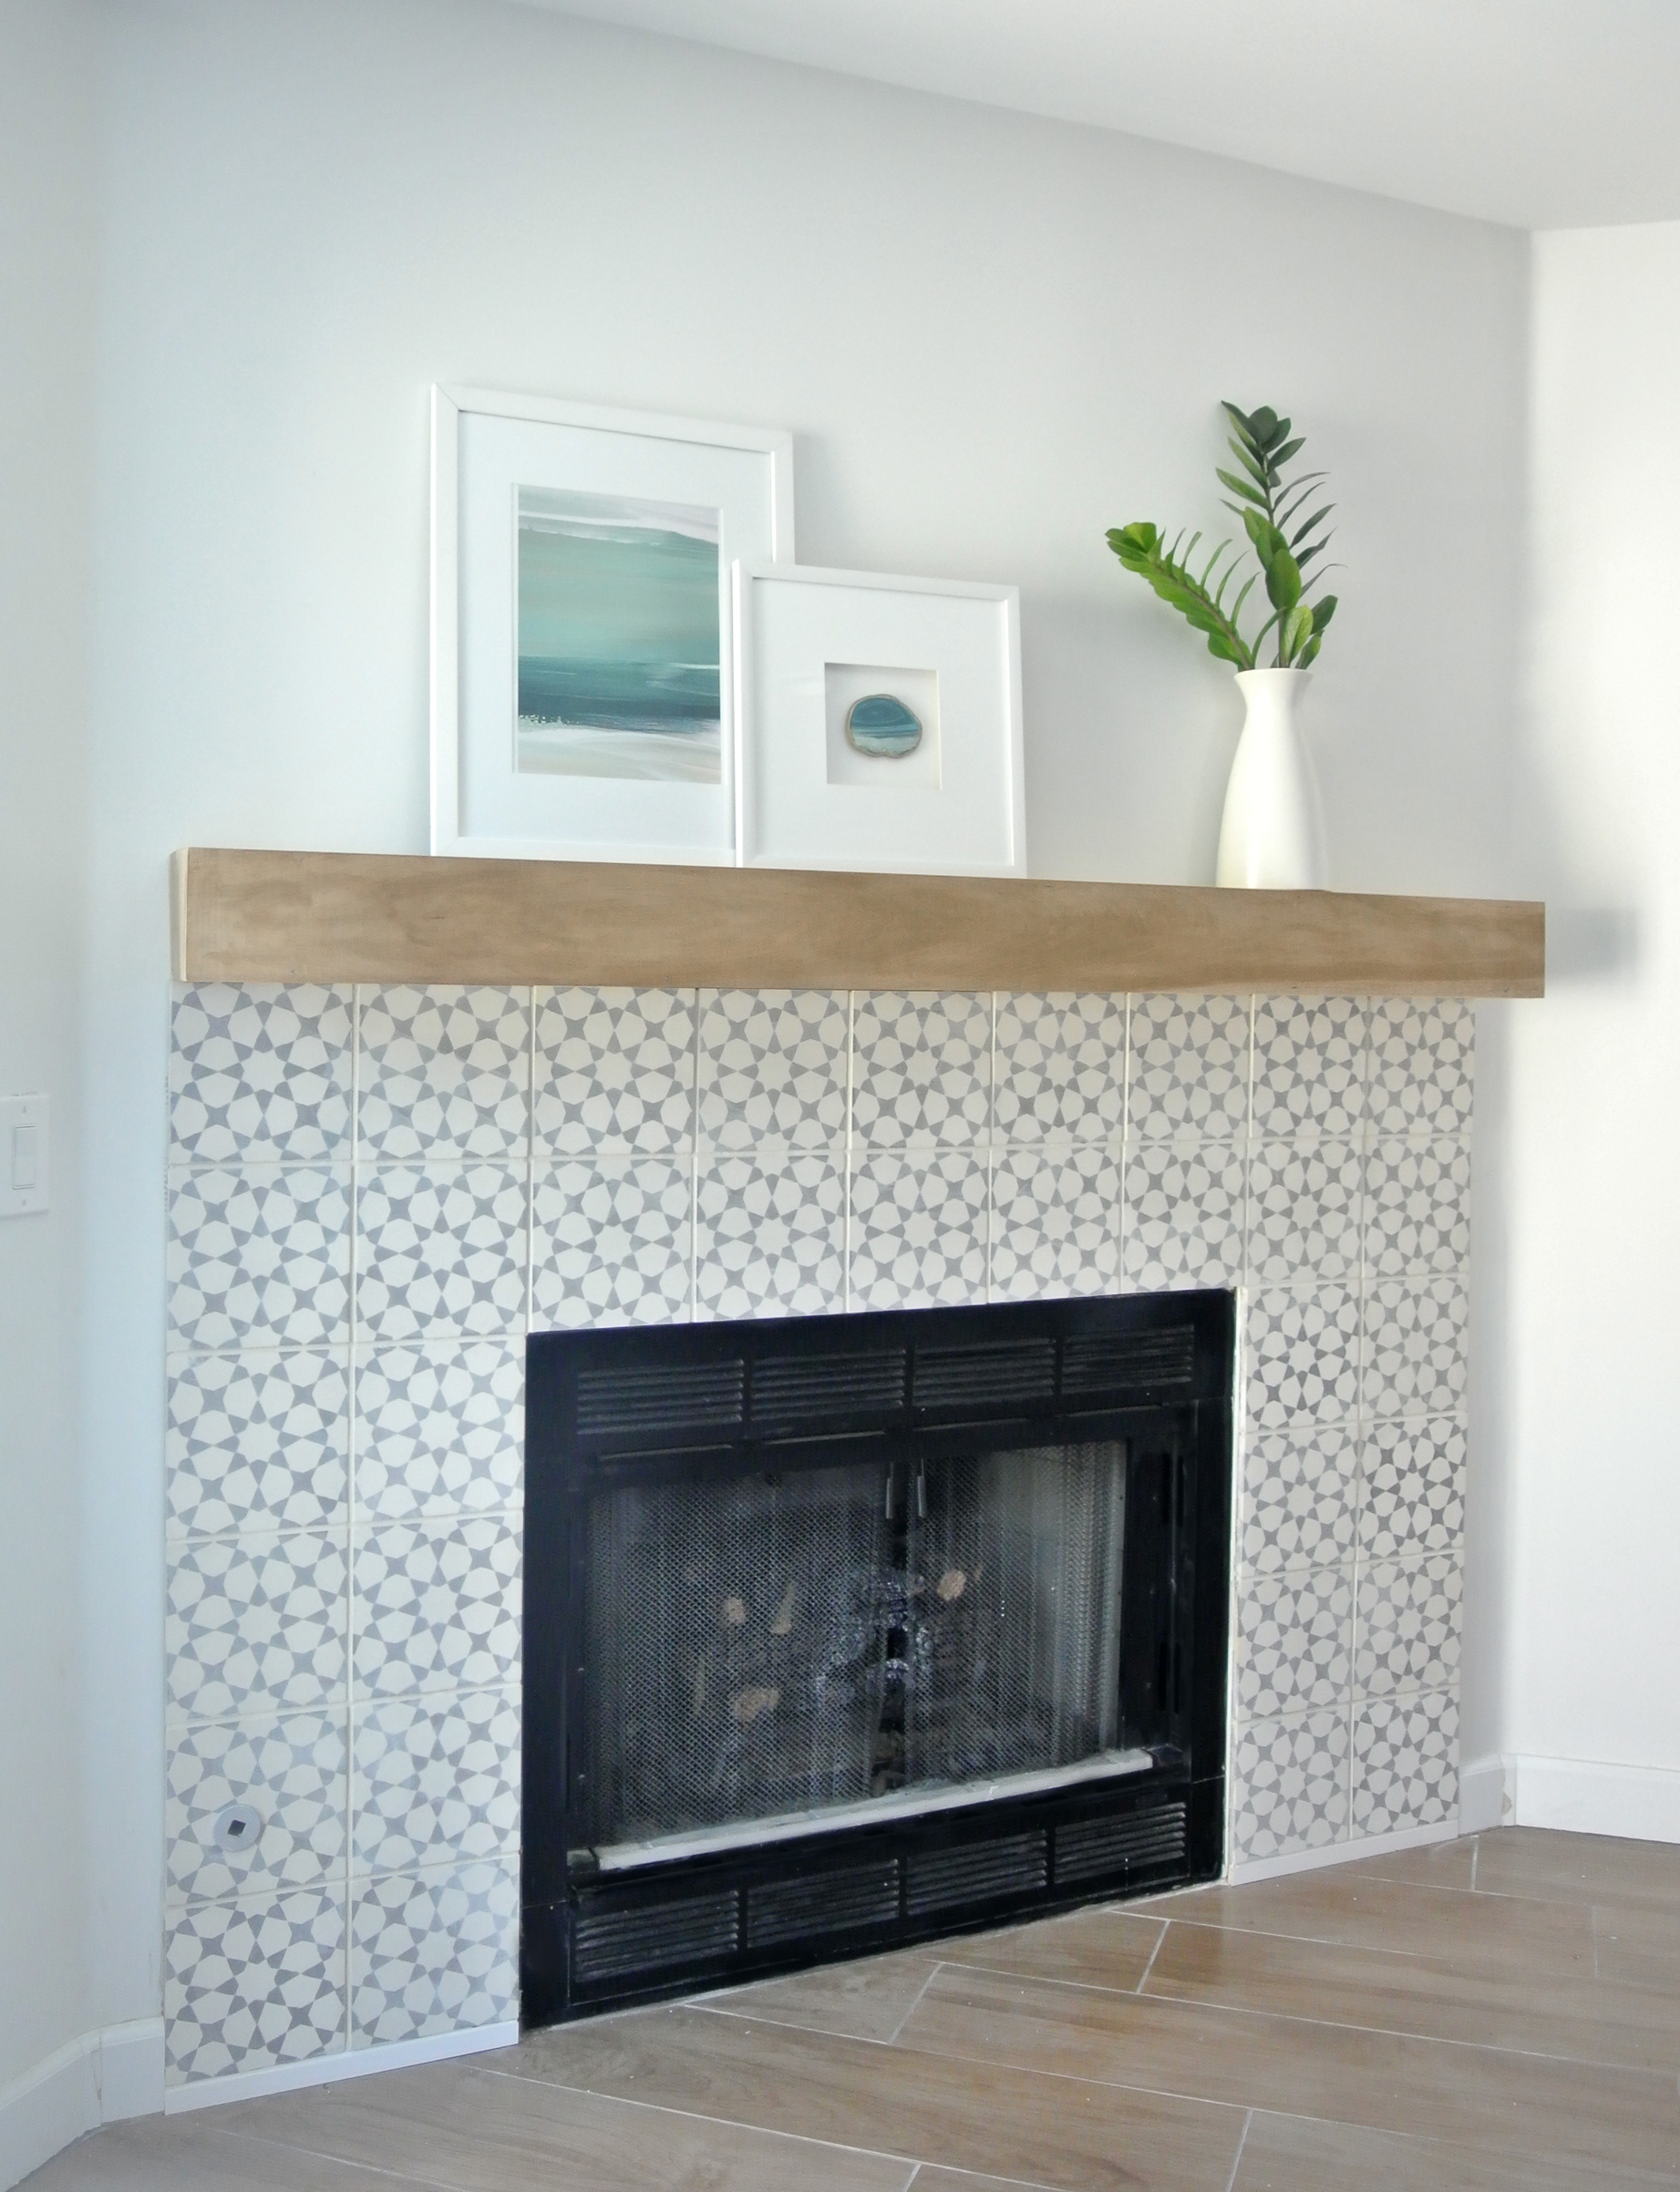
Today it’s a has a more modern look, after filling the niche and removing the drywall mantel, I tiled and grouted and Matt built a new wood mantel.
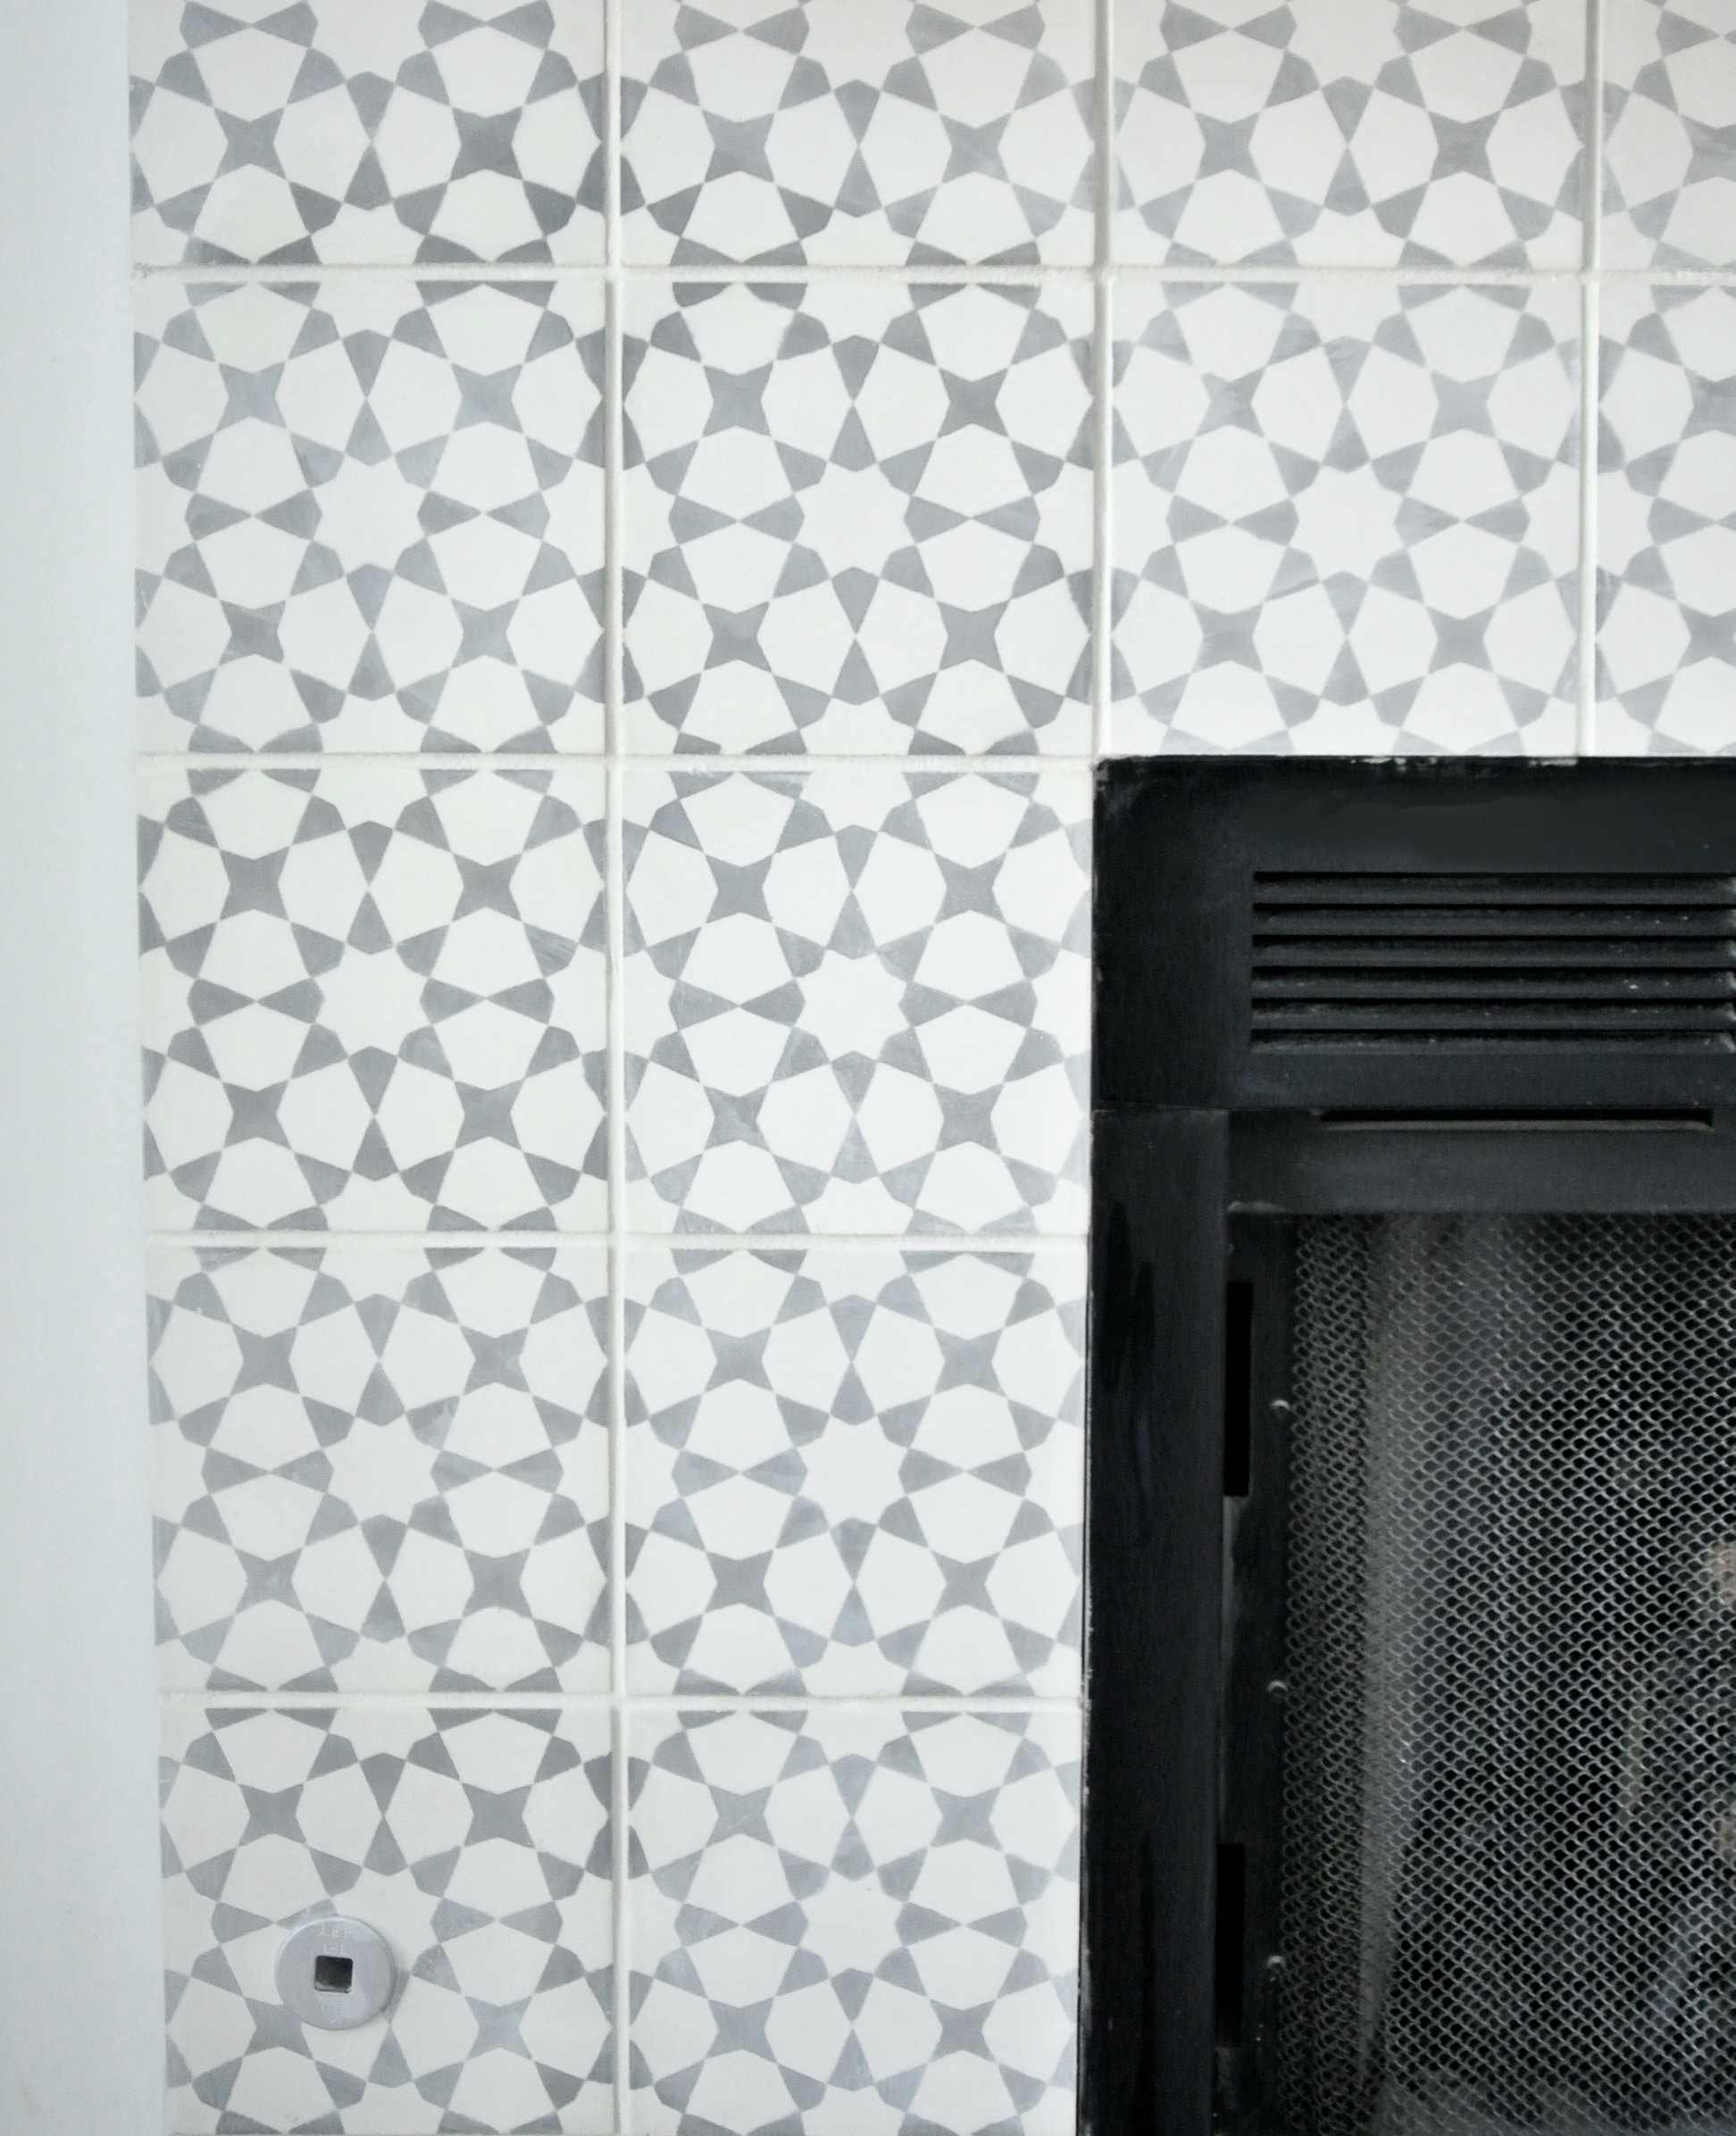
I could have chosen something basic but I couldn’t get this inspiration image out of my head and wanted to create a similar look. The gray and off white cement tile is from from Overstock, it’s a beautiful Moroccan inspired pattern that dresses up the room.
Three boxes arrived in perfect condition with no broken tiles, I was impressed. I didn’t order extra this time since they come in boxes of 12 and I only needed 34 tiles – I didn’t want to spend the extra 100 bucks, so I got lucky.
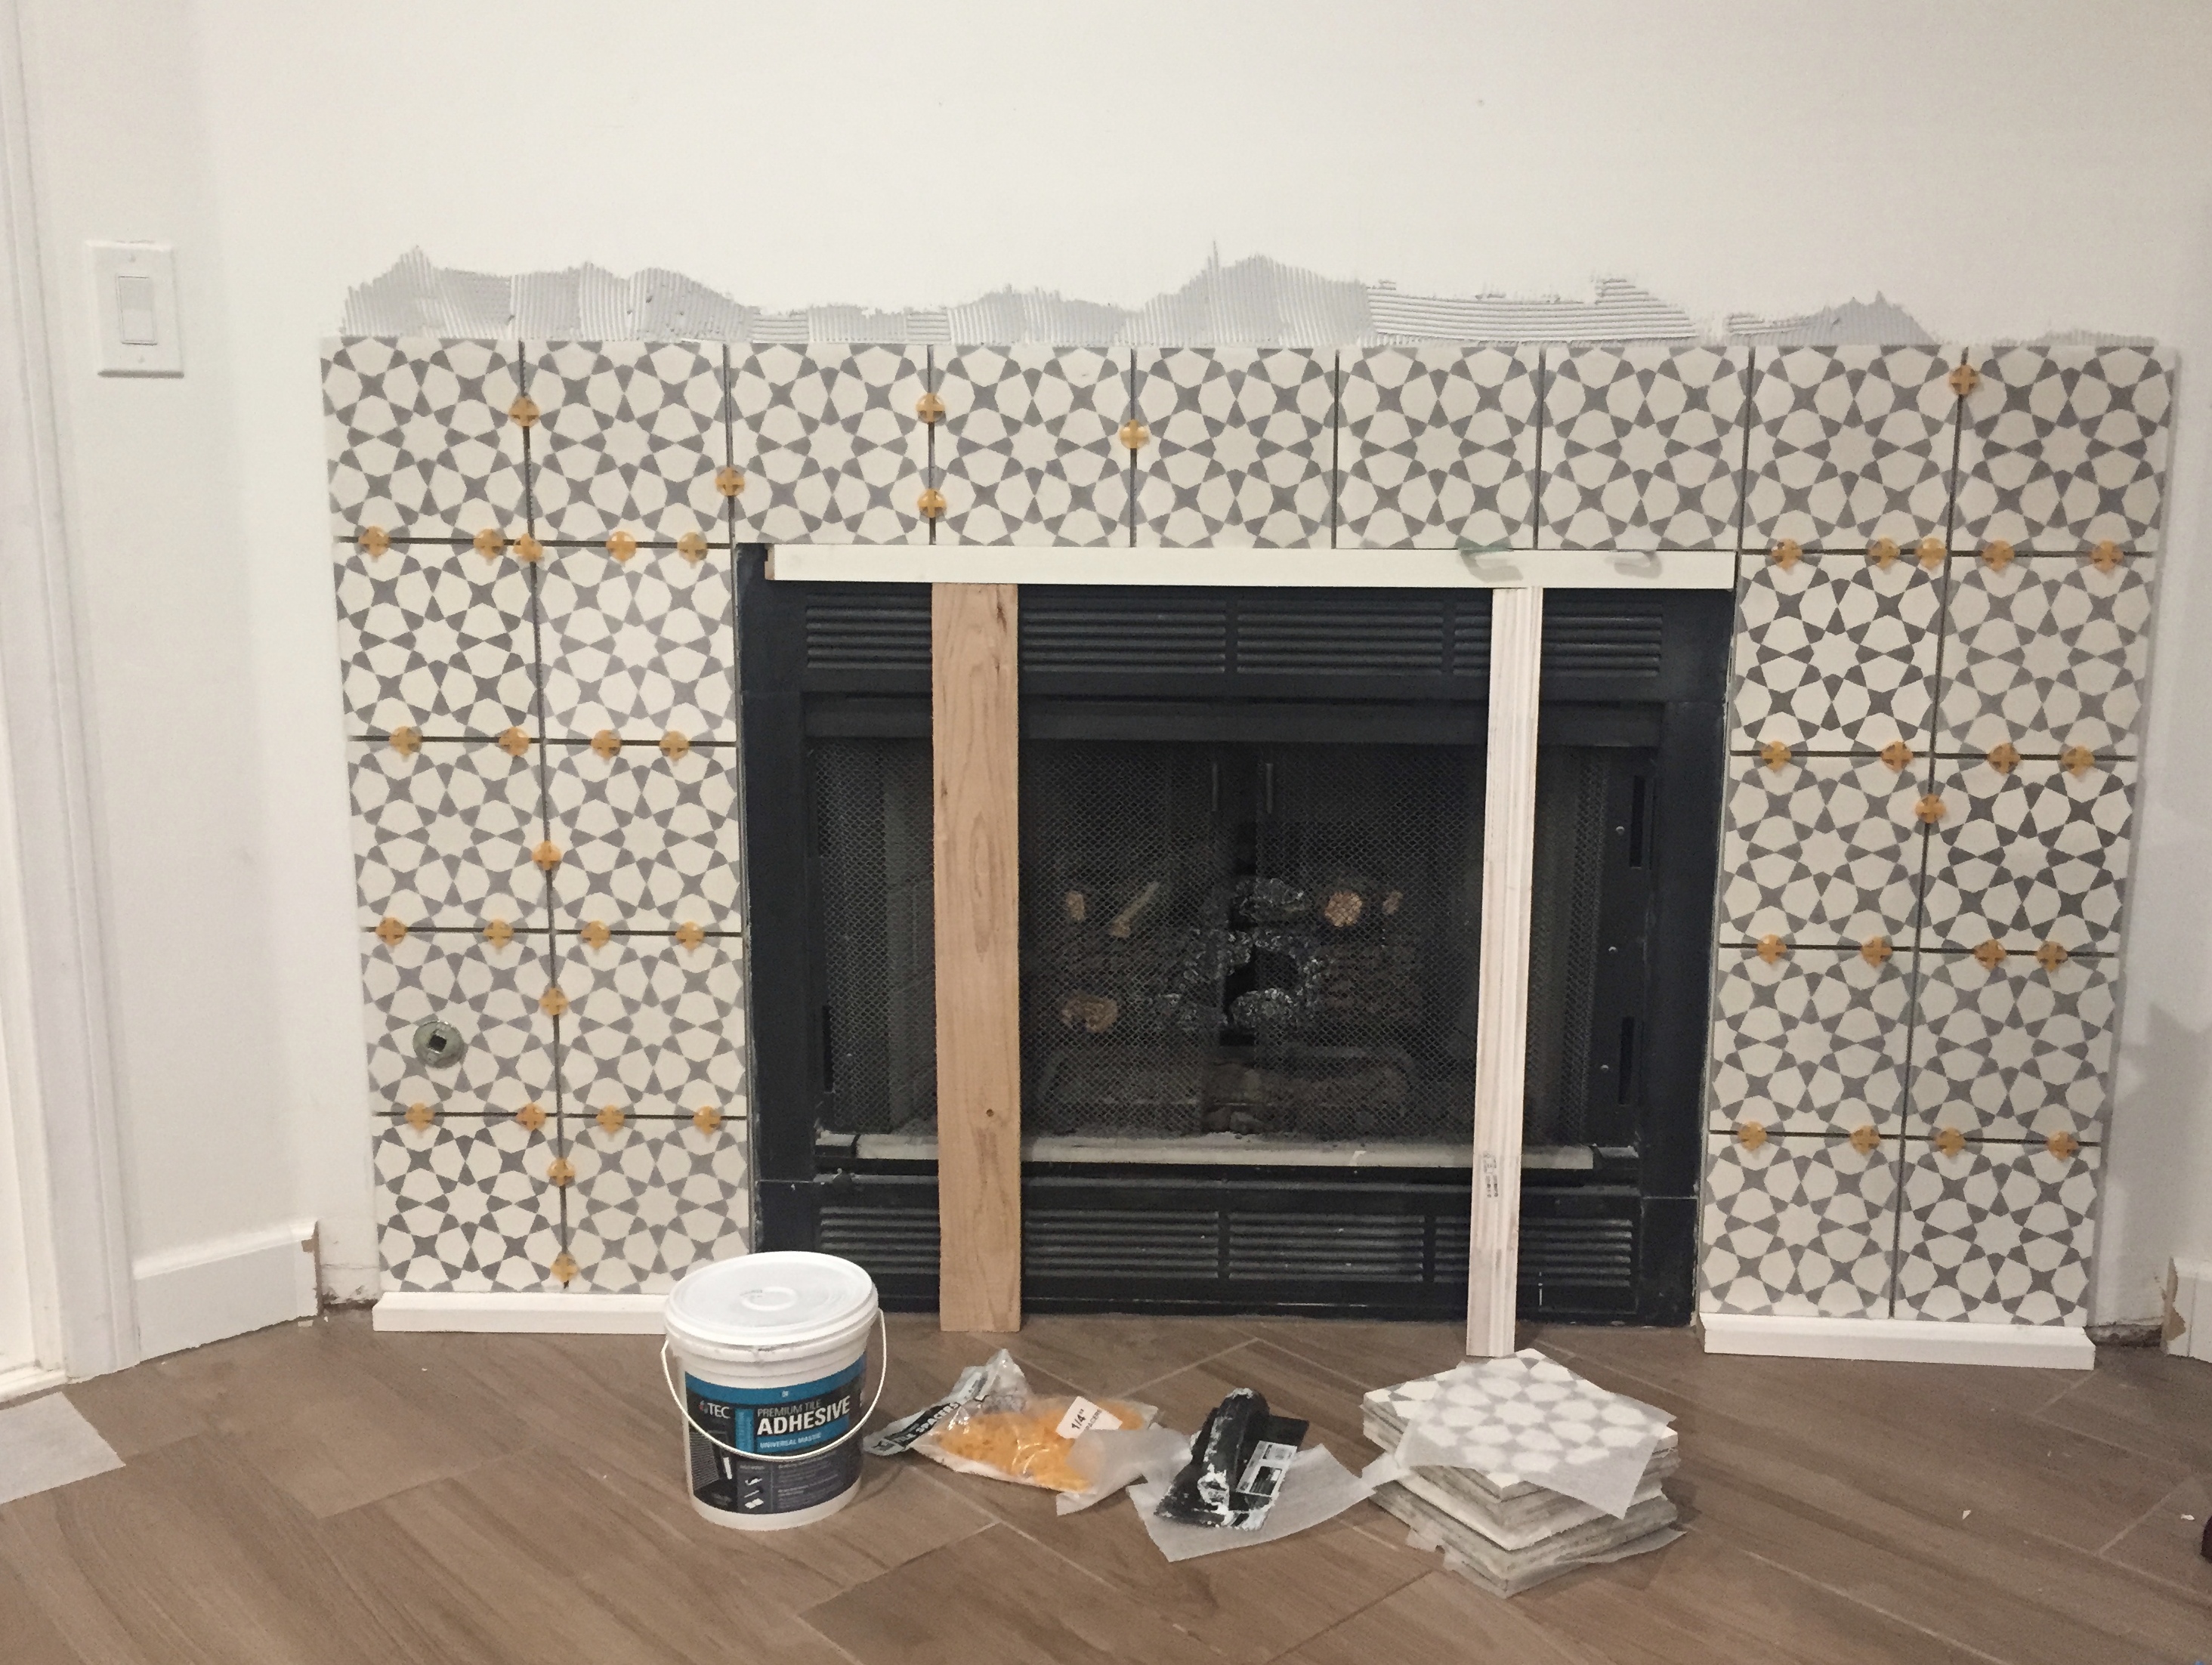
I had to map it out very carefully, the tiles are 8 x 8” and the width of the fireplace box is 41” so I did the math and figured out I could get 5 tiles along the top with ¼ inch spacers and the vertical tiles lined up really nicely too. 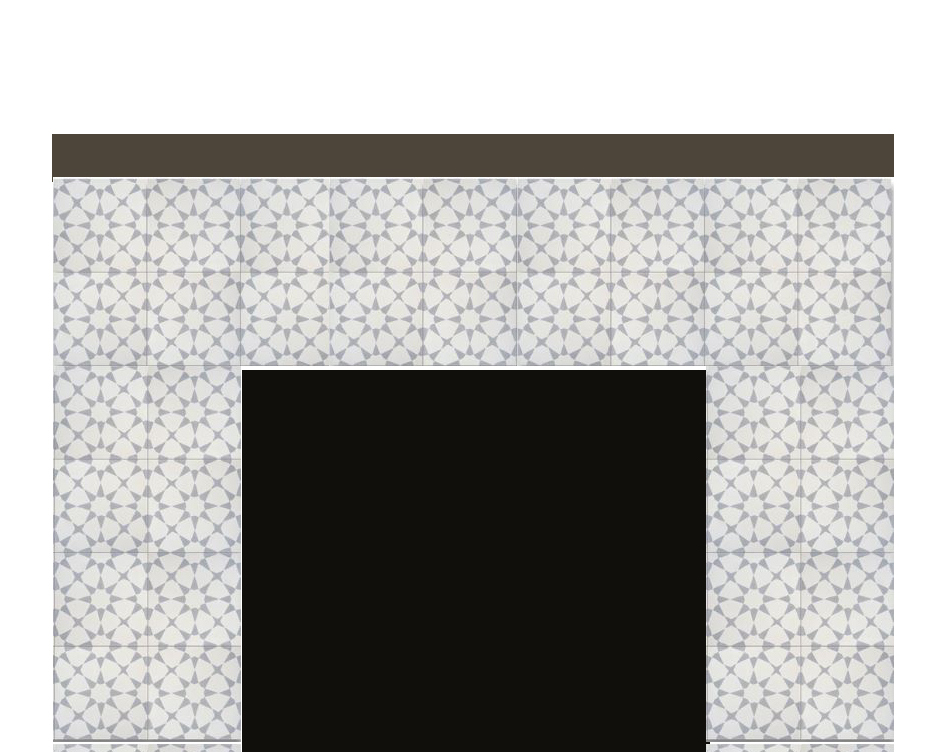
The first complication we had to deal with was the gas line cap – it required a hole in one of the tiles. Matt purchased a really handy drill bit kit that did the trick. It’s a wet diamond hole saw that worked perfectly! I’m holding the metal cap that attaches to the gas line, you can see the hole saw was the perfect size for making the circular cut.
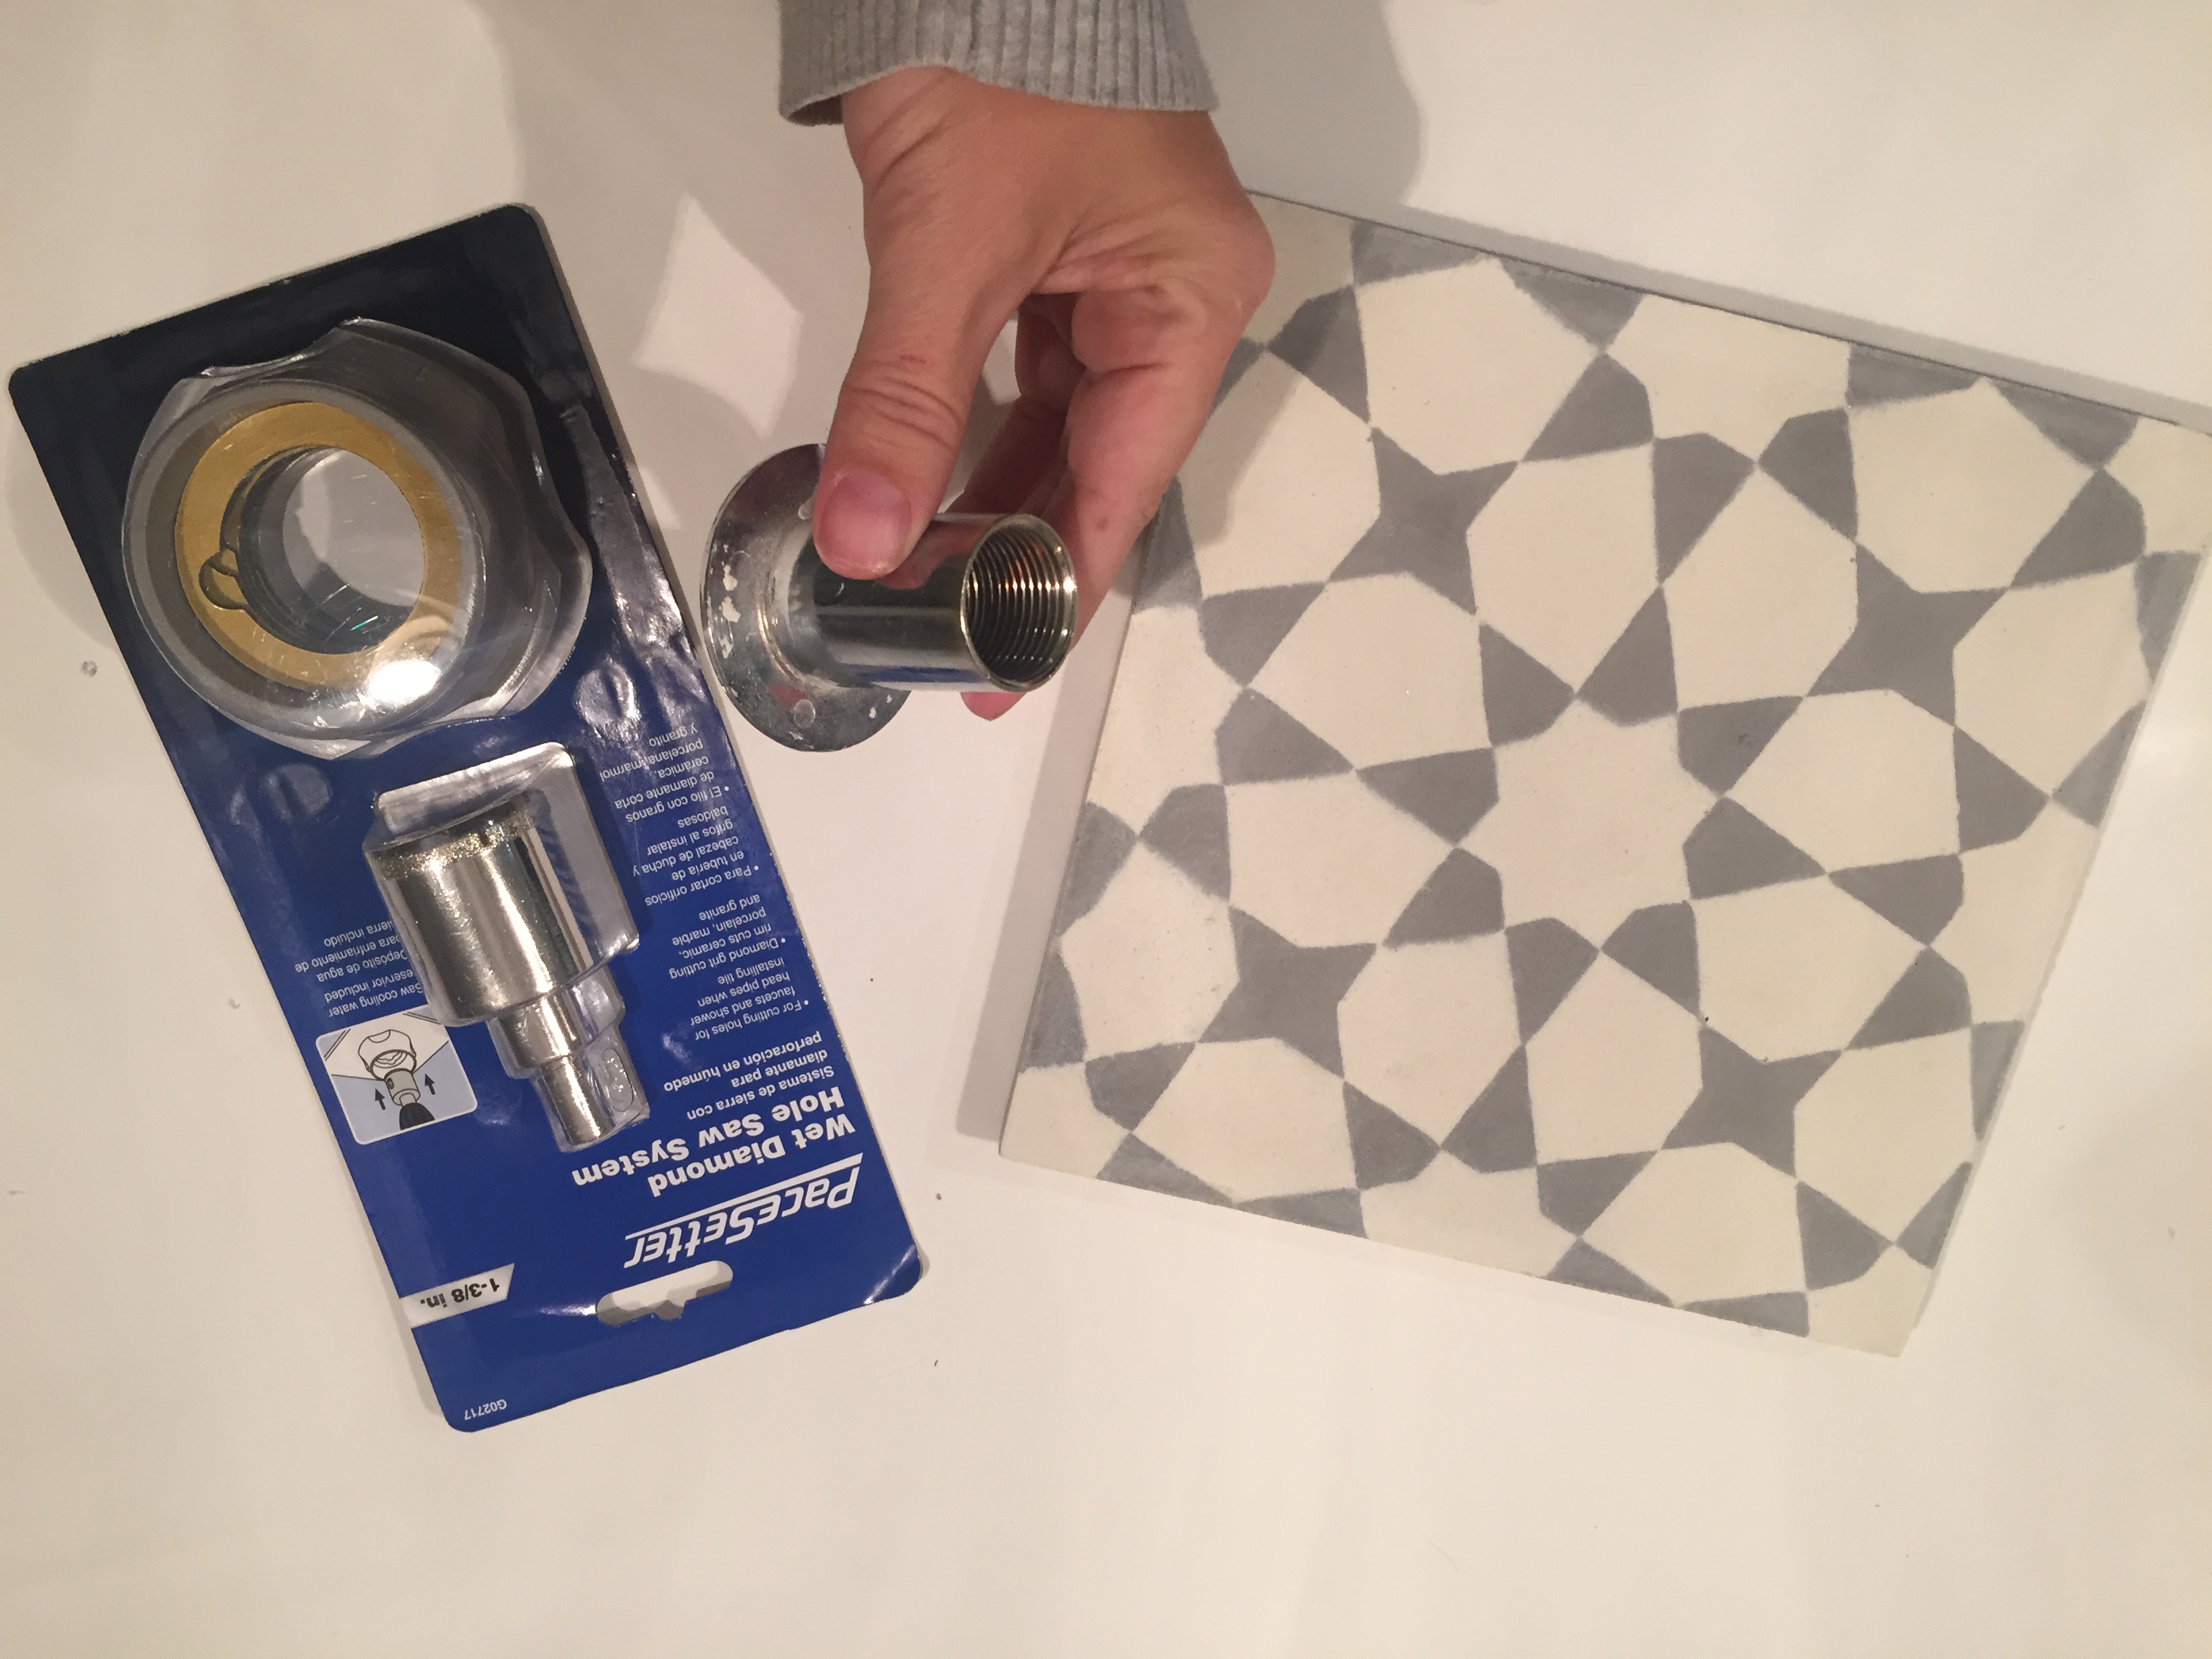
It has an adhesive rubber seal so you can create a mini water reservoir, then the diamond tip cuts the hole, this wet diamond saw is really great for cutting holes in tile for plumbing fixtures in showers.

The tile is very heavy so I had to use strong adhesive and in a thick layer applied with a trowel. (Hidden by my elbow is where the gas line cap is – see image below). I had already mapped it out on the wall and knew there was a small gap on the bottom so I placed a wood support there to support the tile and worked my way up the wall on each side during Downton Abbey reruns. SO excited Season 6 is finally here!
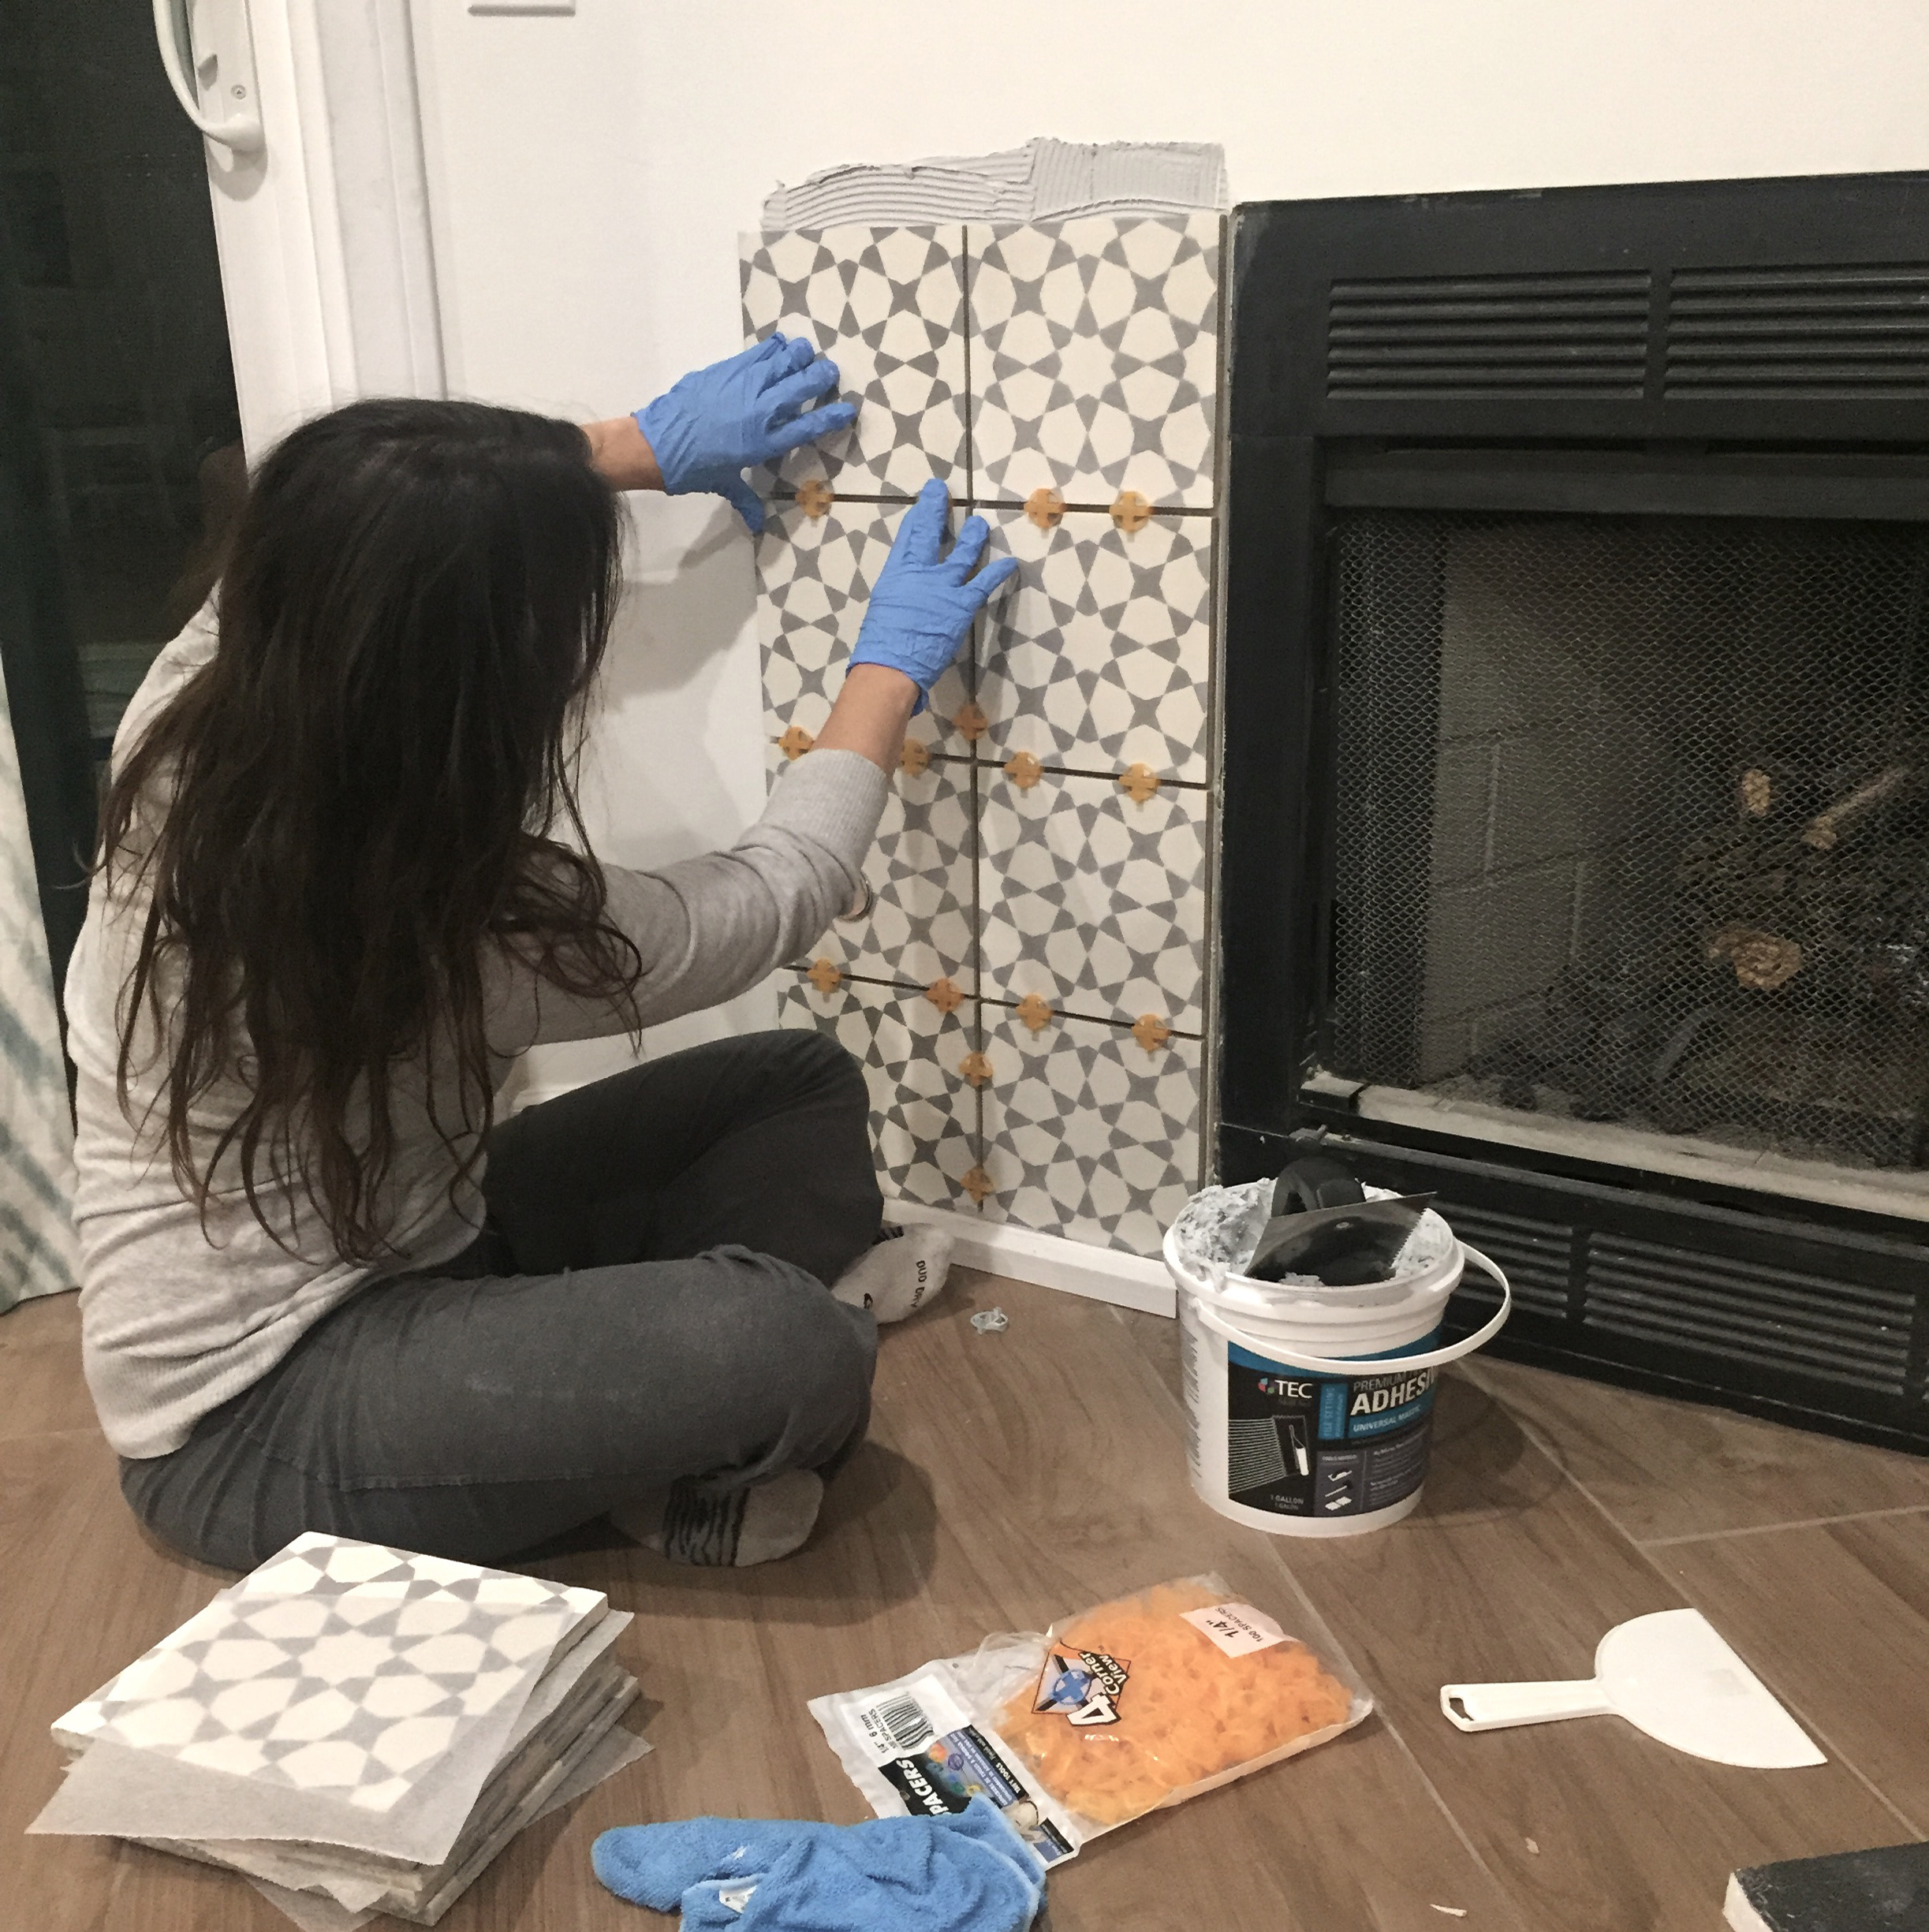
To support the horizontal tile I used a makeshift support created with scrap wood so they heavy tiles would stay in place while the adhesive dried.
I color matched the grout to Antique White but added a bit of Bright White to the mix since the Antique White grout was a hint too yellow. I used a grout float to apply it and a sponge to clean the tile.

With ¼” spacers I was left with a sliver of tile on the bottom, so rather than cut an uber skinny piece of tile we finished off the bottom with basic 3/4” trim.
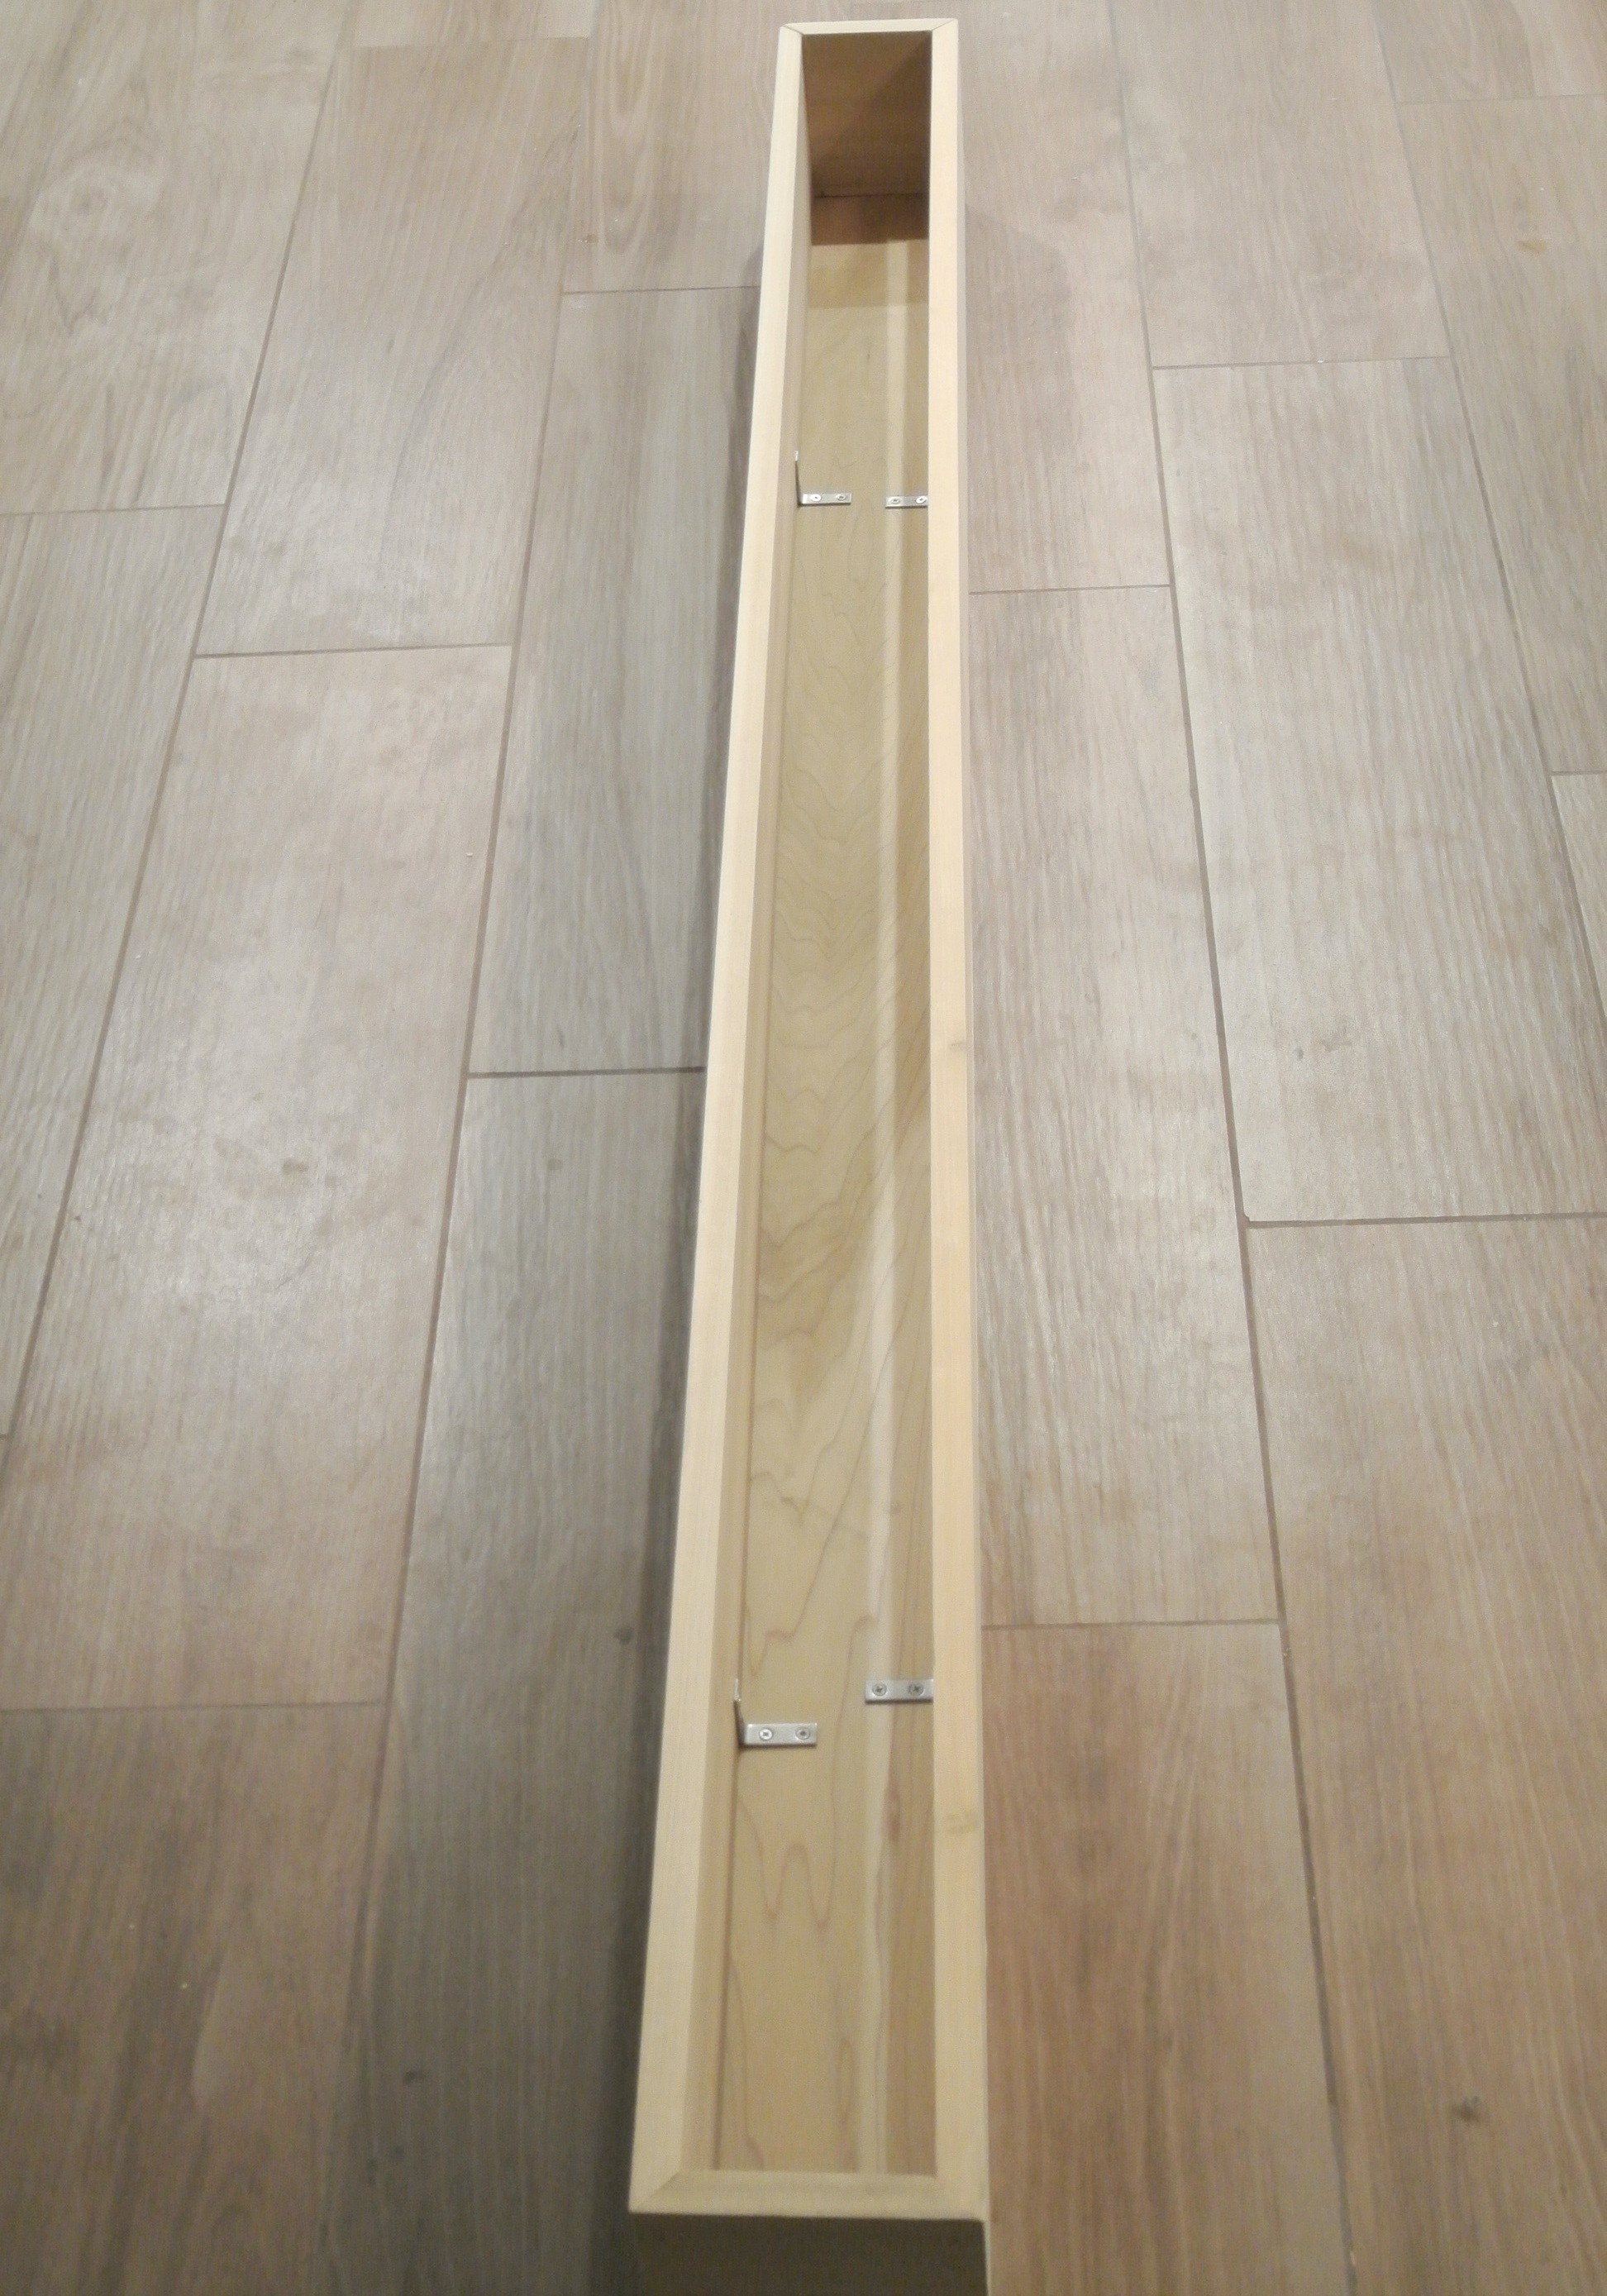
Matt also built a basic wood mantel out of birch wood, he didn’t follow any specific tutorial, just read a few floating mantel articles online and built the box to fit the width of the tile using an inner support made with 2 x 4s.
The three sided mantel box has a hollow interior, Matt used L brackets with wood screws to keep the frame together and nails to attach it to the inner frame. The inner frame made with basic 2 x 4s is screwed into the wall studs.

I tried different stains but decided just to use a dark walnut paste wax on the wood instead.
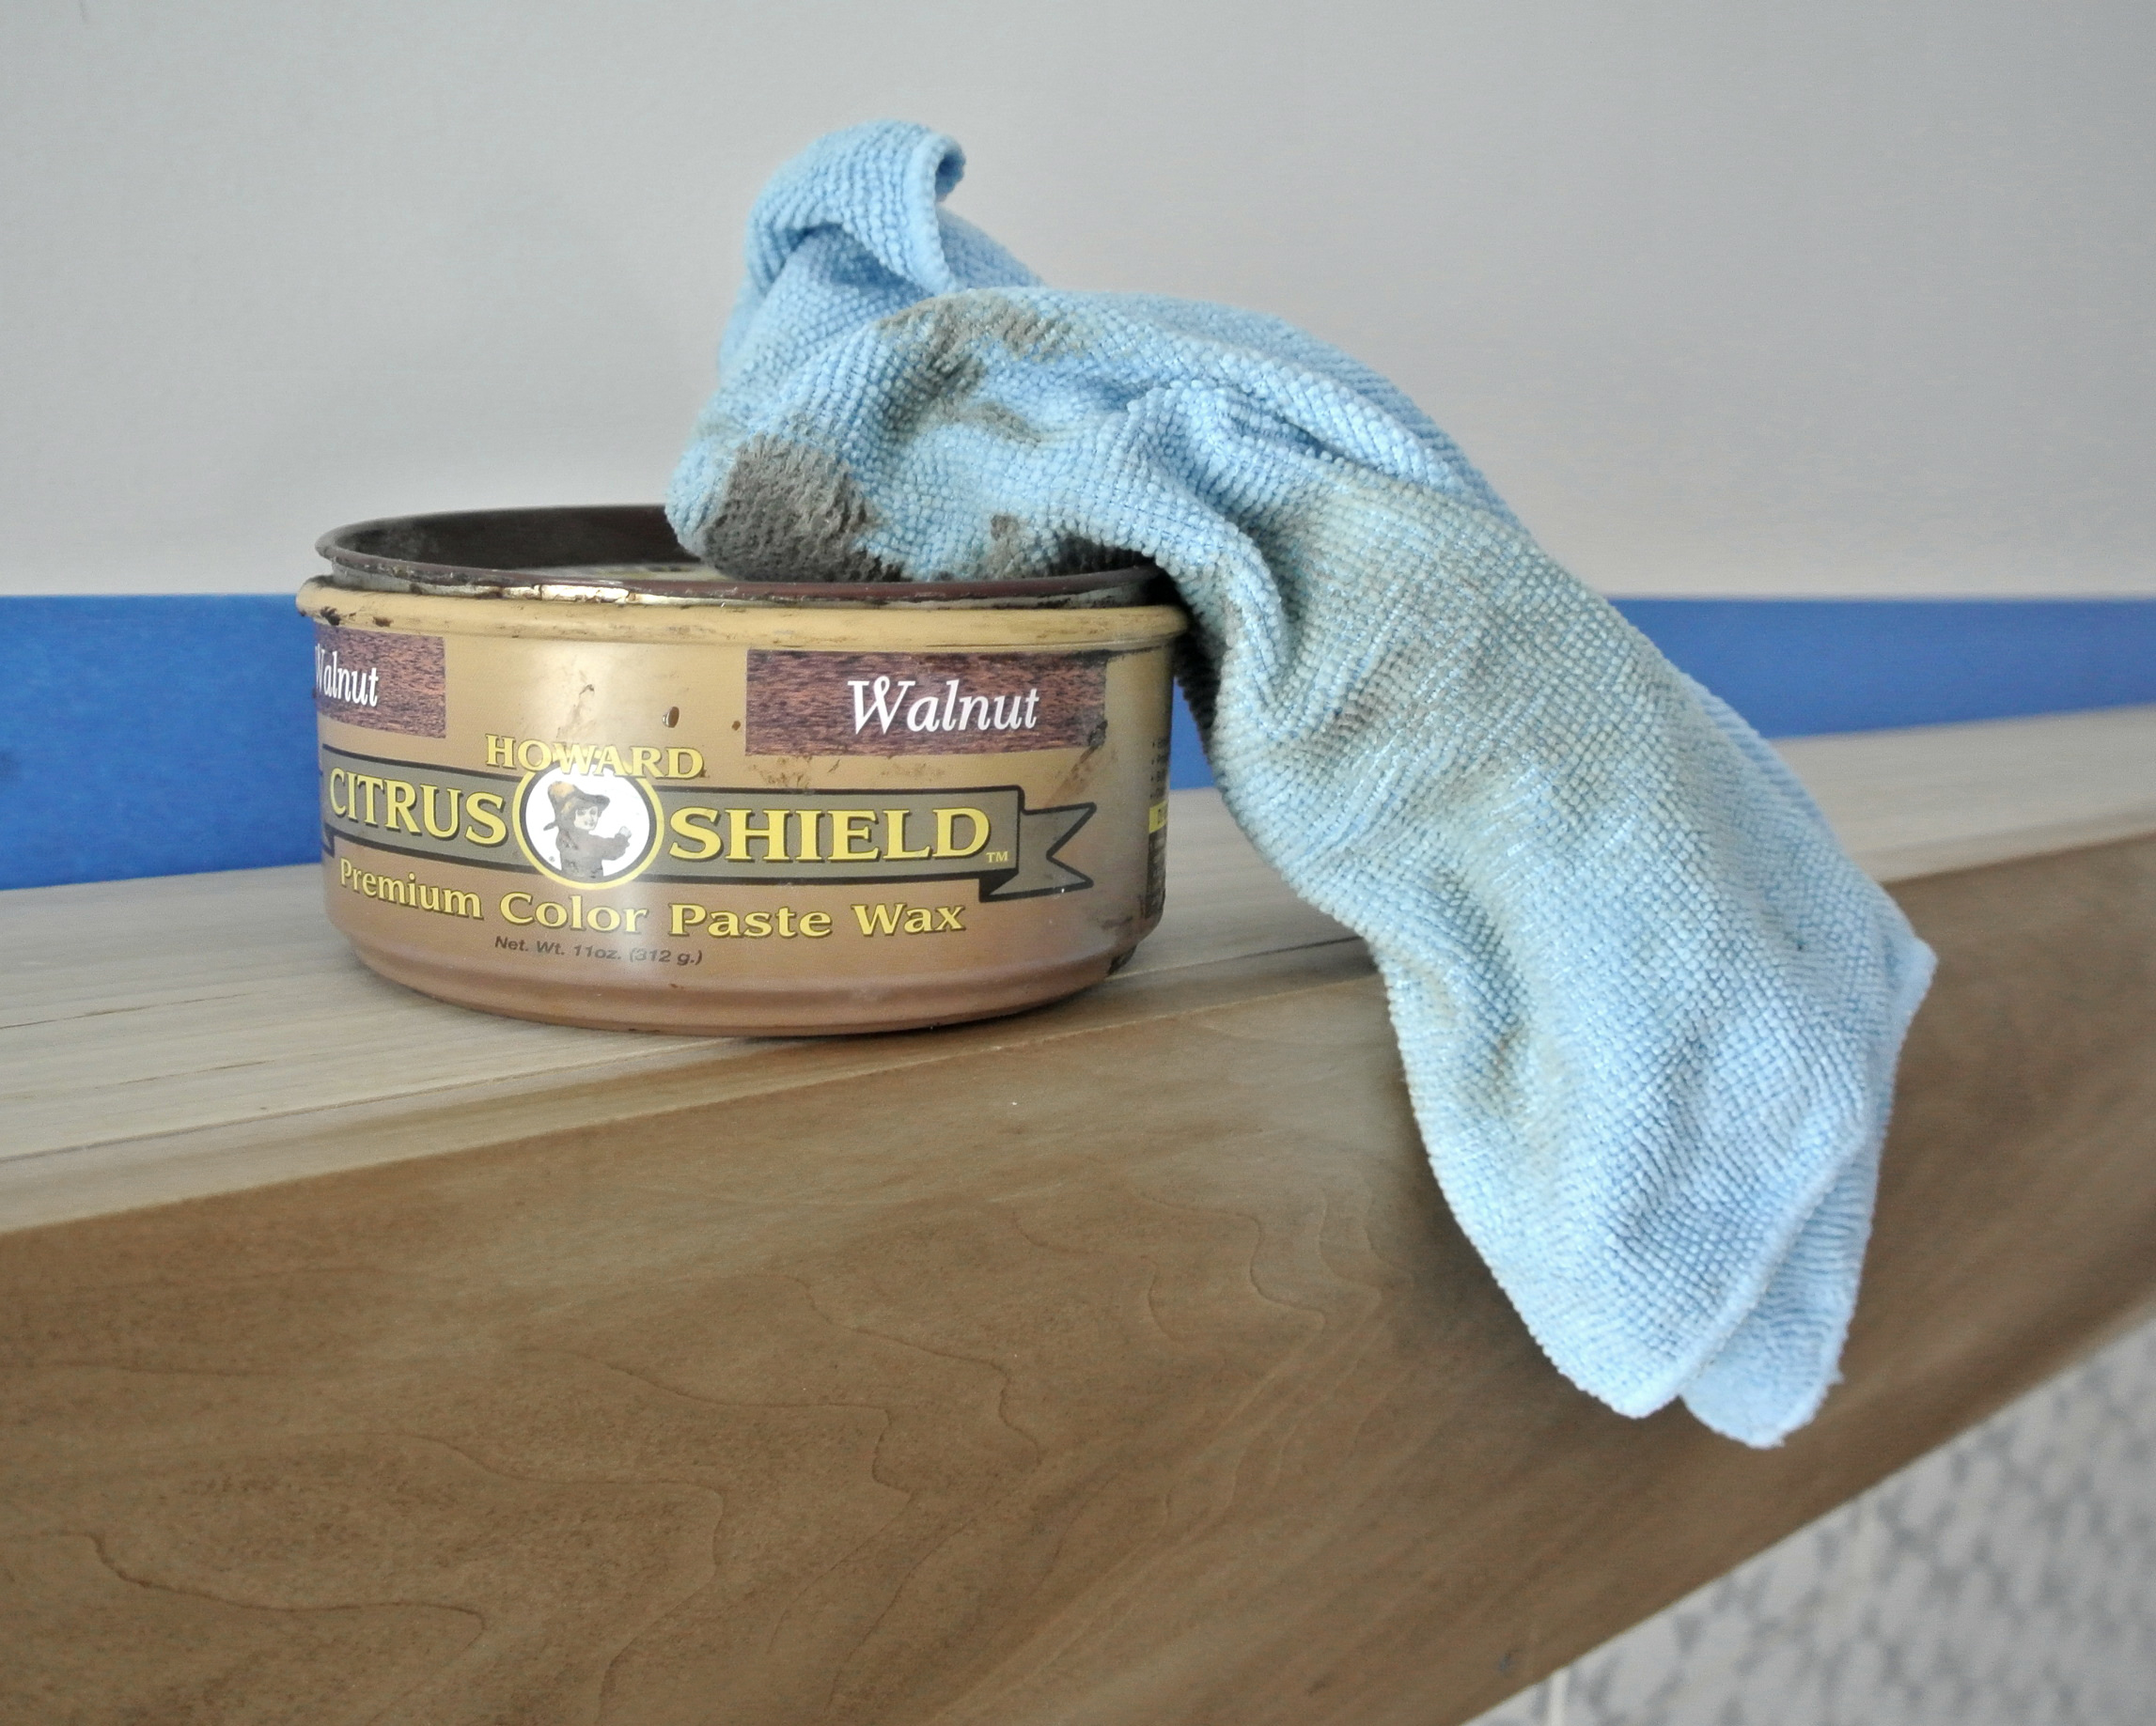
The resulting hue is a close match to the porcelain plank tile floors we installed last year.

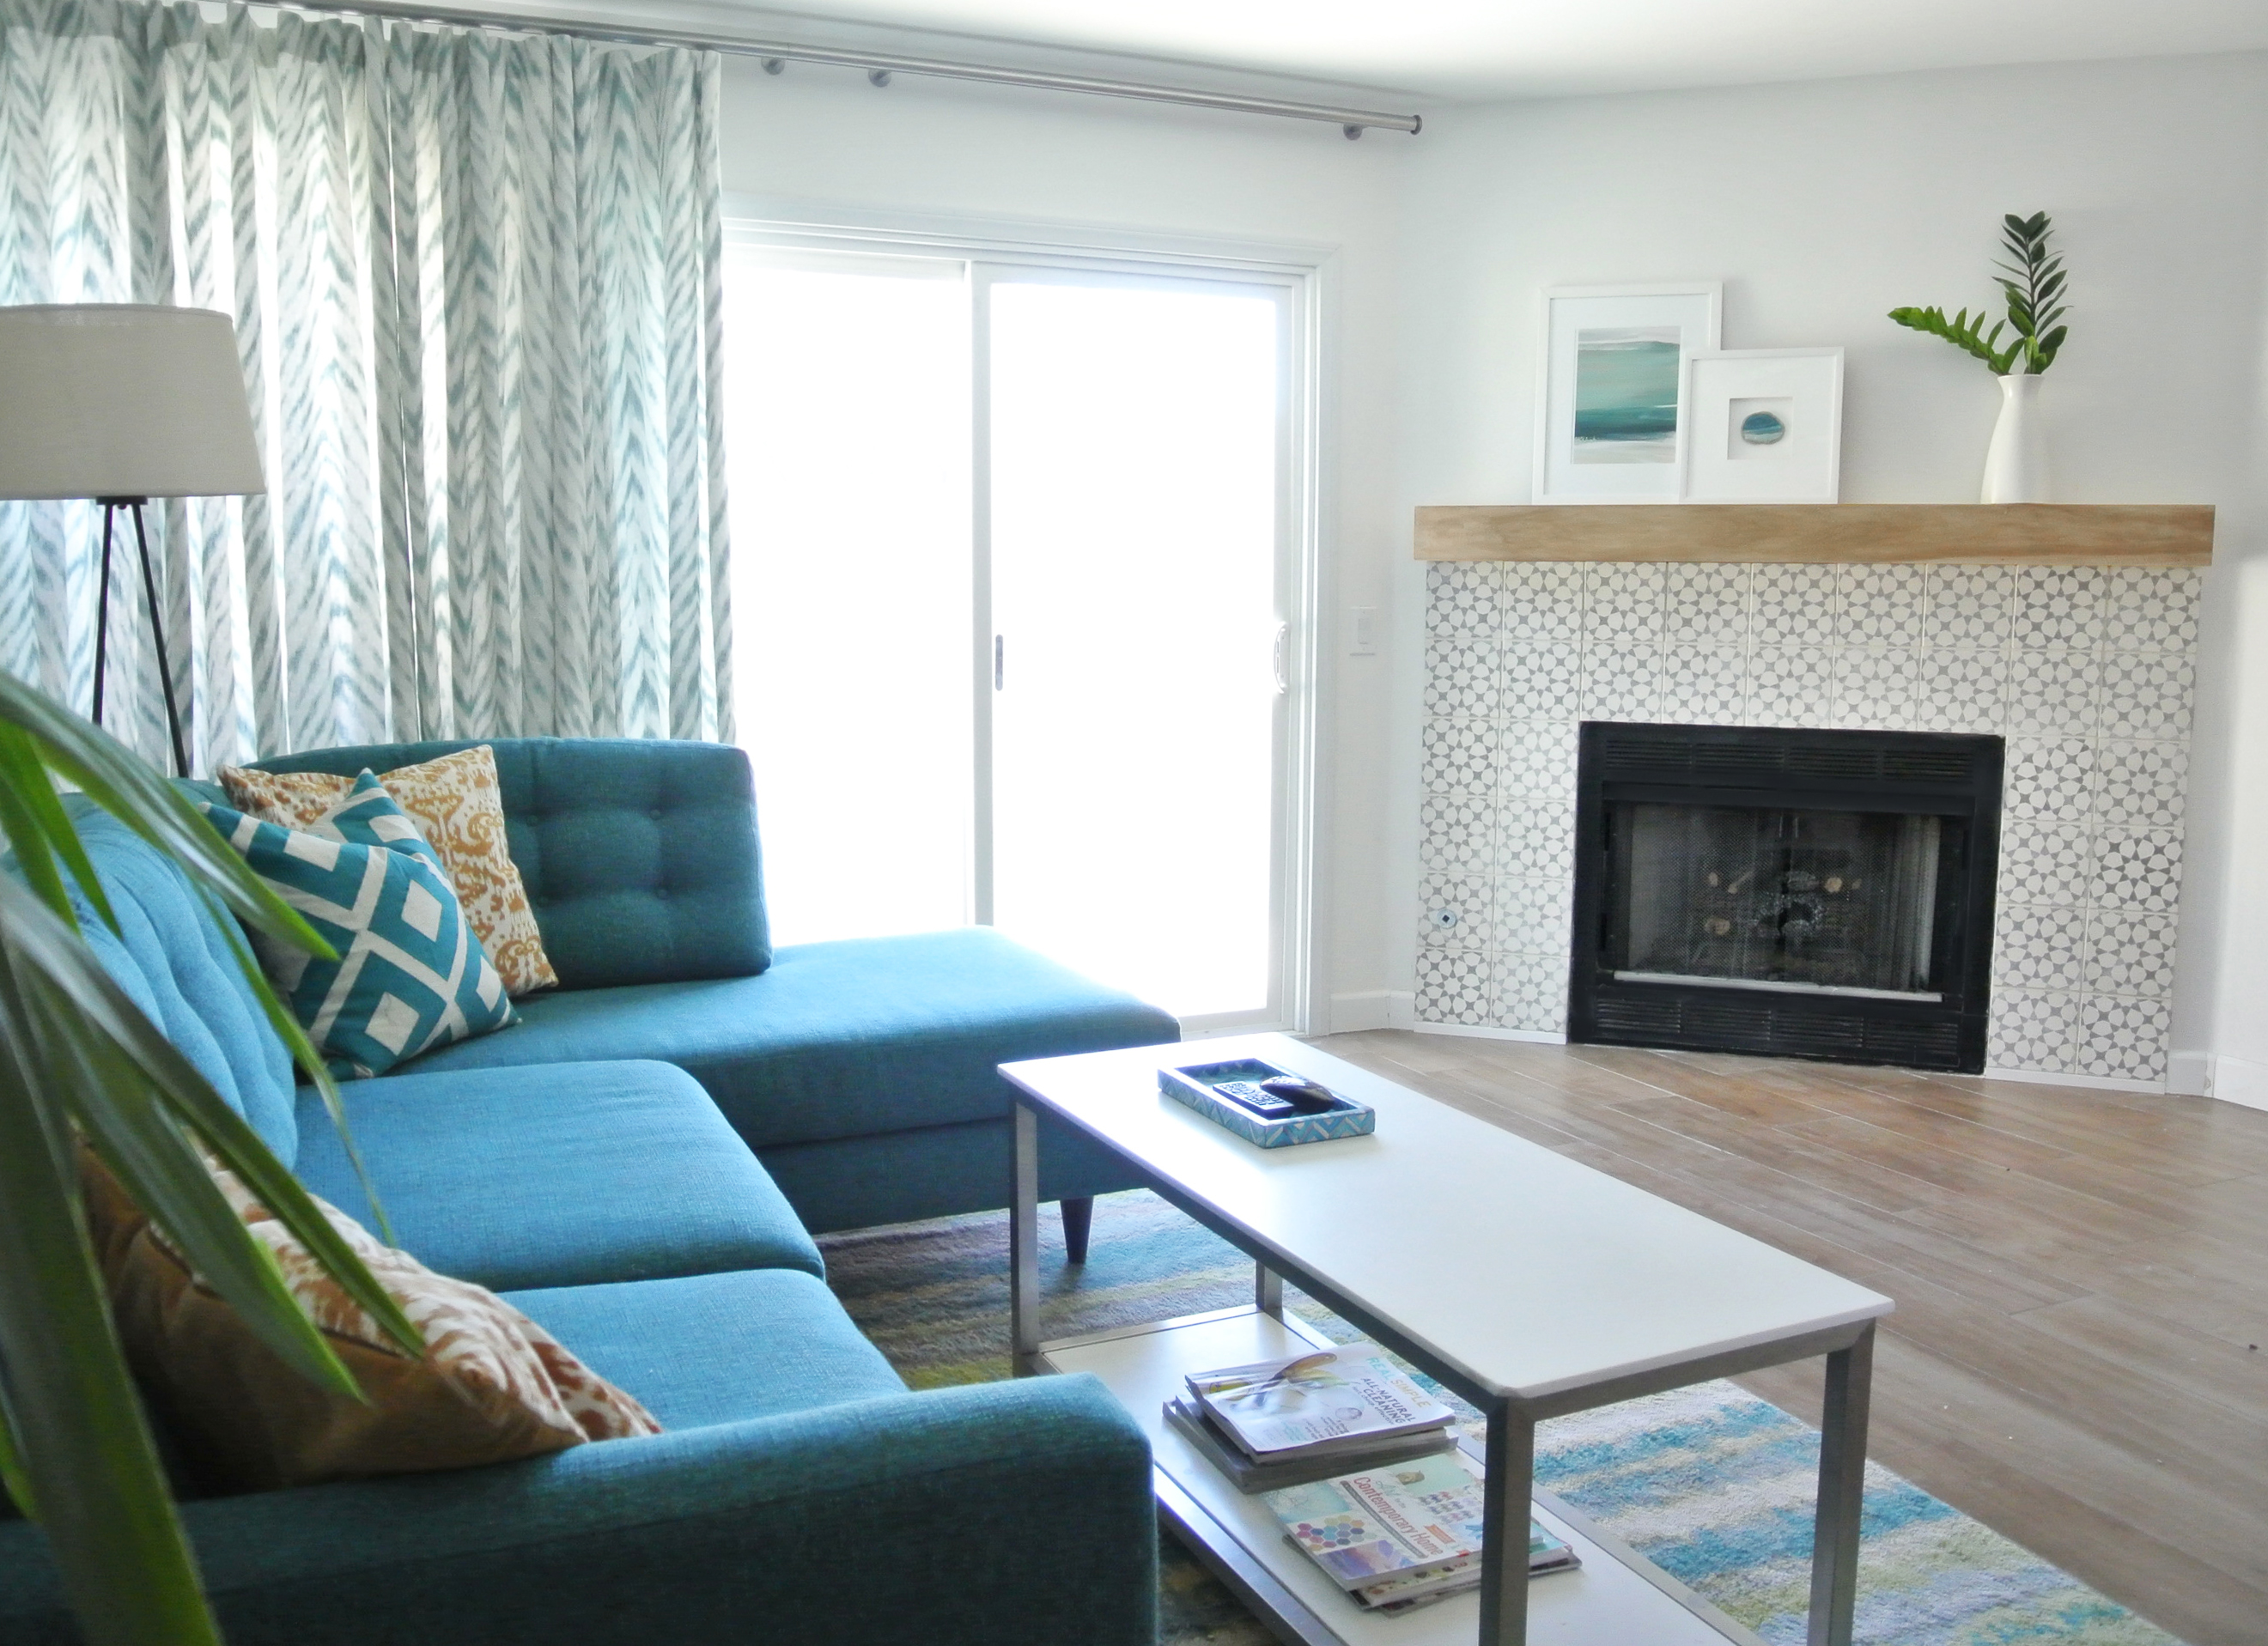
I love the new look! Here’s another side view of the before and after, this one with the past owner’s decor.
It’s a nice focal point looking from my fave teal blue sofa, the media stand is just to the right.
Happy New Year to you all! It feels good to be back! Let me know if you have any questions in the comments…
.


what are the floors? Everything looks beautiful!
I love the floors too! Here’s the post she did on them awhile back that she linked up in this article :). http://centsationalgirl.com/2014/08/finished-floors/
What is the name of the tile?
Happy New Year Kate and welcome back! Good for you for taking time to yourself and savoring the holiday season with family and friends. Wow! Your fireplace is stunning! That tile is gorgeous and you did a beautiful job. That was a true labor of love. I would move into that house in a heart beat! I love everything you’ve done. What a lucky tenat who gets to rent it!
I’ve always wondered what you do with your dirty grout water after you’ve cleaned your tile during the grouting process. Is it safe to dump that water down the drain? Can the grout residue damage my pipes?
Your fireplace is a stunner. I envy the person that gets to rent this home. You’ve done a great job with it.
Hi Mary, I dump the excess grout itself in a bag and allow it to harden then I toss it. The grout water you refer to is just the residue that comes off, I use a bucket the first few times and dump it outside down the drain not down the house’s plumbing. :)
That looks fabulous!!
what a transformation! I love that couch in the last pic! would you mind sharing the source? thanks!
Hi Nicole, I link to the sofa on my Shop page, find it there!
Kate
Absolutely beautiful! You have such a great eye for design and color. I love the art as well. Where did you find it?
The abstract is from Minted Marisa, the smaller framed agate slice is from HomeGoods. :)
The printed tile was such a good choice! I had never thought to use it on a fireplace before – I’ll have to remember that. The prints are beautiful! Where are they from?
amandakatherine.com
Amazing transformation! Looking forward to another year of inspiration and pretty pictures!
How ever much you ate and drank, I ate and drank more! But that’s neither here nor there …
That surround is gorge! Overstock tile, eh? I’ll be remembering that.
You’ve done great job with the fireplace makeover. It’s very cute. Finding balance is really important in once personal life. I’m happy you’ve found yours.
Love that look. You’ve done a spectacular job.
Have to say that I spent most of new year in PJ’s too – very unusual for me.
Merry New Year (as Eddy Murphy says. Do you remember I mentioned this to you last year? I can’t believe a whole year has passed by again!
Happy 2016. Thanks for the constant inspiration.x
Love the new look! I saved that same fireplace inspiration image for future projects. I love how your fireplace turned out. I can’t wait to build ours. Thank you for a new inspiration image to add to my files.
Love this transformation Kate! The cement tile you’ve chosen is perfect, in size, scale, and colouring. The balance of pattern with the clean lines of the mantel feels really fresh.
Glad you had relaxing & restorative holidays. I’m seeking a little more balance in 2016 myself. Have a great year!
Kate, this is by far my favorite project you have done in this house! I love the cement tiles and they are such a perfect accent in the room. Great job, I have been inspired to try a similar project!
Ha ha! I was one who weighed in during construction stating I was a fan of the niche. Now I see the error of my ways. The cement tile looks great and thank goodness you ditched the niche.
Love the tiles and it all came out so beautiful!
Thanks for sharing that you are like the rest of us and can take it easy and eat too much over the holidays! The house is amazing and the fireplace is perfect. Lucky renters!
Love, love, love the remodel! Is this house available to rent? If so, what middle and high schools are you zoned for?
Hi Gail, the zip code is 89117 that should tell you!
The house is amazing and the fireplace is wonderful.
thanks for sharing your work.
good luck.
I think the before actually didn’t look so bad, but your transformation looks great! I really like the wooden mantle :)
I love that tile! What a fun little eclectic touch brought into the room. And you’re right — the finish on the mantel does looks great with the flooring. Excellent choices.
Looks awesome! I love patterned tiles, and those are great and I love the wood mantle. It accents the wood floor perfectly! Great choices and that teal sofa #perfect. Great work guys, thanks for sharing.
Lauren Baxter | Lovely Decor
http://www.lovelydecor.co
xx
It looks gorgeous! My husband and I are wanting to do the same thing. We plan to remove the carpet, have the cement floor stained and redo the tile on the fireplace. The pattern on your tile is very pretty.
Thanks for sharing, Kate!! The tile looks AMAZING!! I am more excited than ever to use it on our backsplash! I also love the idea of approaching the mantel like a floating shelf, rather than investing in a solid plank! Awesome job as always! xo
thanks Jenny ! xo
This is stunning!! Well executed!! Gorgeous. Very inspiring.
We installed this exact tile around our fireplace. It’s beautiful and I love it, but after using the fireplace for two seasons, all of the tiles above the fire box have yellowed. I’ve tried everything, (degreasers,masonry cleaners,etc.), to clean them with no luck. I contacted Overstock, who in turn contacted the manufacturer and said we should have sealed them. Oops. My husband likes it and thinks it gives it an “old world” look, but it kinda drives me nuts.
Hi Kate,
Your new fireplace looks absolutely gorgeous – I love, love, love the tile and mantel! I’m interested in hearing more about the walnut wax you used on the mantel – would you kindly share more about the product? I have wood ceiling beams in my family room that were stained that popular orange color from the 80’s and then covered with several layers of a high gloss protective coat of some sort. After living with them for years, my husband and I finally did the neck breaking job of sanding them. I had originally planned to put a stain on them once the oompa loompa orange color and gloss was gone, but am currently enjoying the raw wood look. However, despite all of the sanding they still have a faint orange hue to them. I’m wondering if you think the walnut wax you used would help neutralize the orange tones? Your finished mantel looks like it has some grey/cool undertones. Thank you in advance!
Hi Dawn, I’m not sure the walnut wax will hide any orange hue, in my opinion it will only darken the wood that is there so if the wood does possess some orange hues, the walnut wax may diminish it but not hide it.
How did you finish the sides to hide the adhesive behind the tiles?
I just made sure the adhesive went right to the edge, then covered it with a thin line of grout. Then caulked the sides to hide any gaps and painted over it.
Hi Kate,
Hoping to do this exact thing on our fireplace surround! Ive typically used hardie board, but noticed you didn’t. How is the tile holding up installed directly onto the wall?
Thanks!
Holding up great! We used a super strong mortar.
Kate
Stunning!! I am in love with the tile you used!!
Hi Kate, We also have a drywall mantel and I hate it! How did you get the drywall off? Any recommendations for getting the mantel off but keeping the wall intact?? :) :) :)
It’s impossible to keep the drywall intact if you remove the mantel, we used a sledgehammer and saw to remove the old mantel and it damaged the wall where the mantel was, but we just patched it over and retextured the wall. :)
I absolutely love this project! Thank you for all the detailed info – on tiling AND making the mantle. One question, did you have anyone give the go ahead to put the wood floors all the way up to the fireplace (or is it wood looking tile?). I just had 1 wood floor guy say we needed to have something on the floor so that the wood doesn’t go right up to the fireplace. But I’m wondering if he’s wrong. I prefer the clean look of your fireplace tile in the wall only..,
Yes for any wood burning fireplace (might be true for gas fireplaces on the floor too) you need something fireproof underneath – check your local codes. In this space the floors are wood look porcelain tile.