My oldest daughter is away at college and it’s her birthday this week so I wanted to send her something special for the occasion (and something easy to ship too!) She mentioned she didn’t have any decent makeup brushes so I made a trip to Sephora to splurge on a new set for her. While I was there I thought about something to hold them all and wanted to give her a little handmade gift to go with the new brushes. I thought a cute fabric pouch would be perfect so I stitched up a makeup brush holder with some leftover fabric remnants from my stash.
This was one of those projects that I made up as I went along but I tell you this, if you can sew a straight line, you can make your own too! Here’s how I made this fabric makeup brush holder for my college girl in about an hour.
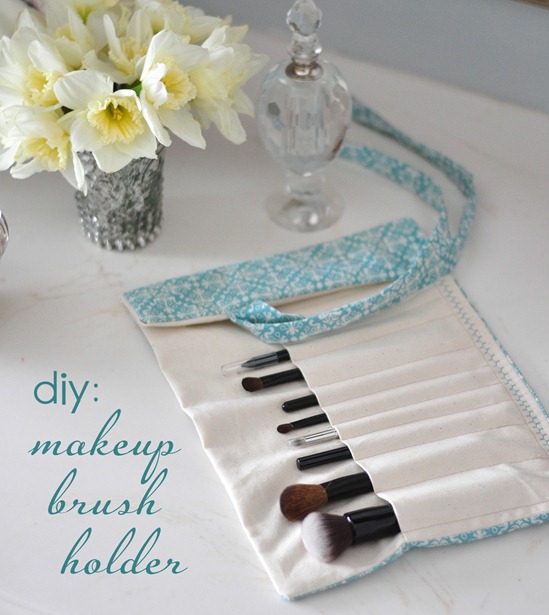
First grab yourself some fabric, for this I used two remnants, one a blue medallion cotton fabric, the other a cotton duck lining.
Here are the measurements of fabric used:
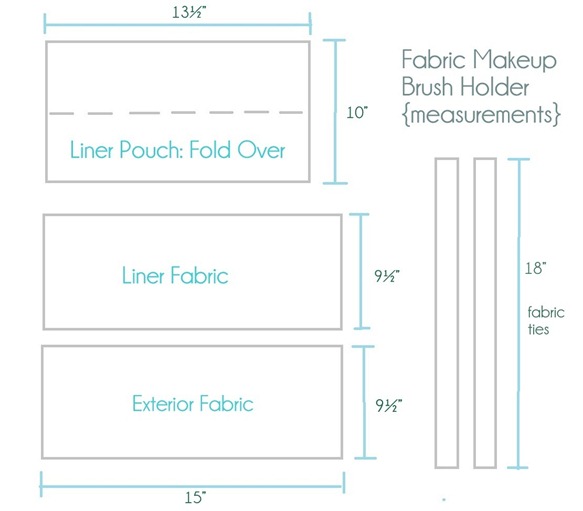
First start by sewing your inside pouch. Take your first piece of liner fabric (see diagram above) and fold it in half. Lay it on top of the second piece of liner fabric and roughly map out the location of your brushes. They really only need to be spaced about 1inch apart, mine are 1 ½ inches in the picture below which ended up being too much but I added extra pouches in the end so it all worked out. Pin your folded over piece of fabric to your liner piece and stitch together where pinned.
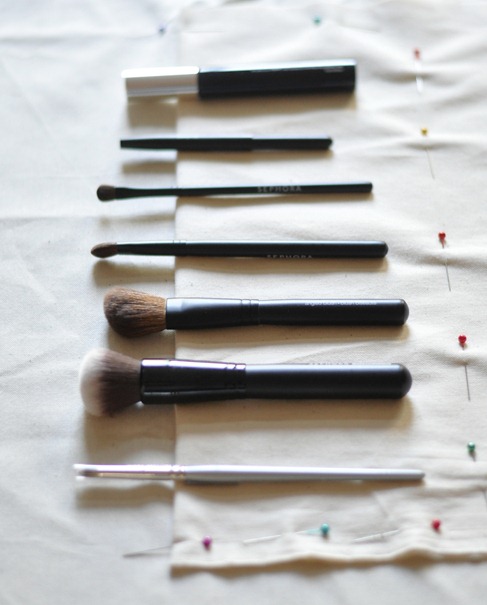
Next stitch the individual brush pouches one by one and varying by size. Use your brushes as your guide if necessary.
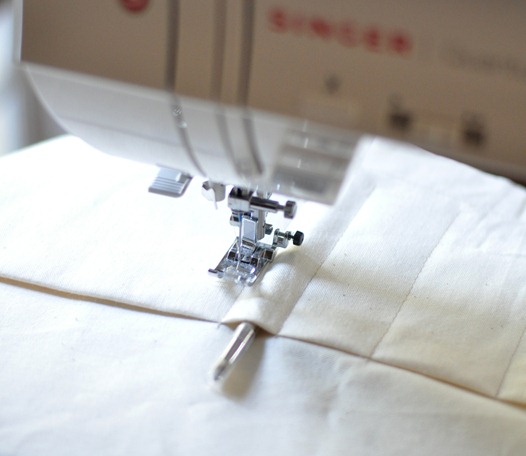
To tie it up at the end, you’ll need some straps, so make some with two strips of fabric. To get them right side out, weave a safety pin attached to one edge through the strap to reveal the outside of the fabric. It helps to press the straps flat with an iron before sewing them to the brush holder.
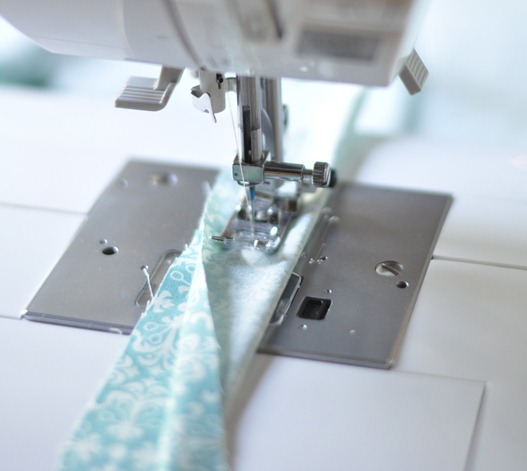
Once your individual brush pouches and straps are sewn, flip the liner + pouch inside out and layer it on top of the exterior fabric. Make sure that exterior fabric is also turned inside out so that the front of the pouch and front of the exterior fabric are facing each other. Pin and sew together, making sure the straps are sewed inside the holder, and allowing 3 to 4 inches of an opening in one corner.
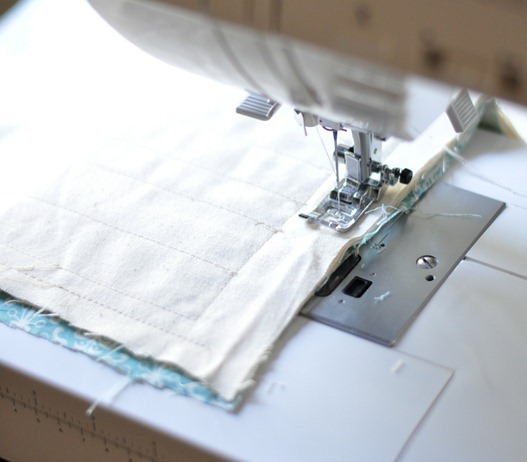
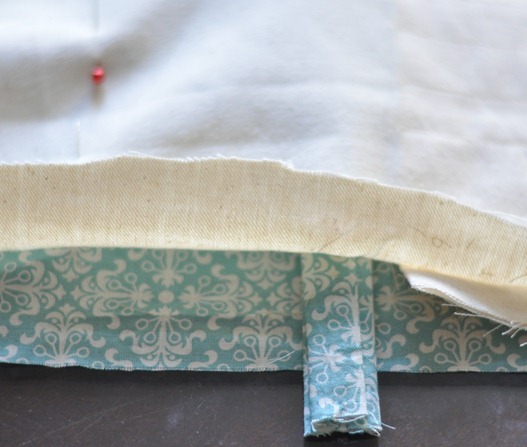
Flip your fabrics right side out to reveal your makeup brush holder, you’re almost done! Now it’s time to seal up your opening.
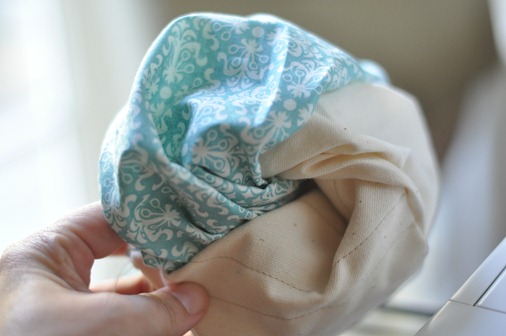
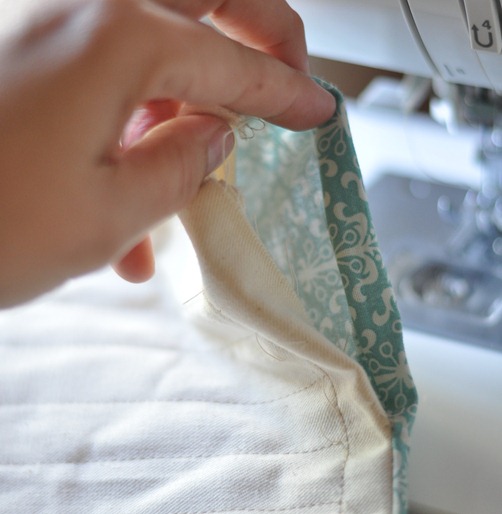
You can use a simple stitch on top of course (like I did with these placemats) or you can do a decorative edge. Ever since I got this new sewing machine I’ve been dying to try out the fancy stitches so I went for it. Number 50 it is!
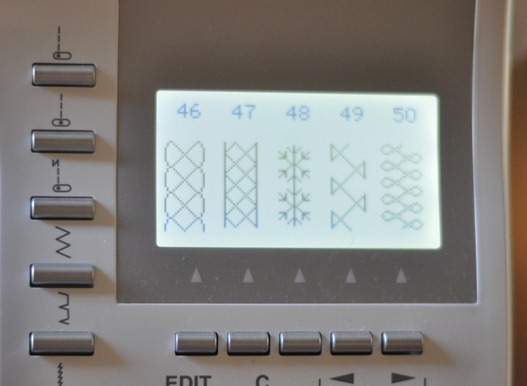
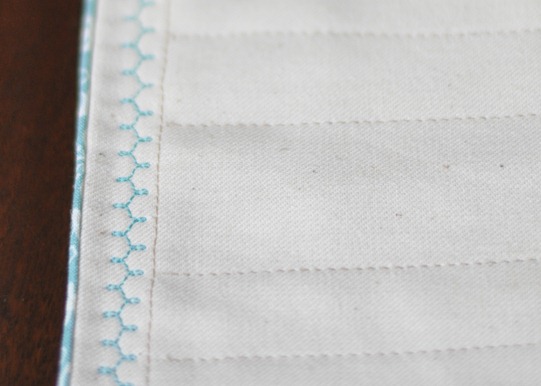
OK, how cool is this? I pressed the button and along the seam was an instant decorative edge, uh-may-zing! I used it to seal the opening shut and give the makeup brush holder a little bit of somethin’ extra.
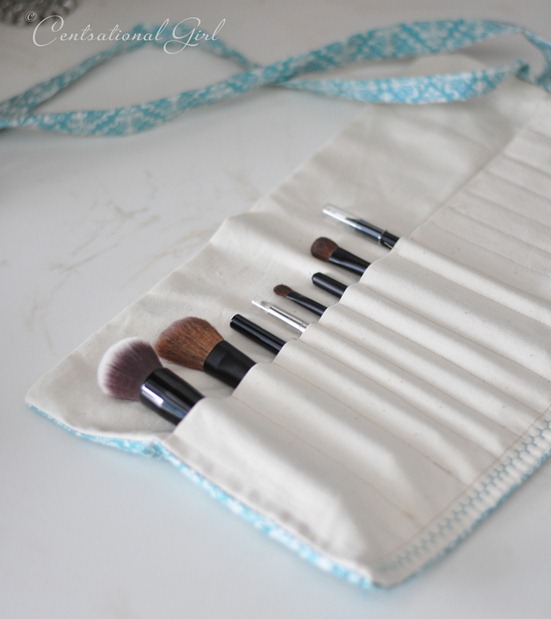
You can fold up the makeup brush kit in a roll and tie it closed with the straps for travel, how fantastic is that?
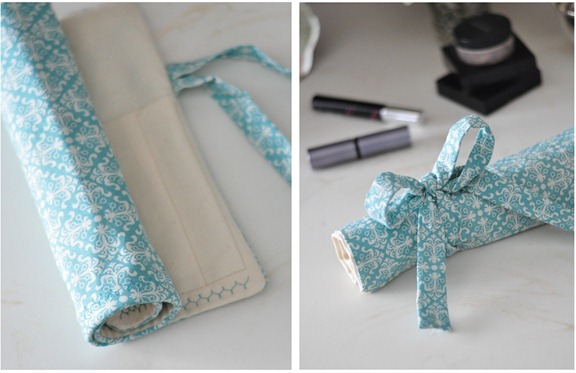
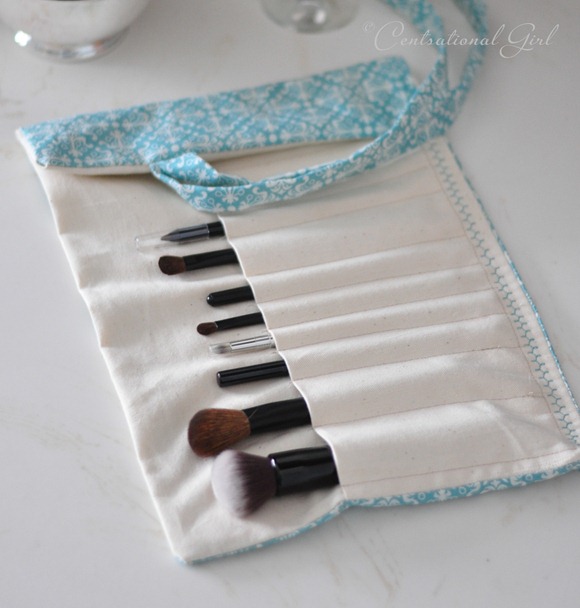
So that’s my step by step to making a simple fabric makeup brush holder. You can use the same technique to create a holder for artist’s brushes or pens and pencils too.
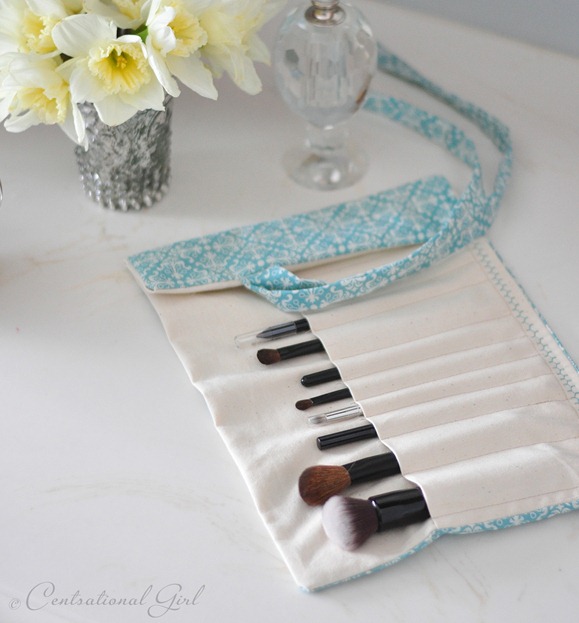
And now that I look at it, it’s just so darn cute I’m thinking I’ll definitely have to make one for me too!
.


Very cute! My oldest daughter would love one of these…XoXo
So cute and crafty!! Love it!
Very cool make-up brush holder you whipped up! Oh to be so talented! And you make it look so easy. Happy Spring……..
just lovely Kate………….you can do just about anything!
such a lovely personalized gift!
That is so cute! And how do I get myself a sewing machine that does stitches like that…… hmmm.
:)
What a great, thoughtful gift. This is one of those things we could use but don’t buy for ourselves. I’m adding this to my Pinterest “gift ideas” board.
I love the fabric! I have some of it in the stash I use for photo backdrops. It makes a lovely brush organizer- thanks for sharing this projects!
Oh, super cute! That fabric is so pretty too. What a thoughtful gift! I need some new brushes…might need to head to Sephora this time. Happy Birthday to your girl!
This is very creative. Unfortunately, I only have one brush… my bag wouldn’t have to be that big. Maybe I should invest in a few more! I am sure she will love her gift.
WOW Kate, you never stop amazing me!!! It is so cute!!! Love the fabric too. Hope she loves your present that you made with love!!! :)
Super cute! You should sell them on etsy :)
Adorable. I thought you were like 30 and childless, so I need to pay better attention!
So pretty. That’s a lucky daughter you have. Handmade gifts are best. (My mom taught me to say “handmade” rather than “homemade,” because she thought it sounded classier. Whatever. Today we just say DIY!) Very nice work, as usual.
She will feel so loved! Thanks for sharing! What a a great idea!
wow.. what a creative and USEFUL diy! love it!
What a cute idea! My current brush holder is pretty darn ugly…I think it’s time to break out the sewing machine.
I made one of these a few months ago and LOVE it!! Cute fabric!!
I can’t believe you just came up with that! It is so clever – and you make it look so easy! Can’t wait to make one.
This is SUPER cute! I could use one of these…
Oh, my gosh…LOVE this!
Super Cute! This post reminded me that I need to clean my makeup brushes! haha!
So cool, really! Well-organized & takes least space possible!
And wow, they have all these fancy digital sewing machines these days? The last I remember was my grandmother’s machine where she rotated the wheel with one hand to make the needle work. And the ones I’ve seen at tailor shops, rocking their feet on the paddle below to make the needle work on the machine. Old-fashioned stuffed … not sure if you’ve seen those, may be in your childhood? :)
I was thinking crochet hooks or knitting needles.
Looks like you could have an Etsy shop idea on your hands!
Great gift idea and simple to follow tutorial! And LOVED your Easter tablescape too…beautiful!
As one of the previous commentors mentioned, this pattern is perfect for knitting needles. My mom made herself one for her HUGE knitting needle collection and I’ve always been meaning to copy it… my needles and crochet hooks end up scattered all over the place and, inevitably, lost. Perhaps I just need to make a whole bunch!
Very, very cute! I made something similar a few years ago for my knitting needles. Very handy.
This is great! A thought–maybe add some iron-on clear vinyl to the inside where the brushes will rest to help keep the inside clean to minimize the amount of washings. Great work! :o)
Oooh, this would make a great teacher gift. I will have to remember!
Love this! A perfect handmade gift I think any girl would enjoy. And may just need to make one for myself too:)
thanks for a great tutorial! Cannot wait to try this (:
This is great! On my to-sew list!! :)
I love that stitch! My sewing machine is pretty basic and old so I don’t have that ability. I’m pretty new to the sewing world but wow, I might have to look into a new one. What a great brush holder. Gorgeous fabric choice :)
You’re not kidding that this is amazing! I just sit here and drool through posts like this (while my eyes glazed over the directions, lol) because the one thing I do not do is sew! Gorgeous…your daughter will love it.
I love it! I got an idea from you to do this for my picnic utensils! Thanks so much.
Hi Kate, that is just adorable. How do you find the time to redecorate, paint, sew and have a family? Amazing.
I love this! Definitely going to try this out! :-)
The colors of this are just so pretty. Great fabric choices, in my opinion. I’ve been making something similar to this for my husband’s sketching pencils, and tossing around the idea of doing one (or several) for my pencils, my paintbrushes, my makeup brushes… lol. This one is much prettier than the one I’m throwing together. ;)
I agree where do you find the time! You are a super woman! I am going to start saving my pennies for a sewing machine!
The brushes are what any girl would want, but the added gift is “Made by Mom”
which I am sure she appreciated even more since she is away from you now.’
Very thoughtful, thanks from sharing.
That is sooooooo cute!! You are so talented. Can you make one foe me?? Ha!
Terriic tutorial. Many thanks for sharing :)
I love it what a lovely idea. Great tutorial. Thanks for sharing.
This is so stinkin’ cute. I am in awe of your sewing talents. You make it all look and sound so easy and I’d have those cute straps sewn, one to my tee shirt, the other to my finger. In other words, I can’t sew a lick.
Your girl is gonna love this.
I am certain that she is in love with her gift…Not only is she getting wonderful brushes, but a beautiful holder made from the heart…Such a wonderful gift from the heart. Those are the best!
Adorable! What a lovely idea!
What a nice mommy you are–big splurge! And a very thoughtful gift to boot. Love it!
We are off to stay with some friends this weekend, and I needed to find a hostess gift. This will be totally perfect!
I bet your daughter will love hers. Something handmade with love when you are away from home on your birthday is the best kind of gift. I am sure she will cherish it for years to come.
PS Following on from Trinity’s idea to add vinyl that can be wiped clean, I am going to line my with ripstop nylon. It’s waterproof and comes in great colors.
Also someone told me the other day that you can put your make-up brushes in the dishwasher to wash them. Has anyone tried this? I am a bit nervous to give it a go …
Kate,
You do beautiful work! I was so surprised to know you have a daughter in college, since you don’t look old enough!
Your daughter should be totally in love with her gift and better yet, that YOU made it!
Cheers!,
Barbara
this is a fantastic idea! thank you for sharing!
Kate,
That is absolutely darling. I just got my sewing machine repaired/serviced and now I have the perfect project to sew. Thank you.
Karen
Love it Kate!!! I may be able to actually do this one…haha!! Fabulous job!
Very nice Kate!!
So pretty! I just made a similar brush roll, but I used oilcloth for the liner so that I could wipe the inside clean of any stray makeup coming off the brushes.
Hermoso!! Gracias Mil por la explicación!!!!
I made this very same thing in bright colors for my grandchildren for their gel pens and pencil crayons! They love it! ! ! !
OMG…I love it…seem simple and looks awesome. I’ll definately try to make one for myself.
I luv the stitching you choose (#50!!) .. beautiful = fabric selection/design/end-result. Hmmm, I may need to dust my sewing machine :) Let me catch up first w/creating the clay flower u taught us, so for now … dust stays on the sewing machine :)
Oooh this is super cute. Just might have to start dragging out my sewing machine although i wonder if it will work.. its antique lol. Might have to invest in a new one ^_^
Ohhh-kay… At first I thought – cute, but I’m probably never going to get around to this realistically. Then you busted out that stitch-detail-move, and I was all – wh-what?! Well, now I HAVE to do this! :)
Oh this is a great DIY project.
THIS IS SO COOOL!!!!:)
That is the cutest! I’m using old jeans for part of the fabric and hope it turns out just as nice as yours =)
Just finished my Makeup brush holder. It’s so easy to make. Just follow the instructions.
This is absolutely brilliant!
I don’t even know how to sew in a straight line, but my mother-in-law is great at it. She may be teaching me how so that I can make this. I love it!
What a beautiful brush holder! I would rather have one of your holders than any I could buy! I wish I could sew! Maybe I have to find someone who can.
Whaoooo ! super cute… Merci ! ;) Thanks a lot, can’t wait to try one for my sister’s birthday !
Beautiful! I’m thinking this will make wonderful christmas gifts for my nieces and girlfriends. Thanks for the great tutorial.