I often like to rearrange the furniture, and while I’m at it, just throw some new paint on the walls. It’s a very serious yet incurable condition ~ fortunately, my hub has adjusted to these sudden whims I have.
A few months ago, I repainted the kids playroom a pale green color. It’s a combination of the leftover BM ‘Camouflage’ from the kitchen, mixed with some of the green leftover from these cottage chairs.
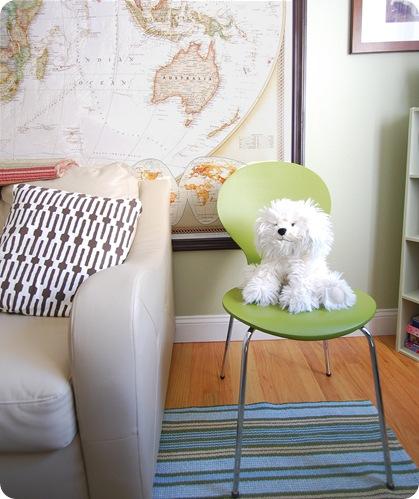
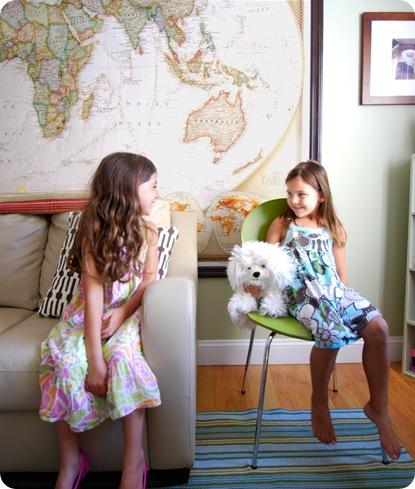
The other day I was at Tarjay and found these modern stacking green chairs for the kids’ play space ~ I just love the pop of fresh color they bring to this room. I’m also loving this Dash & Albert Caravan Stripe rug ~ it was meant to go upstairs in the boy’s room, but it’s just going to have to live here for a little while.
Then I remembered I forgot to write about the wood window cornice I built for the room several months ago ~ you can catch a glimpse of it in this article about painting laminate furniture.
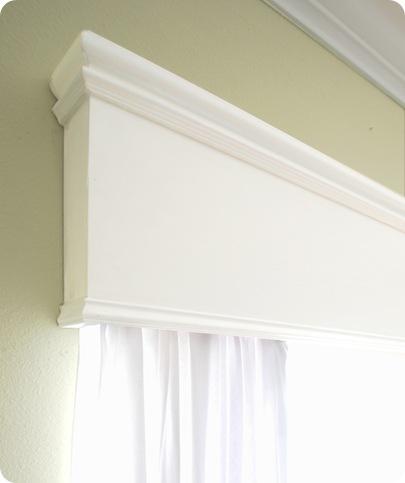
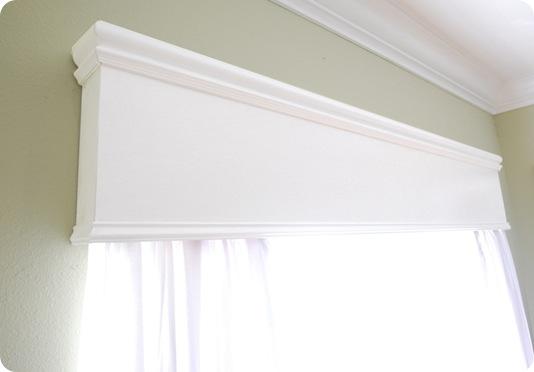
I wanted to add some architectural interest to the window beyond just window panels, and disguise the blinds that pull up underneath, so I built this solid wood cornice out of supplies found at Lowes.
How to Build a Wood Window Cornice:
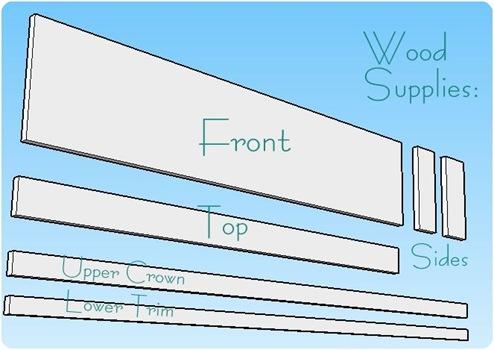
Supplies: 1/4 inch thick plywood cut to width and height of window; 1/2” thick wood top cut to length of front piece; 2 1” thick boards cut to height of front; crown for top and thinner molding for bottom trim; framing nails; wood glue; primer and paint color of choice;’L’ brackets.
Tools: Compound miter saw; hammer; clamps
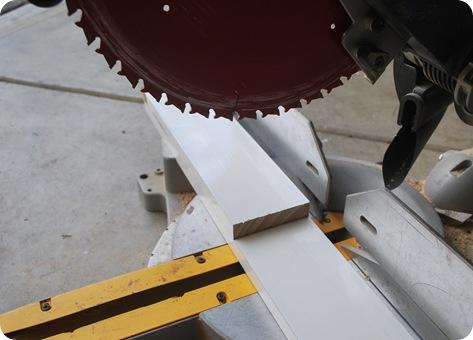
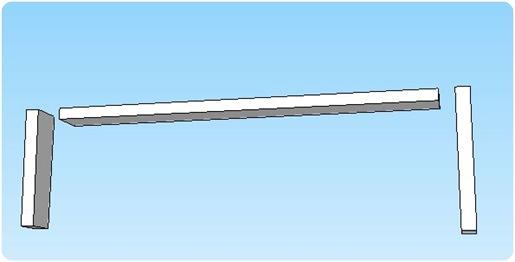
1: Prime your wood pieces, then cut the sides and top with a miter saw to form the frame of the cornice.
2: Nail your side pieces to the top piece with framing nails to form the frame.
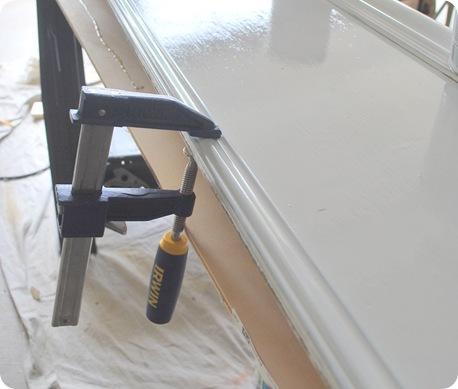
3. With more framing nails, attach the front piece to form the box. 4. Cut your crown and bottom trim with your miter saw to wrap around the cornice box; you can use wood glue and clamps to attach your trim ~ small brad nails also help to secure your crown and trim.
Two coats of paint later . . . a custom wood window cornice. Secure it to your wall studs with ‘L’ brackets.
Another bonus from a cornice is it gives you extra display space since it forms a little shelf just above your window ~ perfect display for all those sports trophies, critters, or collectibles.
My white canvas panels are simply stapled to the inside with a staple gun ~ no rod underneath.
New pops of color plus a new white wood cornice in this freshened space !
The National Geographic mural wall map comes in quite handy whenever something happens around the globe, like the World Cup. “Hey hun, where’s Uruguay?”
The real reason for the wall map is so that the kids learn their geography better than their parents.
Have you added any fresh color to your home lately ?
.




Love the colors on this space! So delightful and the map is a brilliant idea!
first, how did you ever just happen to mix up that gorgeous
shade of green? brilliant.
second, the nat geog map is perfect for a child to imagine
exotic places to travel. spectacular.
third, the bright green chairs and striped rug make the room
look like lots of fun. splendid.
you lost me on the cornice board. you made that????
Love the playroom! And, perfect timing…I was wanting to build some cornices for several windows we have to hide our wood blind header as well. Your instructions will be extremely helpful. We just recently repainted our kitchen, kept the same color walls as before but now have painted ceilings to match! I love them…can’t wait to paint all of our ceilings. Our daughter’s new room (big sis old room) will get a fresh coat of paint next week. I love how a little paint can make such a difference.
How is it attached to the wall?
Cute little rug!! Your cornice is beautiful. Love the simple lines and those white panels—very nice!!
So fresh and fun! The target chairs are a perfect addition to this room, love them.
I am working on giving my dining room a little makeover and really want to add some color somehow, Im a neutral girl when it comes to my living spaces. Our playroom is another story….
The cornice really does add a lot to the window and love the pops of color in the room!! Great job as always! Janell
i’ve loved this playroom for a loooong time now! and seeing it again…i love it more!! great job on the paint mix and the super cute cornice. :)
The cornice is great, simple and pretty. Your instructions are perfect too. I’d love to hear what your first projects with tools were and what you think are the best “beginner” projects. I read your post on the tools you love and thought it was great information. I’m starting to peek my nose into my husband’s tools but am a total novice.
Love the colour combo – so light and fresh!!
That is the prettiest room. I love the cornice you made. Very nice. And, I’m thinking a few of those chairs would be handy when we have folks over. We don’t have tons of seating.
I love this. A girl that can build! As a teenager I was obsessed with carpentry, but in my grown up life I feel a bit intimidated by it.
I adore that window cornice. My ceilings aren’t high enough for something like that unfortunately :-(
Love your play room.
Kristine
xx
Love it!
Can you give an idea on the ratio you used with the paint? How much of the Camouflage to the cottage-chair green?
Love this + book marking. It even looks like something I could handle myself.
I am SO making one of those! thanks for figuring out all the difficult how-tos for me. :)
I would never put those green chairs with that wall color. But it works beautifully. I need to learn to take more risks. I’m too predictable. Thanks for the motivation.
Wow, love those chairs and the rug! I’d like to try one of those cornices too!
The rug works just perfect with those chairs, they’re meant for each other! The color palette for the playroom is just adorable: fresh, modern and serene! Your girl is just a sweetie!
love the fresh colour and the details here and there. you’ve also managed to unclutter the playroom a lot from the before look. not only does pregnancy make you do crazy things, so does the onset of meno..ahem..(can’t bring myself to say it). Most certainly I have added colour to my toilet..take a look (pics in latest post) but I warn you, brace yourself :)
I love your playroom. I have a large world map like yours for the same reason. Although it’s been used more for history lesson for my kids cause i find my dad staring at it whenever he visists and then telling my kids where he’s been and the “history of his life”.
I’ve been banned from painting because of my shoulder and back injuries – I miss painting!
Love the cornice! I really want to make one and this is the perfect little tutorial! :)
I suffer from the same paint-related condition. Our husbands should start a therapy group.
I have that same National Geographic map! I mounted it on a huge piece of foam core, and we stick map pins in all the places we visit. I spent forever looking for a map with a good color scheme–I bet you did the same!
Gorgeous cornice! I love how you kept the wall color pretty neutral & allowed certain pops of color really liven up to space. :-)
I love the cornice board idea! Thanks for posting how to build it!
Michelle @ One Crafty Chick’s Creations
I love the cornice! I have this window seat in my nursery and I think I might have to copy your idea! The map is a really nice idea too. Kids just love to look at the world and your right, it really does help them with their geography. Thanks for sharing!
Those green chairs are too cute! Thanks for the tutorial!
XO
Lenore
I absolutely love the cornice. Is there any way that you can write a step by step tutorial of how you attached it to the wall. That is the only issue that I am having problems with because I can’t seem to understand how to get behind the cornice and screw in the cornice. I am confused. Please help because I love this idea.
The room is so cute. I love the color. I might add a pop of this color to my son’s new toddler room.
Love the map on the wall! Where did you find such a larg map? Room looks great. I’m a Tarjay girl too.
Great job! Did you make the cornice the exact width of the windows? Or can you make it a little wider (if you want your panels to hang beyond the windows)?
P.S. You should update your “My Spaces” photo link with these new playroom ones!
Your cornice looks great, I used to use the staple the panel trick all the time !
Love the use of the map :)
I love the cornice. Thanks for your excellent tutorial, I now feel like I can do this.
Beautiful job! You are quite the handywoman!
Love the room! The wooden cornice is great and it looks pretty easy. You’ve done such a beautiful job with the room.
Love the new color!! I’m really into the greens/blues right now and love the color combos you did. I have a green playroom as well and may have to go straight to Tarjay and get those chairs!!
I thought the dog was real at first!
Wow! It looks fabulous! Just found your blog and I’m now a new follower!
The cornice is such a neat idea! and I like the map.
I love the chairs. I saw them at Target also and was thinking about getting them for extra seating outside….thanks to this posting, I just may have to go get them.
We’ve had a NG map in our family room since the boys were little and like you use it all the time (yes, also during the World Cup). Even though my youngest is off to college in September, that map is going to stay up. Love the color scheme of yours.
Amazing great job! Seriously HOW does one become so handy? Do you ever feel like you will run out of home improvement projects, because if you do my house is only a four hour drive away :)
Oh I LOVE this! I think it would look fabulous in either the nursery or my master bedroom. Such a wonderful idea — and it turned out beautifully. Thanks for even more inspiration! :)
I love the Map in the playroom. I’ve been trying to find an extra large wall map like that and haven’t been successful. Where did you find it?
I love how this room came together. I want to curl up in a cozy chair there and read for hours!
That seriously looks like it is out of a magazine. I love that map in the playroom. So nice and bright love it!
I love your room. It is a playroom, but looks classy…the map is a brilliant idea. I wish I’d done that when my kids were young. As for adding color to my home…check out the post before my current one. I got a new chair…with daisies all over it!
You are really amazing. I’m so happy I found your blog. (My kitchen is the same color and everyone comments on it when the visit my house the first time.) Thanks for sharing your good taste and skilz!
Julie
It looks awesome! I wish we had a space that was strictly dedicated to toys…and it looks that nice!
CUTE! Those chairs look as though they were made for that space!
This could not be more timely! I just received two white window panels from my neighbor who was getting rid of them. I want to frame my master bedroom window and wasn’t sure what kind of cornice to add. This is perfect! Thanks for sharing.
Superb! The table legs look incredible. Great choices of colours to take you past the “play” stage too.
Always so classy.
Your play room seriously looks like it came out of a magazine! I love it. I also love that Dash & Albert rug. Wonder where I could put that…
I am thinking about making a smaller version of this for my office as I want something simple and your post is a great inspiration. Can you tell me where you installed the L brackets and how did you screw them to the wall…just thinking how I would get my hand up in there.
I was wondering how you painted around the railing surrounding the map. Did you just tape it off? Curious because I’m itching to paint in the play room and we have a similar piece on the wall that would be impossible to move without ruining it.
Thanks!