Sneak Peek of Final Product:

There are many ways to cover a corkboard with fabric – this I have done, but I was curious about making a fabric covered magnetic board, so I started poking around online. In doing my research, I saw that there were not a lot of fabric covered magnetic boards out there, but I did find some where the crafty creator is actually cutting steel for inside of a frame. Perhaps I am lazy, or just a bit chicken when it comes to cutting metal, but I just wanted to cover a magnetic board that I found at the local office supply store.
Supplies:
- 18” x 24” magnetic dry erase board from office supply store
- Heavy duty nickel sized magnets from hardware store (not from office supply, those are too weak)
- 5/8 yard of cotton fabric of choice (the thinner the better, but not transparent)
- Decorative brads (or shells, or glass rocks, or whatever you choose to glue to your magnets.)
- Decorative ribbon for “frame” and for optional hanging.
- Hot glue gun

Start by ironing your cotton fabric to remove any creases. Then lay your magnetic board on top of the fabric.

Begin gluing the fabric to the top of the magnetic board. (Note: This is easier to do if your fabric has some sort of pattern or stripe that you can follow to align the fabric as you glue.) Then glue the bottom, and then glue the sides. Go slowly, because you don’t want any puckering and you want your fabric pattern to be straight.

My magnetic board came with tiny brackets for hanging on the wall, so I cut into the fabric where I wanted the bracket (16” apart is the width of most wall studs). Then I glued around the bracket to solidify the fabric edging, and to secure the bracket in place.


While your glue on the board dries, take your magnets and hot glue the brads on top of the magnets. [Note: these magnets are powerful, and dangerous around small children, so I would not do this project around, or for, anyone under the age of 5].


Allow your new magnets to dry, and turn back to the ribbon “frame” on your magnetic board. Lay out your ribbon, and glue it slowly, while you trim up the corners. Apply glue underneath all of the ribbon and let dry.


Optional: If you do not want to use the brackets to hang your board, you can add a ribbon trim, like pictured below. Make sure you use a lot of glue to secure the bow in place. [Pretend the glue is collagen, and the bow is Meg Ryan’s lips and pump away ! Sorry Meg, I still love ya.]

So here’s how it looks when it’s complete. Total time is about 90 minutes.

Idea Gallery:
Gal’s Office: Do a larger version of this with a dramatic patterned fabric and elegant ribbon, and use antique buttons or scrapbook “jewels” for the magnets.
Guy’s Office: Cover the board in slate gray, and make magnets out of polished rocks. Or would he prefer beer bottle caps? :-)
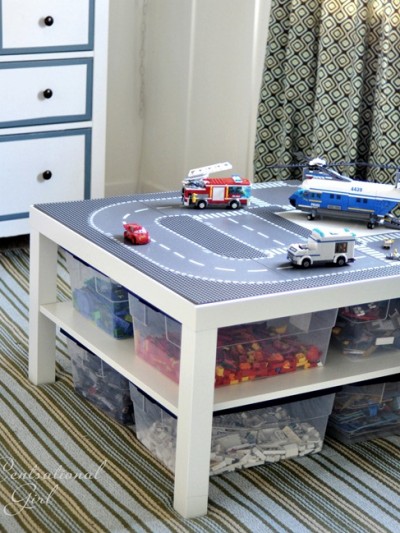
Boy’s Room: For a pirate theme, find a fabric with a map pattern, and make magnets with gold coins. If your boy loves cars, make a “racetrack” on the board with gray or black ribbon, and find miniature cars for his magnets. Zoom zoom.
Beach Style: Find a cotton linen fabric, then make magnets with shells or sea glass.
Kitchen: Find a fabric that compliments your kitchen, then make magnets out of miniature food items found at your local craft store, or from anything metallic that matches your hardware.
Mudroom/Home Organization Center: Anything goes.
If you do this project, send me your photos and I will post them !
Oh, and check out these different style handmade magnetic boards on Etsy. These are very chic. Also, look at Little Birdie Secrets version of a magnetic board. And also her separate post on fabric covered button magnets. Love them!

That is SO cute! I love your instructions: makes me want to hot glue something! Beautiful fabric combination! Lovely!
I love this! Great job. I make something similar with a corkboard and then a use push pins on it and hang all my jewelry on it!
This is so cute! It makes me want to cover my Ikea magnetic board with fabric and ribbon. Thanks for sharing.
Great project! Saving this for future reference. Thanks for sharing!
Love it! I also have made a couple of covered tack/jewelry boards!
http://annaoreilly.blogspot.com/2009/02/easy-diy-jewelry-board.html
http://annaoreilly.blogspot.com/2008/12/tims-home-office.html
I hope you enjoy CG!
Anna
Came across your board googling how to do this exact project. Thought of it and just needed to see someone else do it… so thanks!