A great question landed in my inbox regarding subway tile installation, it’s one I haven’t tackled here on the blog, so today’s a great day to do so!
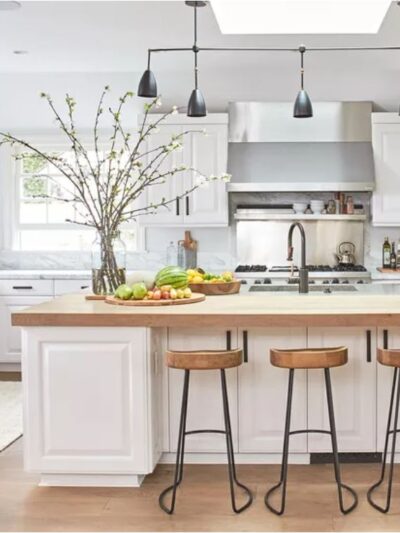
“Hi Kate, love your blog! I would love your opinion. I am using 3×6″ grey dove tile for a kitchen backsplash and now I’m confused about how to lay them! The picture shows a 1/3 offset, any help you have would be greatly appreciated! Many thanks!” ~ Franca

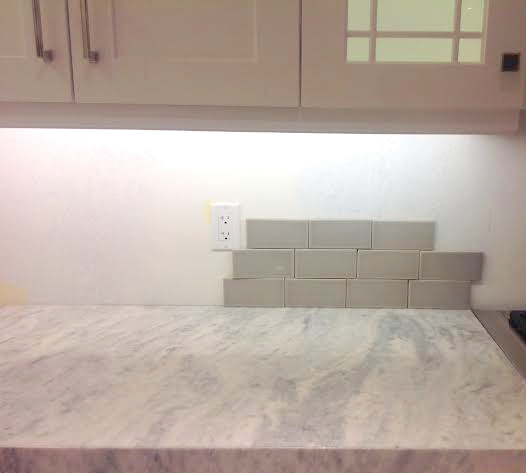
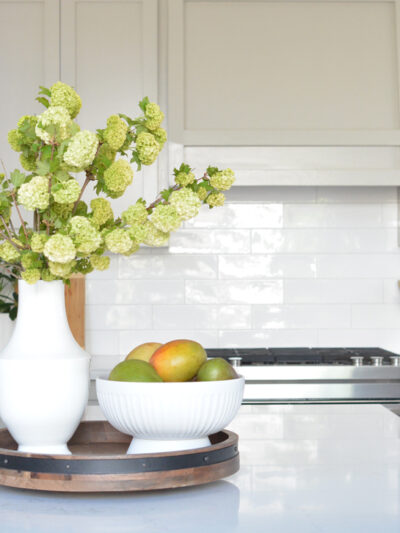
First of all Franca, your kitchen is gorgeous! I love all the classic choices, I can tell it’s going to be quite fabulous when complete!
Most subway tiles come in 2 x 4″ or 3 x 6″ sizes, but there are other sizes too. I have white brick pattern tile in my own kitchen and I chose it 8 years ago because it’s timeless and I’ll never tire of it. With wood flooring, a random pattern is desirable but with a backsplash symmetry is important, and there are a variety of patterns you can create with subway tile.
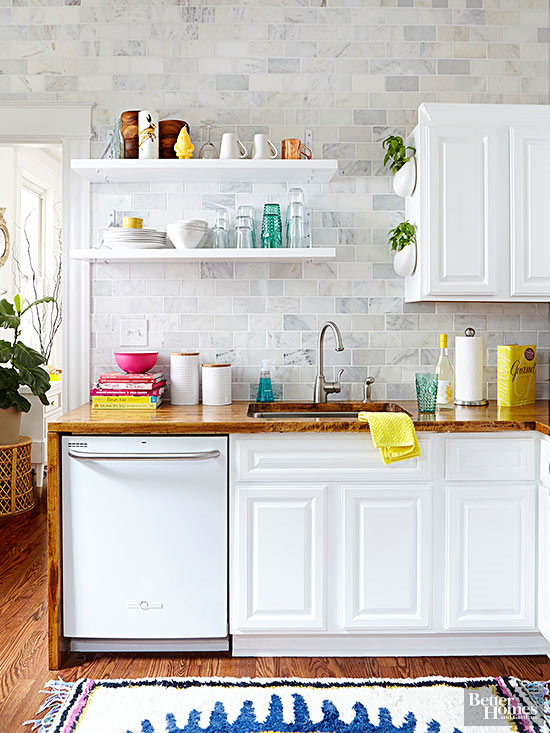
Classic 50% offset pattern for subway tile (sometimes referred to as “running bond”) looks like the images below, with every other tile’s edge matching up in a vertical line. You can choose no grout and skip the spacers, or with spacers match the grout to the tile or choose a different color grout for contrast, or instead of basic white opt for a marble or colored subway tile like you’ve chosen.
If you want to continue with the one third or 33% offset as indicated in your picture the movement will be different, it will look more like this:
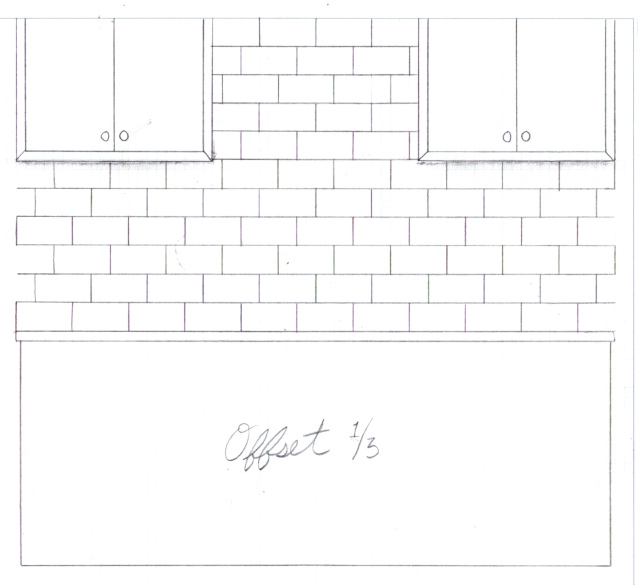 drawing courtesy of tile tramp
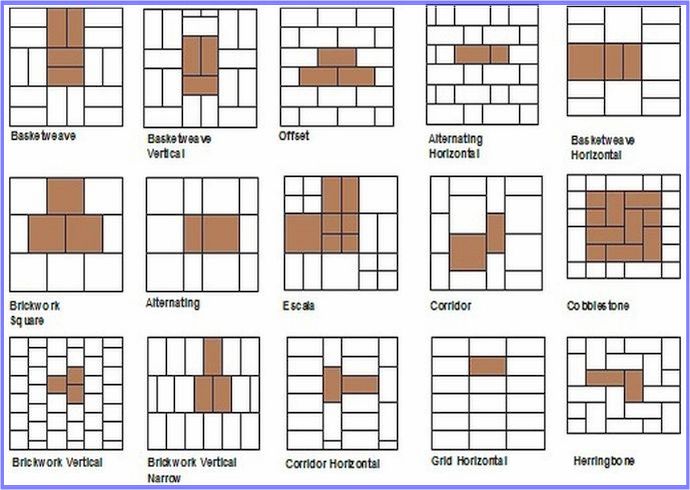
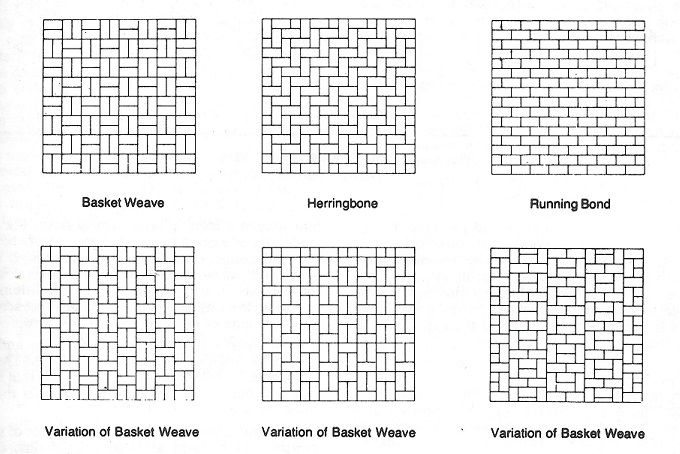
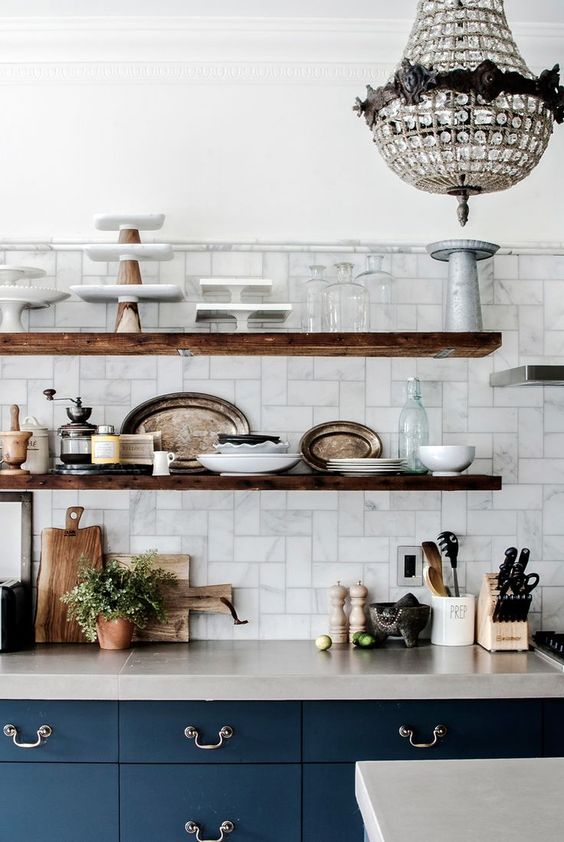
Rectangular subway tiles can be installed in many different ways, the symmetry makes them all great candidates for a backsplash, it’s just a matter of personal taste, whether you want to go with the a basic offset 50% or 33% offset or mix it up with something a bit different like the examples below.

Take a peek at Apartment Therapy’s roundup of examples of subway tile in real spaces in alternative patterns.
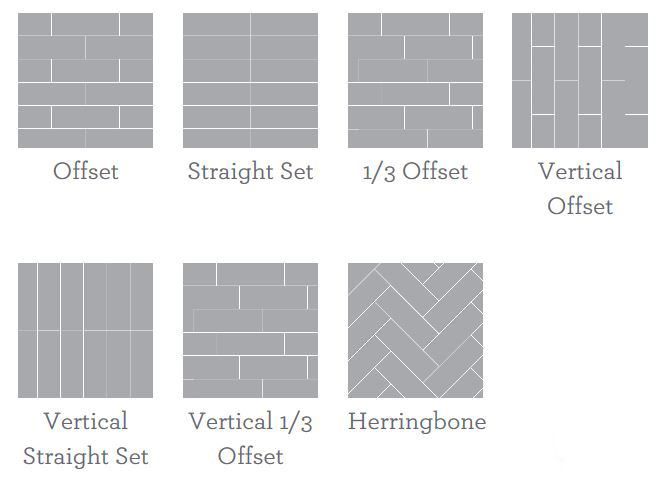
Elsie at A Beautiful Mess pulled together some tips and this graphic, visit their blog to view more inspiring images of these patterns in real spaces.

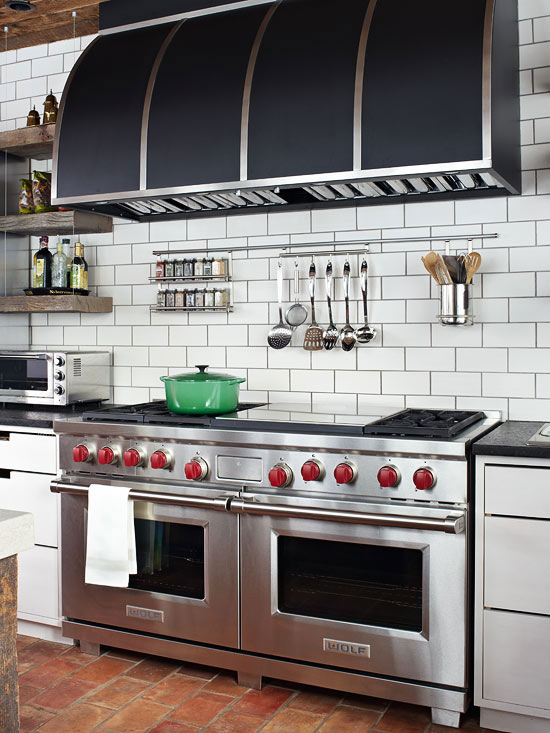
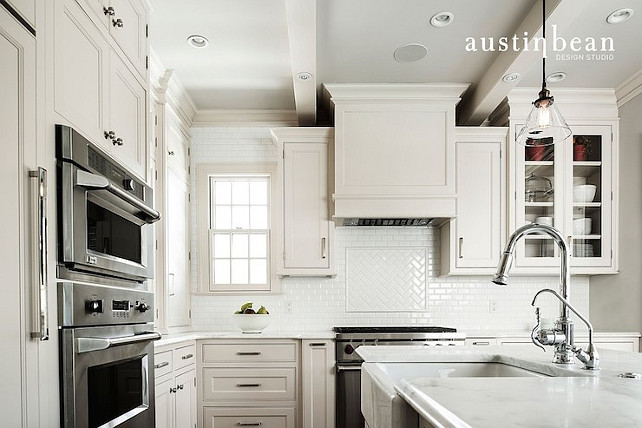
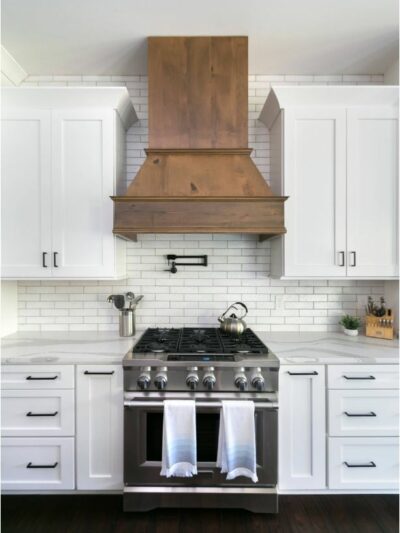
One traditional way of changing up the basic offset pattern is to use the same tile but in a different layout behind the range framed by pencil tiles (I did this in my own kitchen with white tile.)
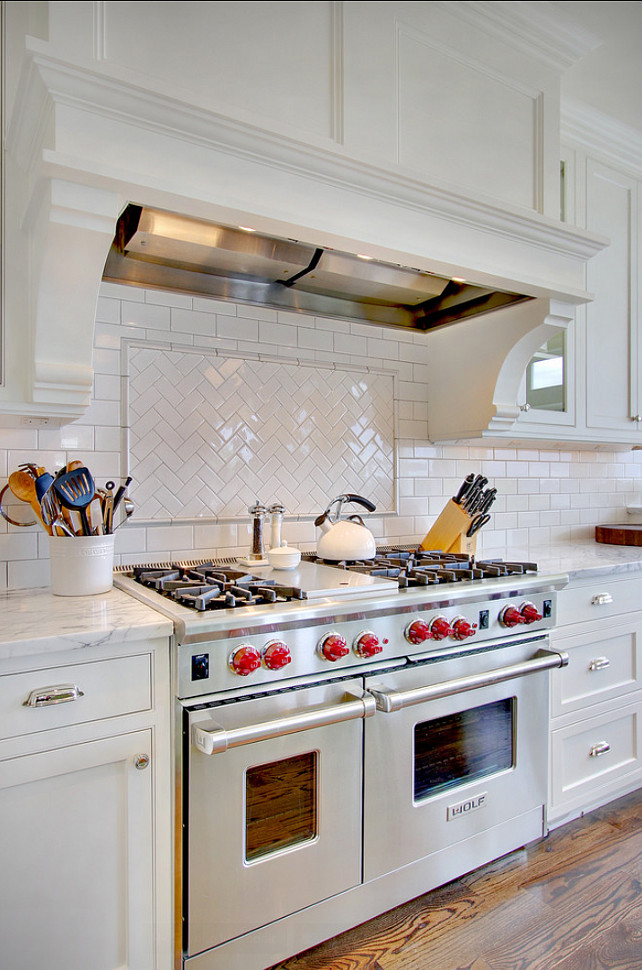
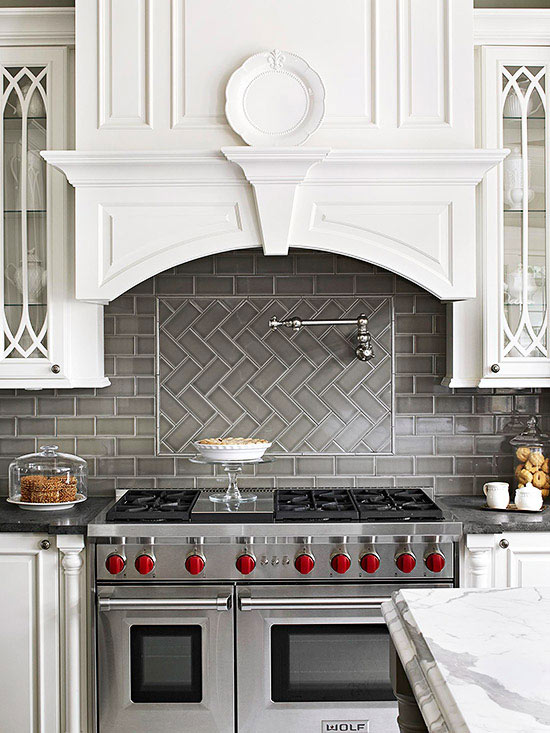
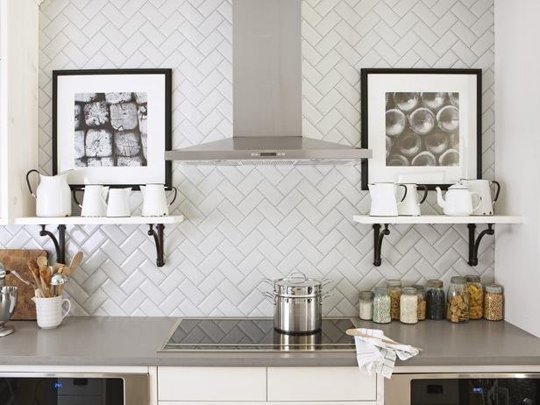
Here is personal favorite installation for subway tile, I’d love to do this in a bathroom or kitchen, it’s the straight (or 90 degree) herringbone pattern, classic with a twist!
So Franca, it’s up to you which way to you want to go. You really can’t go wrong as long as the install is done symmetrically in any of the patterns featured above.
Readers, chime in! What subway tile pattern have you used in your home? Feel free to link to images/posts showing your subway tile installations!
.


Beautiful! That is going to be one gorgeous kitchen, and I love all of the pattern examples. My two cents is that when the subway tiles are laid in anything but the running bond, they create more interest, and would look best with a solid countertop so that the backsplash can be the focal point. When the countertop is patterned stone or quartz like this kitchen, then the countertop should be what attracts the eye’s attention, and the backsplash would look better in the plain running bond…as a supporting actor!
I love all of these looks! We remodeled our kitchen over the summer and used subway tile. We used the typical offset pattern all around but used herringbone over the stove area. I could not love it more! It’s one of the best things we did in our kitchen! Here is the link to that post – http://calypsointhecountry.blogspot.com/2015/08/subway-tile.html
Shelley
SO beautiful Shelley, how lovely to see yet another example of the classic + herringbone mix!
Kate
The last one, herringbone, is my fav.
Great post kate thx, the last picture is the best.
Such a fabulous round-up, Kate! After many years without one, we are planning on installing a subway tile backsplash soon. I know I will refer back to your post again and again. But how will we decide? They all look fabulous. I would love to do the traditional pattern in most places and then perhaps a herringbone accent above the stove. Thanks again!
I must say that I absolutely love this kitchen – it looks fabulous already, I can only imagine how great it will look once completed.
I will be bookmarking this post, as I will be doing over my kitchen soon and have already decided on white subway tiles. I personally love the offset layout with the herringbone behind the range. It is a detail that adds something special to the kitchen. I’m not sure if it would work in my kitchen reno as I don’t have a flat range but you have given me food for thought.
Fabulous post, Kate – definitely one to save – I like the way you repeat the patterns in different formats because we all “see” differently. What I would do next if I were Franca would be to google “grey subway tile backsplash on HOUZZ” and then flip through the pics to see what spoke to me. Just did it myself and there are some very pretty kitchens that show up, some with similar countertops and some with similar layouts. It’s an extra trick I use a lot for inspiration. I hope Franca will send you the after pics – it’s already a beautiful kitchen..
Excellent suggestion Sandy!
Love this round up of information, Kate.
Franca, your kitchen is beautiful and I love the color of tile you went with.
I prefer 1/2 offset. It is the most classic & the 1/3 is too busy. I would definetly do herringbone with pencil tile above the range for releif.
This is a very helpful collection of all the different options. All the examples are so beautiful! I also think Franca’s kitchen is going to be SO pretty, regardless of the pattern she chooses. For what it’s worth, in our kitchen we chose to do one accent wall with all herringbone and then the rest of it in the traditional brick. http://www.whoseideawasittobuythishouse.com/diy-kitchen-renovation-before-and-after/
Anni what a beautiful solution, I love it!