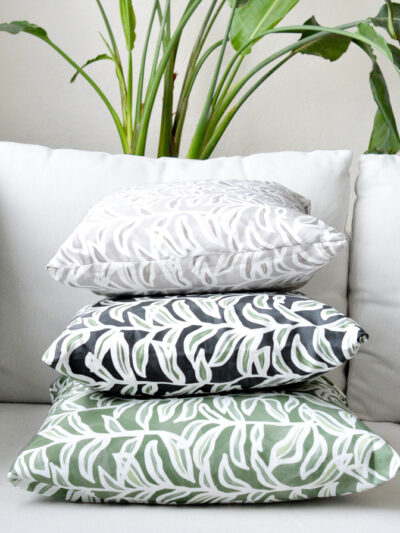
I thought about calling this the Ten Minute Pillow Cover, but realized it might take some a full fifteen minutes, or the pros just five. I sew a lot of pillow covers because when I spy a pretty piece of fabric and this can happen anywhere at anytime (a scarf, a curtain, or regular ol’ fabric I see at a store) my first instinct is “ooooh this would make a really fab pillow!”. Great fabrics for decorative pillows are everywhere if you keep your eyes open.
I also sew a few pillow covers each time I feature a new fabric, so even though a basic pillow cover tutorial is so 2012 I don’t care because this is the method I’ve adopted and I use time and again to sew the easiest pillow cover ever in the history of the world and today I’m sharing it with you.

In the past I would cut three separate pieces of fabric to make envelope pillow covers but then realized ‘duh’ you really only need one long piece to sew an envelope pillow cover. And even though zippered pillow covers aren’t that hard either, I like this method for speed because with a single 44” x 22” piece of fabric, I can stitch up a cover for a standard size 20” pillow insert in about ten minutes. Or at least that’s how long it takes me now that I’ve mastered the technique.
Away we go! Here’s what you need for a 20” envelope pillow cover: a piece of 44” x 22” fabric, a few ball head pins, scissors, a 20” pillow insert, and a trusty sewing machine. Can you sew a straight line? Well then, you can make a pillow cover. (Come to think of it, you could probably replicate with fusible web and skip the sewing.)
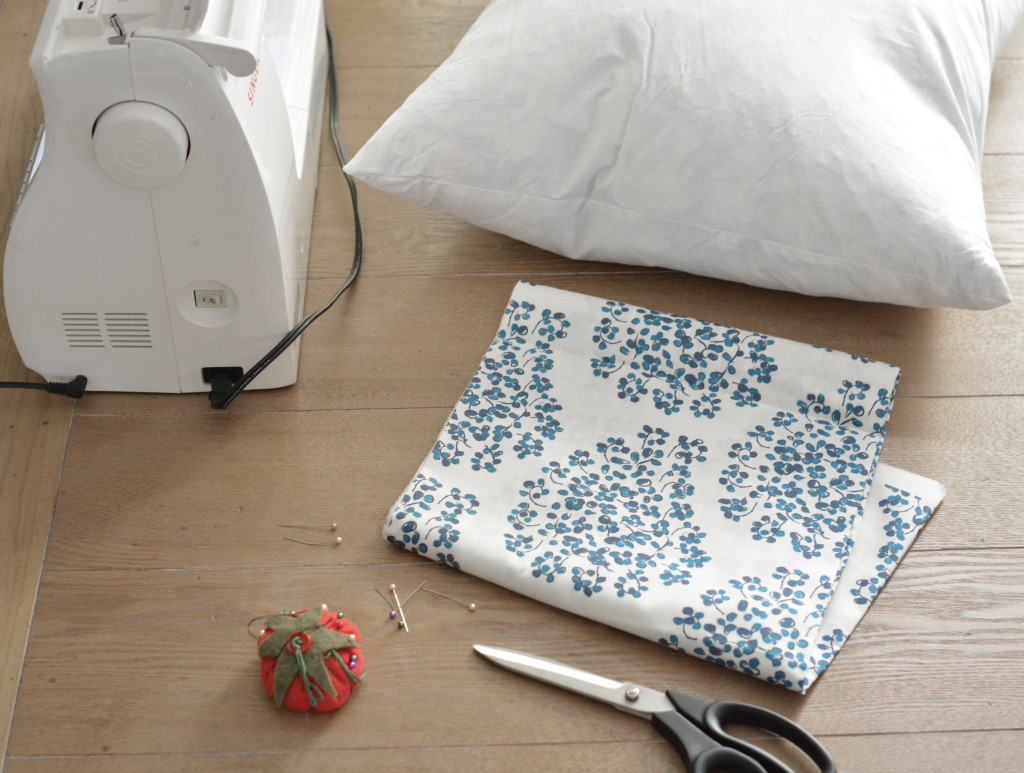
I have no fancy sewing table, all of this happens on my dining room table cause that’s how I roll. First (obvs) cut your fabric to the proper size. If you’re working with standard 44” inch wide cotton, cut it so that you have a piece that measures 44″ x 22” in height. (If your fabric is wider than 44″ that’s fine too, it gives you more overlap on the back side.)
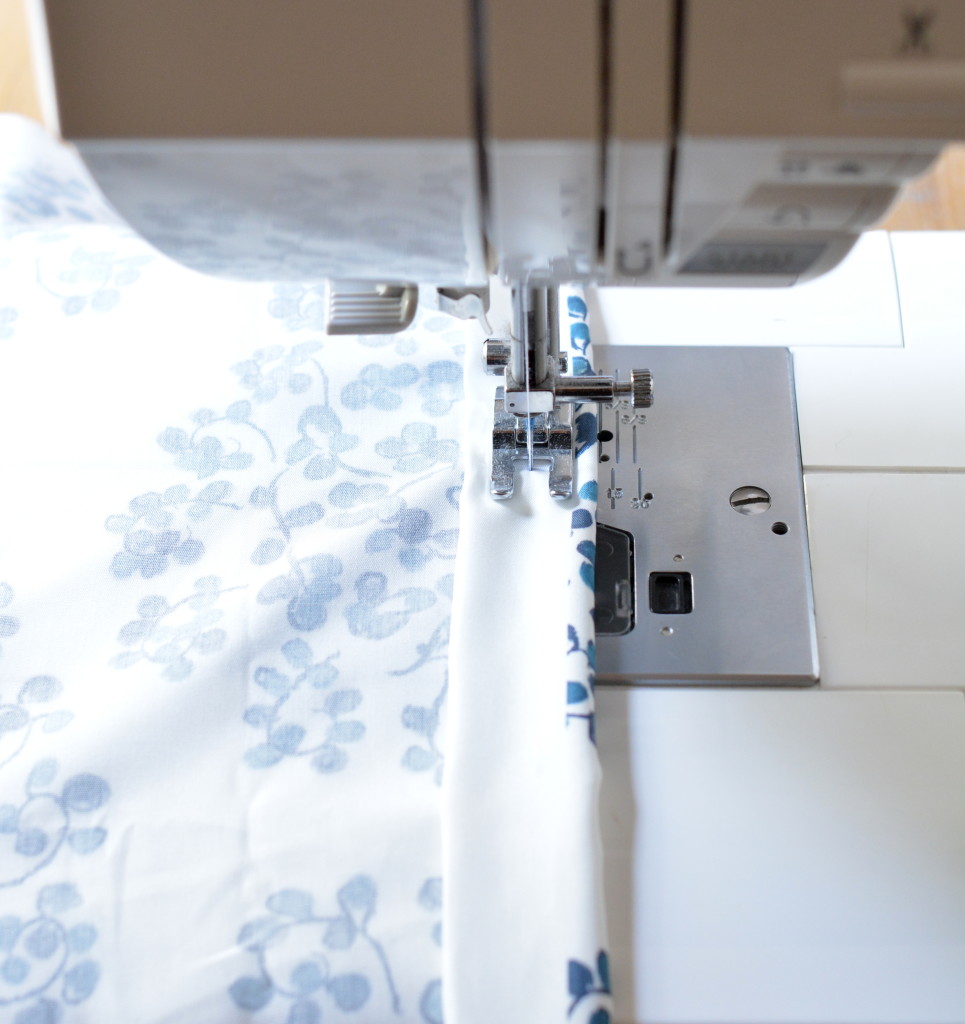
At a minimum, the A side is 22” the B width is 44”. The edges of the A side of fabric are the selvedge edge so you’ll want to hem them first.

I just roll the edge underneath then sew straight down, repeat for both sides.
Once you’ve hemmed those selvedge edges, turn the fabric upside down so you’re looking at the back and overlap the sides to form the envelope (the pattern should be on the inside), it looks like this diagram below. The A side now has hemmed edges, the B width is the 44″ minus 3/4 inch on each sides where you hemmed. If your pattern allows you to match the repeat you score bonus points.
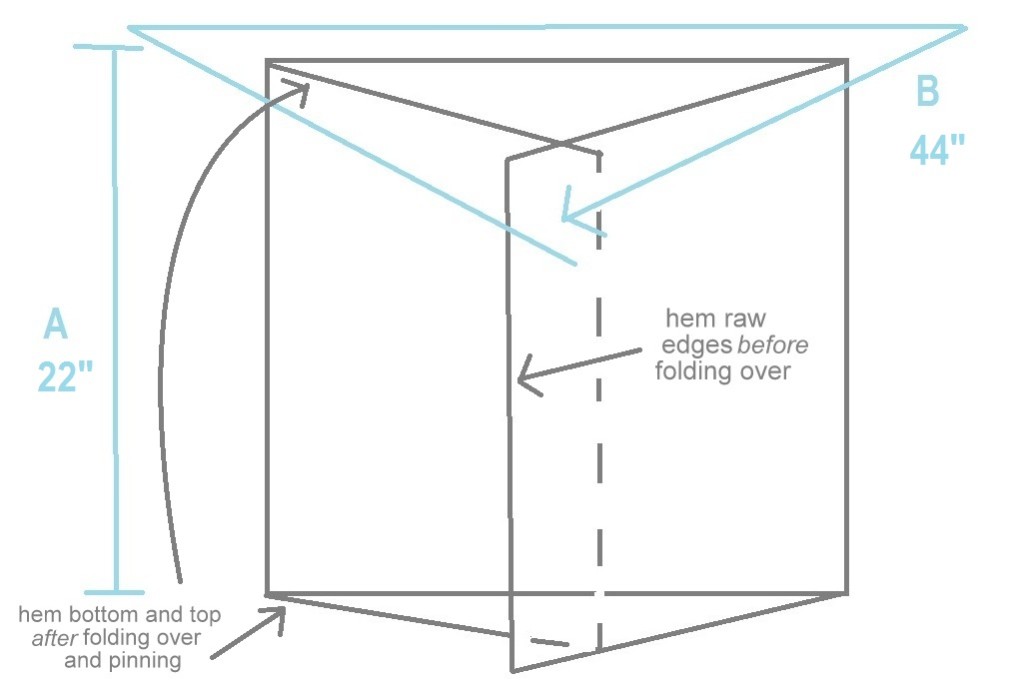

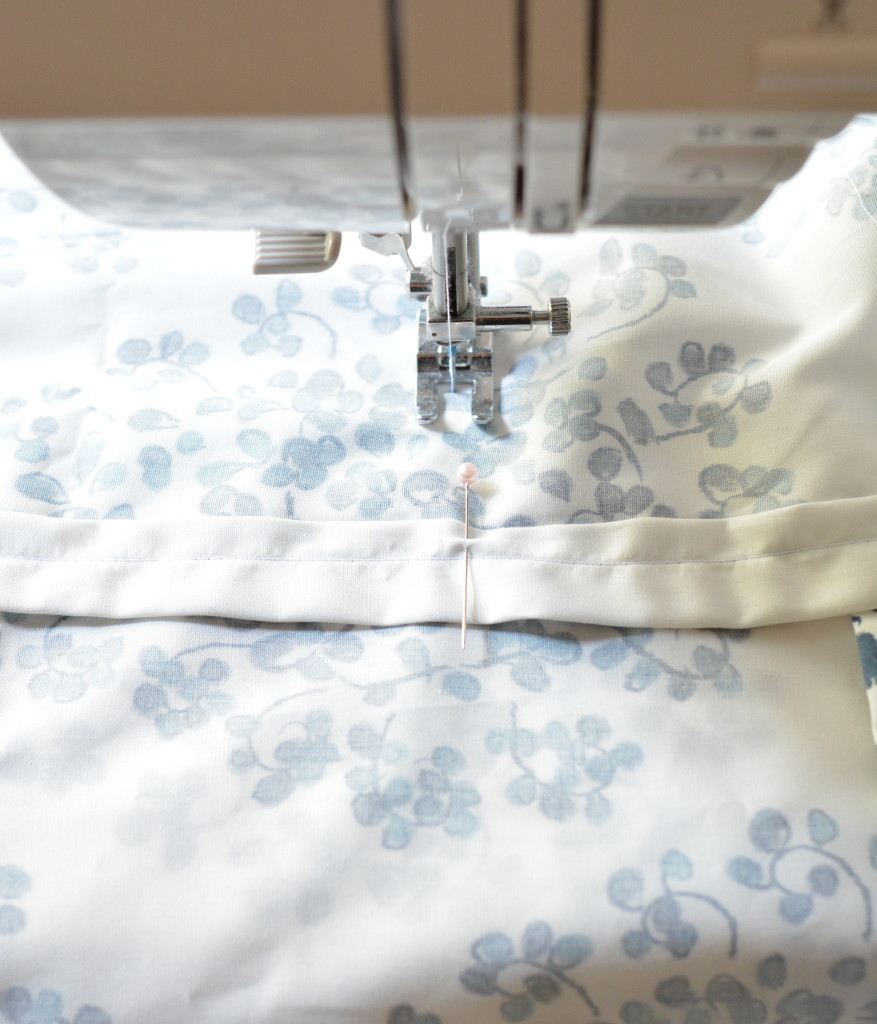
Lay the pillow insert on top to eyeball the width, then use the ball head pins to secure the fabric together and also to mark where you’ll sew that straight line to form the top and bottom seam.
Follow the pins with your sewing machine to sew across the top and bottom of the cover to form the seams of your pillow cover.
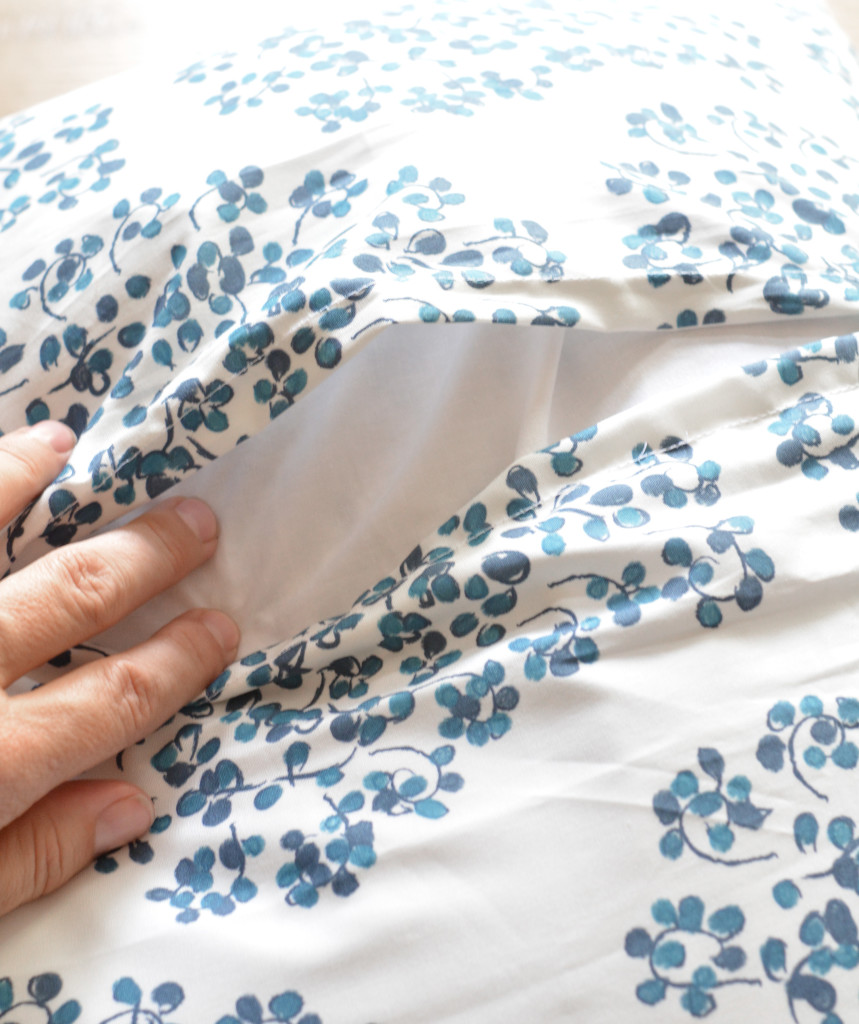
Once those two straight seams are complete on the top and bottom of your pillow cover trim any excess fabric and turn it right side out.

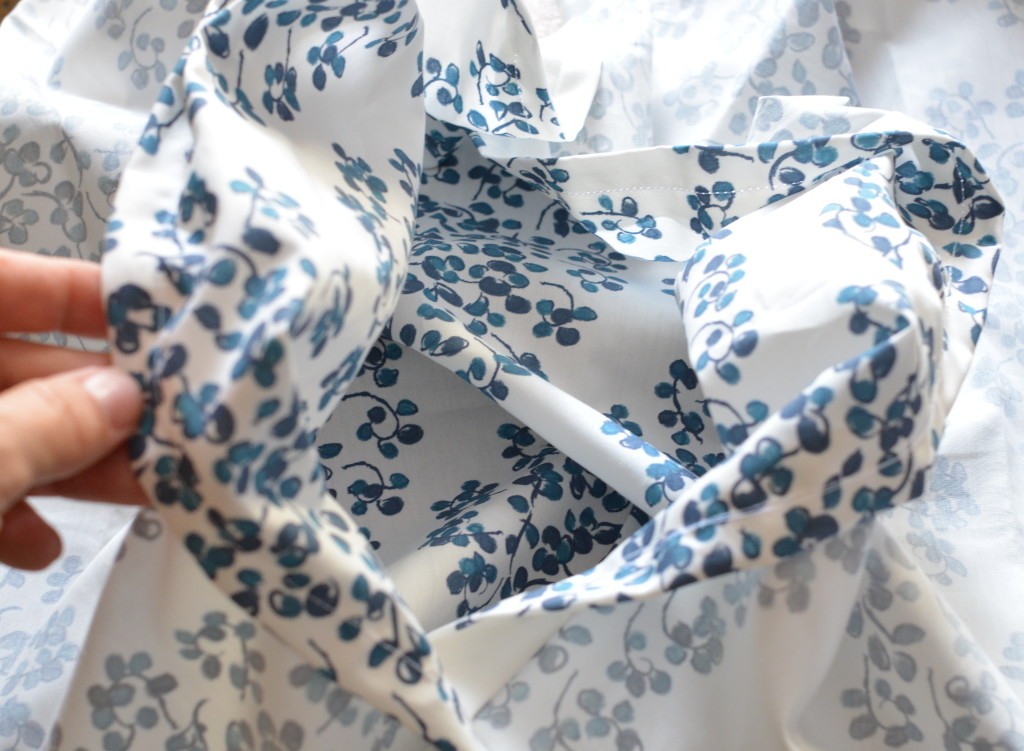
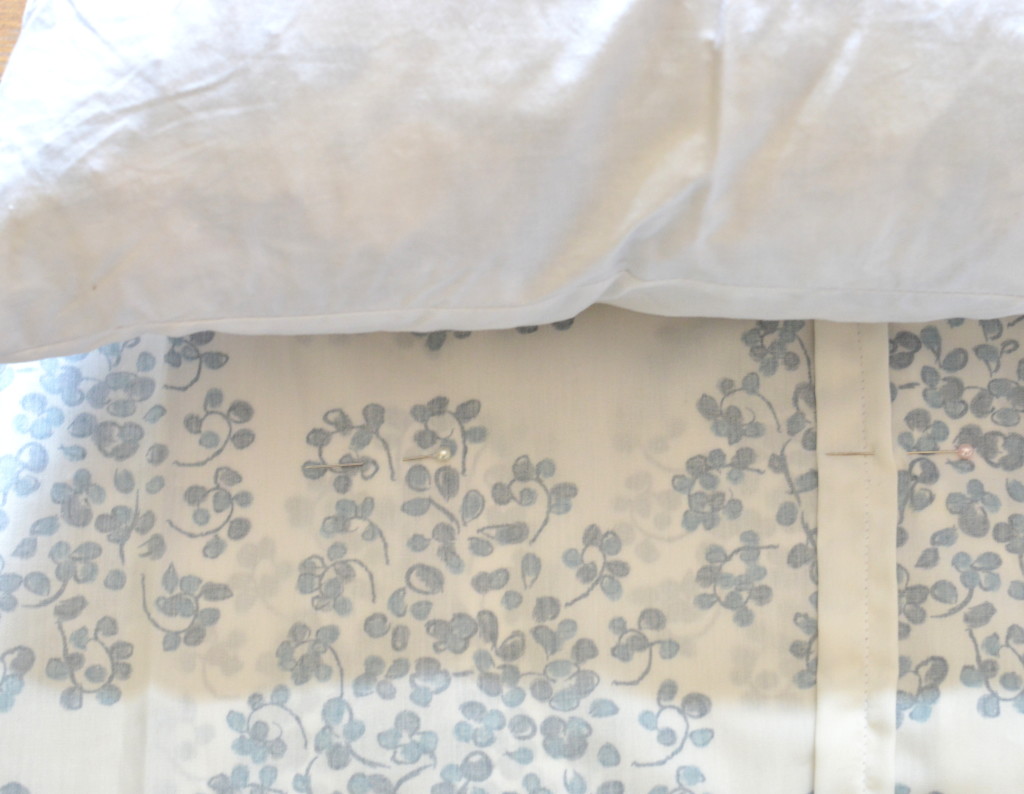
Insert your pillow inside the envelope and you’re done!
The nice thing about this method is you end up with an uninterrupted pattern that wraps around the pillow. There are no side seams so there’s no break in the print repeat and it always looks great from the side!
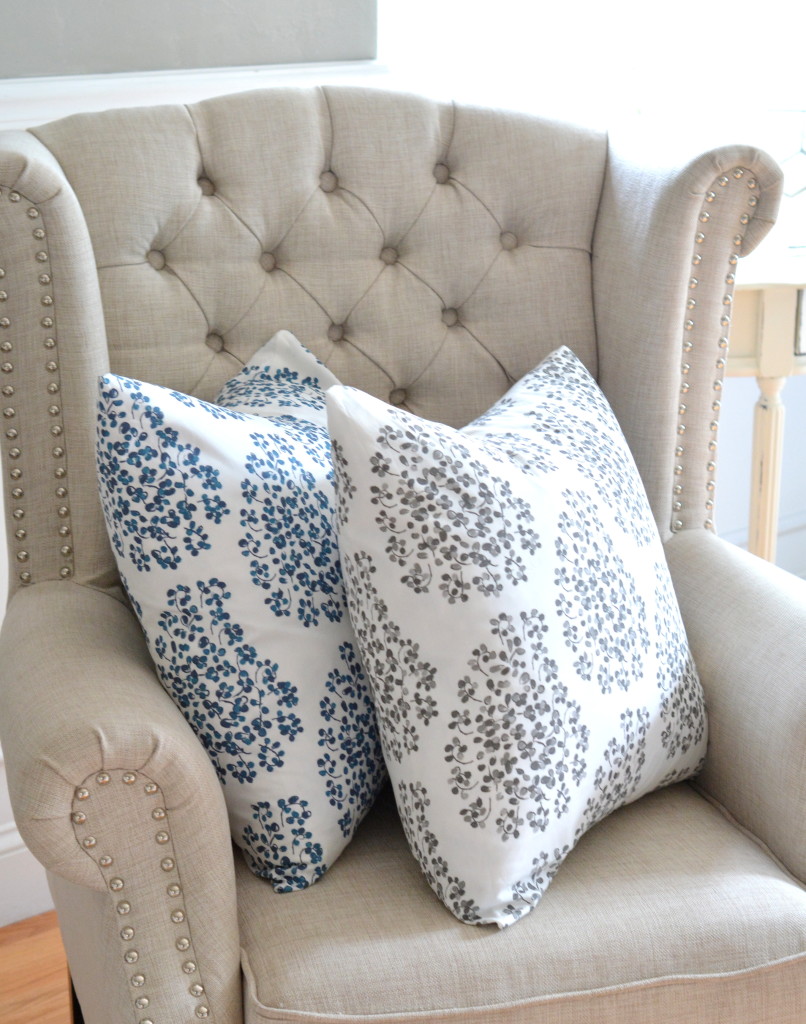

That’s it friends, my method for the simplest, easiest way to sew a pillow cover ever!
…


Ha! One long piece, -of course! I was a 3-piece girl too.
Sew simple. Sew easy. Sew pretty. So perfect.
This sounds so easy. However, I may be really obtuse, but if you are hemming the long 44″ side, folding the short 22″ sides in to overlap, pinning the now folded long side and sewing it, why do you have to hem that long side? Aren’t you sewing and trimming away the hem? What am I missing? Thanks.
I’m updating the diagram NC hope that will help!
I’m a little confused here. I understand that the A sides are selvedge and the B sides are raw, but shouldn’t you be hemming the A sides since the B edges are sewn together to form the pillowcase?
The A height of 22″ is the selvedge edge, the B width of 44″ overlaps inside out like and envelope, then you hem the top and bottom of the “envelope” after securing it with pins, I updated the diagram, hope that helps!
I completely understand the construction. The confusing sentence is the one that begins with “The edges of the B sides have raw edges…”. It would be less confusing if this sentence were to be omitted entirely.
I love that fabric. I’m also thinking it’s about time I got a sewing machine…
What type of pillows do you usually use? Do you prefer down pillows or do you buy forms at regular fabric stores.
Also how wide are the fabrics you have designed?
Hi Janet, my favorite inserts are down from West Elm, they use thicker fabric so the feathers don’t protrude through. The fabrics I designed come in different widths, the 44″ is the traditional width for basic cotton, the linen/cotton blends and some others are as wide as 54″.
I am a beginner sewer that has now made lotsa pillow covers. I’ve been doing it this way for a while, just out of pure laziness, ha! I go back and forth because sometimes I like the look of a seam, but with a pattern, you are right, this way works best!
Exactly Lisa!
Trying so hard to visualize this… So where do the seams end up if they are not on the sides??? Thanks!
On the top and bottom Christy! Where you hemmed the top and bottom of the envelope :)
This is awesome. I want to sew pillow covers so badly! Now I feel like I might be able to! I don’t have a sewing machine, but my MIL does-CUE Christmas projects!
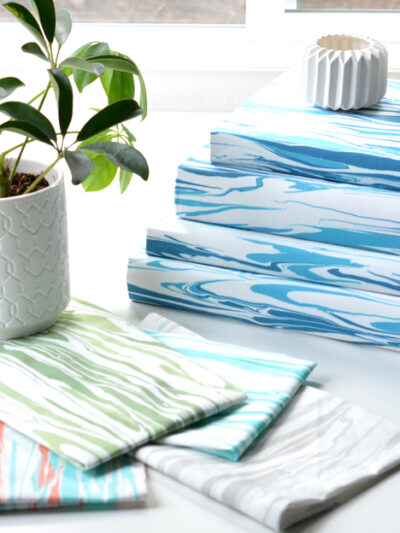
Gotta ask if the fabric above is the blue or the teal? Love the pattern! I love making my own pillows and also find no fabric is immune.
Wonderful tutorial, Kate! Ive been trying out different kinds of ways to make pillow covers lately and I can’t wait to try this method! Thanks for sharing and as always beautiful photos (even your process photos are gorgeous…ive tried but I’m too messy of a diy-er to get pretty process photos, lol)!:-)
Love that fabric – I’ve made a million pillow covers like this (maybe a little exaggeration) and it’s the best method I’ve found. So easy to do, easy to clean. And it takes so little fabric!
Great post, Kate! Love the pattern you’ve chosen. Those covers indeed seem to be easy to make, but we’ll see…:) I’ll try it one pillow first then replicate it adding a zipper. Hope I’ll be skillful enough :)
Great idea! My daughter is always asking for pillow covers. Easy peasy. Thanks. Oh, by the way, I think using the term “hem” instead of just “sew the top and bottom raw edges” may be what is confusing some of the readers. Thanks for posting.
ha thanks for noticing Judy, you’re right!