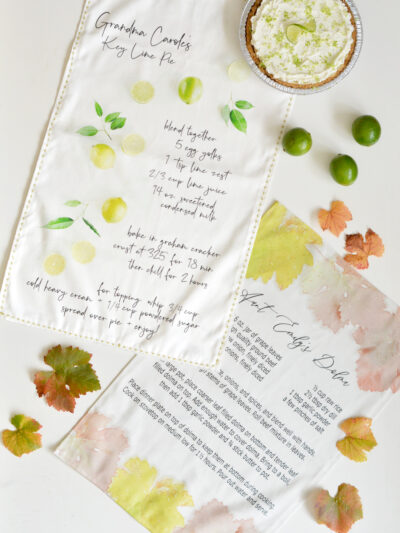
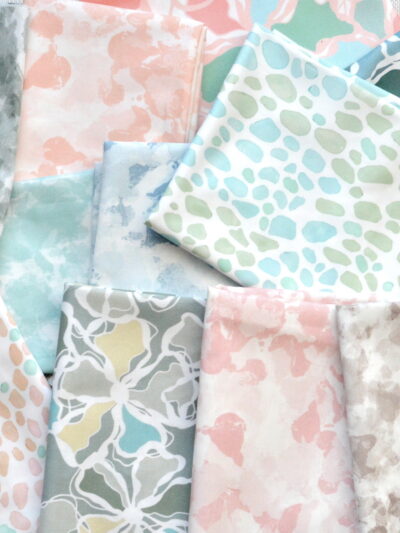
Greetings friends and happy April Fools Day, watch out for tricksters! Today I’m sharing another print from the collection I created for spring, this is a bold brushstrokes print called Wild & Free! There are three vibrant colorways and I had a lot of fun designing this one too. I even made a dress out of the navy and pink version I loved it so much!
This pattern is an expression of purposeful imperfection – the lovely thing I’ve discovered on this fabric design journey is I can create a repeat with imperfect details (like these brushstrokes) yet within it there is symmetry and rhythm so the imperfection continues on and on through the yardage and as it flows throughout it becomes something truly beautiful in itself and I just love that.

Remember that campaign desk I painted Kelly green years ago? I’ve still got it and won’t ever part with it, the desk is one of my favorite thrift store finds! It’s getting moved to my son’s room which will be the perfect next space for its history in our home.

I made these charming little storage buckets with one yard of the Wild & Free fabric in the Leaf colorway in heavy cotton twill. It’s best to use a heavier weight fabric like twill, canvas, or denim for this project.

To recreate, here’s what you’ll need: 1 yard of heavy cotton twill, denim, or canvas fabric in 58” width, 1 cheap flexible plastic binder, 8 ½” salad plate (for measurement), Sharpie pen, thread, scissors, flexible measuring tape, sewing machine.
Step One: Use a Sharpie to outline a salad plate on both sides of your cheap plastic binder then cut out the plastic circle. (I used plastic instead of cardboard so that the bins are washable.) Yes you’re sacrificing a perfectly good binder for a greater cause!

Here’s the diagram of the cuts of fabric on a 58” wide piece of twill, denim, or canvas fabric to make two buckets. Use the plastic cut out to guide cutting out the fabric circles allowing for ½” fabric beyond edge of circle for sewing.

Step Two: Sew the A and B circles together with the fabric pattern inside out, leaving a few inches open on one edge.


Step Three: Flip the fabric over to reveal the pattern, insert the plastic circle then sew the remaining few inches closed, tucking the raw edges of the fabric inside as you do. Be careful not to sew over the plastic with your needle! (I rolled the plastic over on the inside to avoid that situation.)


Using the flexible measuring tape helps you determine circumference of the completed fabric covered plastic base, in my case it worked out to be 28 ½” inches around, roughly the same as the length of the long piece that forms the sides of the bucket.

Step Four: Fold over your 29” piece of fabric inside out to form a rectangle that measures 29 x 13” and sew the D sides and only one of the E sides together. Leave the remaining E side open then flip it right side out so the fabric pattern is facing you, it looks like a long pillow cover.

Pressing the rectangle and especially the edges of the long E side with an iron helps in the next step when you attach the base of the bucket.

Step Five: This is the part where you need to go slow since you’re attaching a round piece of fabric to a square one. Sew the bottom C circle of fabric to the long piece that forms the sides and pause about ½” as you go around to rotate the fabric. (I ended up with a little extra of the circle fabric toward the back so I made mini pleats in the circle fabric in the last two inches so that the sides of the bucket fabric met up uniformly in the back.)


Step Six: Once the circle is fully attached to the bottom of the long piece, sew up the back side of the long rectangle to form the back of the bucket with the tightest seam possible.

Insert your fabric covered plastic base into the bottom, roll over the tops and there you have it, free standing fabric buckets for storing just about anything.

Perfect for kid collections of critters or anything else you can imagine.

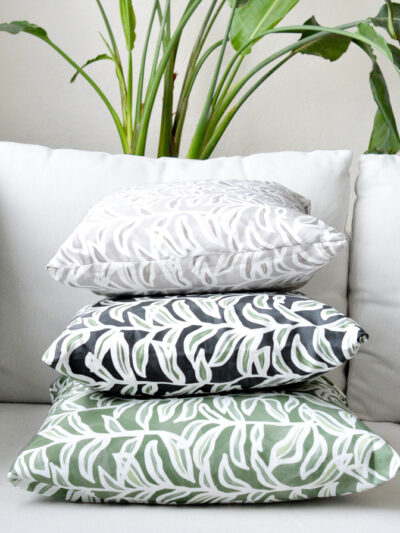
The Wild & Free pattern makes a fabulous accent pillow too!


The print featured today is available in my Kate Riley Spoonflower shop. Tomorrow I’ll share the Lookbook which includes many more unseen patterns and prints in the Spring collection! …
…


Another fantastic fabric! Love this collection so far :)
Great work
Lauren | LB Designs
xx
Hope you’re going to show us your dress!
Loving the fabric patterns for these pillows!!!
xo,
Seng
http://www.sengerson.com
i would like to use this fabric to decoupage my laundry room cabinet doors. is it too heavy? have you done this method before? the coral colors are sooo in!
Please show us the dress!
I would also like to see the dress. Love this fresh-looking fabric!
I’ll show the dress tomorrow in the Lookbook, and thanks so much Kimm!
xo
Brushtrokes is my favorite yet!
I love your new patterns so much Kate, especially this brushstroke. As you know this one caught my eye the other day when I saw your pretty dress in your new photo. I am tryng to teach myself how to sew. I wonder if I could tackle a dress like yours…. On another note, I adore your son’s painting of the little dog. Kids art is the best!
Love it! The Dollar Tree stores in my area usually carry flexible cutting boards that are the same material as the binder, maybe a little heavier even. I have gotten them in a 2 pack before, this could be a good option for anyone who doesn’t want to sacrifice/waste the rest of the binder parts!
I’m just loving these! How about a non sewing tutorial, like with heat and bond? As someone who is very new to sewing that would be awesome! I do love these fabrics you’ve designed! Very pretty.
The last several emails I have gotten from you does not display the picture images in the email. They are all blank. Thank you.
I love the cushions on the last photo – so vivid colours! +1 to Kristin: why not a non sewing tutorial? :) I’m not good in sewing… :)
These fabrics are GORGEOUS, Kate!!! I just spent about an hour on Spoonflower, drooling over the color and pattern combos, I think some may be your previous lines? I LOVE them all! Particularly like the coral and navy colorway of this painterly pattern shown in this post… nice job! is there anything you can’t do, LOL? I seriously think I may have finally found my drapery fabric from one of your patterns, after looking for about a year now!
Totally obsessed with these prints! I love how colorful they are. Reminds me of summer and all the fun that comes with it.
I receive your blog via email. Like Amy above, for the past few days, I receive text and boxes with a red “x” but no pictures. What are you doing different?
Something is glitching in the email subscriptions Cathy, I’m looking into it!
Kate
Love the fabric! And thank you for all of the instructions. This would be a fun project with my grand-daughter – to teach her how to sew and make something fun for herself!!
Omg, I’m in love with the patterns, they give such an artistic look to the whole room! And fabrics look high quality, too!
Lovely idea. You could use cardboard instead of destroying a binder and just remove before washing, or you could cover cardboard with fabric and use what’s left of the binder so you can still use it. Just a thought.Also, you can buy cheap, cheap binders at Thrift stores. so I am going to try this. Thank you so much for the idea.