Last week a crew from BH&G came to photograph both my kids’ rooms for an online story and I had the chance to work again with a stylist and professional photographer for a day and watch them create their magic in front of and behind the lens. Several shots included windows and I watched as the photographer took two different exposures of the window view in both dark and light settings.
For any one of you who photograph interiors with window scenes, you know that when you’ve got your camera set with a wide aperture and/or slow shutter speed to pull more light into the lens and brighten the room, often you end up with a window that is all white, or “blown out”, meaning the interior looks great but you cannot see the garden or scenery beyond, or any of the architecture of the window.
You can minimize this by waiting until the absolute perfect time of day when there is no direct sunlight coming through the window but that requires excellent timing, and there is an alternative. The photographer showed me this simple way he eliminates the problem by taking two different exposures and combining them with a Layer Mask.
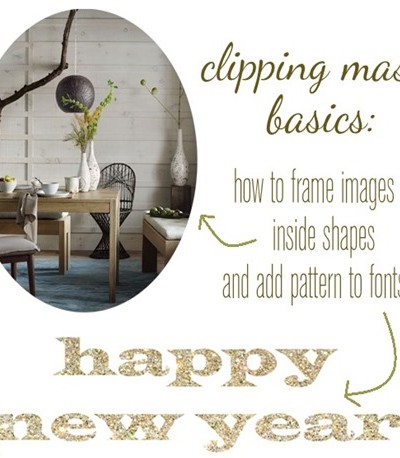
Here’s an example of how it works using Pixlr – that free online photo editing software I’ve mentioned before with same tools as Photoshop. (If you have Photoshop or PE, the technique uses the same tools and similar steps.) Here is the picture of our dining room table with plenty of light coming into the lens to show the details of the table and chair.

The problem? You can barely see the detail of the doors or that there is a garden beyond because the French doors are blown out from the light entering through them. Quicken the shutter speed and the interior falls flat and the room gets dark but you can see the divided light panels of the door and the garden beyond.

In the real world, you can see both the room in bright natural light and the outside view, but the camera has limitations in these light conditions and can have difficulty capturing both, which is where clever photo editing comes in.

You can combine the two and reveal the outside view while maintaining the brightness of the interior (seen above). Here’s how with a handy photo editing trick to combines the two exposures in a few simple steps.
This only works if you are working with images taken with a camera on a tripod, one that captures the interior the way you want, and one that captures the exterior scene (which will be a much darker exposure of the room) and they need to be in the exact same position. Open both the dark and light image in Pixlr (or Photoshop Elements).

Use the Copy and Paste tools (or keyboard shortcuts) to copy the light image and paste it on top of the darker one. {Edit>Copy then click on the darker image then Edit>Paste}


It will appear as if both images open in your editing software are the same but they are not. One is the original light image, the other is a combined layer of the dark and light together. At this point you can close the “light” image on the left (you don’t need it anymore) and simply work with the “dark under light” layered version on the right.
Make sure your light layer and dark layer are both unlocked in your Layers Window by double clicking on them to remove the lock icon (in Pixlr you’ll see a little check in a box to the right appear).

Select Layer 0 (the dark version under the light version) then select “add layer mask”. {Layer > Add Layer Mask}

You can do the very same thing by clicking on the little circle inside a box icon inside your Layers window (also in Photoshop). You’ll see the white box that represents the layer mask appear to the right.
![]()
In Pixlr, switch the layer order so the dark + layer mask version sits on top of the light.

(In Photoshop you add the mask to the lighter layer and you don’t need to switch them)
Now select the brush tool and set it at a low opacity. Make sure the brush color is set to black (it is by default when you open the program).

Use the brush tool to “paint” on top of the area you want the dark layer to come through the light one. Don’t worry that it looks green in Pixlr, that’s just to guide you. When you release the brush you can see that the underlying layer’s darker image is now coming through, adding more depth to the view.

Do you see where the initial brushstrokes now reveal the view beyond the window?

I also use the Polygonal Lasso tool to isolate a particular area and apply the brush at low opacity over the top.


You may need a few attempts but the the underlying darker layer will be revealed. Now instead of an image of a room with blown out window or doors like these…

You get an image with more depth because you can see a hint of the view beyond the window. It’s a subtle difference, but you can see how the combined exposures are more realistic since they show the window detail and a glimpse of the outdoors.

I thought it was a nifty trick and loved watching how photographers use it in the field to combine the outdoor view with an interior shot photographed at brighter settings.
The next time you are shooting an interior and the window gets blown out (it happens to me all the time), try this editing trick and you’ll end up with an image with greater depth. Pretty cool!
.

Oh my gosh, thank you so much for this tutorial! I have that problem all the time when it comes to taking pictures with windows in them, but you make this look so simple, so I’m definitely going to try it next time! I’m pinning this, thanks!
Wow, what a great tutorial! I have a huge problem with blown out windows and try to avoid taking photos of them at all costs but I’ll have to try this next time and see what happens :)
Such a great tutorial! I pinned it for future reference, thanks so much!
Thanks for the tutorial, this is amazing. I always wondered how they did it.
Realtors® who take their own pictures of their listing would love this tutorial.
I will try this too! Awesome and thanks for sharing.
Actually “Yellow Brick Home” just posted a similar tutorial about evening indoor photography this week which was a similar/same concept.
Thanks for an awesome tutorial. I’ve heard people refer to this technique before but always assumed it was way out of my abilities. You’ve summarized it so well – I actually think I can do this! :)
This great, Kate. I have definitely had this problem and have become a pretty frequent user of pixlr thanks to you. Now if you could just do a tutorial on that lasso tool. I have the hardest time with it and wonder what I am missing. Thanks so much for sharing all of your great ideas!
Wow, thanks for sharing this great tip! My windows always look blown out!
Awesome. I love PIXLR but never used that tool. Thanks for sharing the tips and congrats on working with BHG! :-)
Julie
Wonderful tip. Very generous of you to share it, thank you!
Thanks so much for this, Kate! I can’t wait to try it.
Wow, yep definitely cool! I’m going to have to come back to this one and try it someday.
Thanks!
Sarah
This is awesome! The photographer who took our photo for This Old House said he would do the same thing with a photo he took of us sitting on a window bench. I didn’t know how he did it – now I do!
Thank you for sharing this, I definitely want to try this out!
That is such a neat trick!! Thank you so much for sharing step by step with visuals!! Great tutorial!! Pinning now!!
Thanks for the tips! I recently purchased a Canon EOS 60D and I have been playing with it. Still so much to learn! Thanks for sharing :) Happy Thursday!
Thanks Kate! ALWAYS a problem that I never knew how to fix. My editing skills aren’t great so I’m a die-hard picmonkey user (no photoshop) but I would like to play around with this!
Awesome tutorial. Now all I need to do is get myself a tripod!
This is such great information, sometimes truth be told I like the blown out look when I like to focus on something on the inside but I’m for sure going to try this the next time I take photos of my interiors!!
I agree Laurie, sometimes I like the blown out look too! I also like that the technique can be done in gradual stages, you can tweak it just a little or do it more dramatically like I did for illustration, just changing the opacity or how many times you use the brush lets you adjust as you please.
Super helpful post! Those of you pinning: how do you ‘pin’ it for future reference?
There’s a little “Pin It” button at the bottom Lynette if you’d like to refer back to it in the future. THanks! :)
Wow! I would have never thought of this!
Thanks so much for the tips. I will have to try this method. Have a great weekend!
Wow! Such a great tip! Thanks for sharing Kate :) xo Kristin
Hello, This is awesome! Very helpful. I’m pinning it.
Bri lliant!
this is wonderful! thanks for sharing. such an easy solution.
I know this post is about photography but all I could see was that dining set…where did you get the table? Love it!
Ha, thanks Laura! I wrote about our trestle table here:
http://www.centsationalgirl.com/2012/10/trestle-table-arrival/
Kate
This is great! I was photographing our new kids’ bathroom the other day (link to post below) and was having this very problem! Fantastic tips!!! Thanks!
http://simplymodernhome.com/2013/04/11/our-kids-bath/
Great tip Kate – just what I have been trying to figure out. Thanks for sharing your knowledge and the step by step tute. ‘
This is so helpful! Thank you so much. I am on it…
Thank you so much for sharing and providing a fantastic step by step tutorial. I am pinning it right now. Very helpful.
Oh, wow!
What a difference that makes.
Thanks for the tip!
This is sort of what’s called an ‘HDR image’. You can use Photoshop’s built in HDR features to do this…or Photomatix is the other popular one (and might be free?).
Very cool…Thank you!
genius! these little tricks are what make good photographers become great photographers! thank you for this!
This is such a great tutorial! Wonderful! Thanks so much.
That is an amazing trick! I definitely need to save this post!
This is brilliant! Thanks so much for sharing! :)
Very simple and straightforward. I’ve used masks before in Photoshop, but this is a very simple tutorial anyone could use. Thanks for sharing!
Great tutorial and LOVE the Trestle table. I have the Ethan Allen one that you featured in an earlier post and it’s a love find for me. I love how it looks when juxtaposed with more feminine chairs as I have a similar look in my dining room as well.
Love this tutorial! THANKS for the tip!
Thanks for this wonderful tip. I have not used pixlr but I will be checking out this week.
Traci
Oh, what a great tip, thanks! I pinned so I don’t forget it ; )
This is such a great tip, I always have this problem, this will help loads. thanks!
My mind has just been blown! Thank you so, so much for sharing this with us! ~M.
Great tip! Thanks!
I missed this tip when you first shared it, but came across it tonight. My house hardly gets any natural light so I have to open up my lens quite a bit to get bright(er) photos inside my home. I always hate that my gorgeous Craftsman-style windows get blown out. Now I have a solution! Thanks! By the way, I would LOVE to watch professionals style and photograph my (or any) home. I’m sure there is a lot to learn during the process.
Just now going through this tutorial more closely because I have a blown out window issue in the nursery – thanks so much for this trick!
PS your photography tips are always awesome and I’m always searching your site for them – you should have a photography resource button in your nav or side bar for quick links! I’m sure there are so many readers who would totally utilize that ;-).