I’ve mentioned before, we have a little guest studio above our garage that we’ve rented out in the past, but mostly use for guests, especially this time of year. A few months ago I refinished the kitchen cabinets, and last weekend I thought it time to refinish the old Pottery Barn pedestal table that sits in that space. It used to be our breakfast table, and over the course of ten years it has had its share of damage done to it.
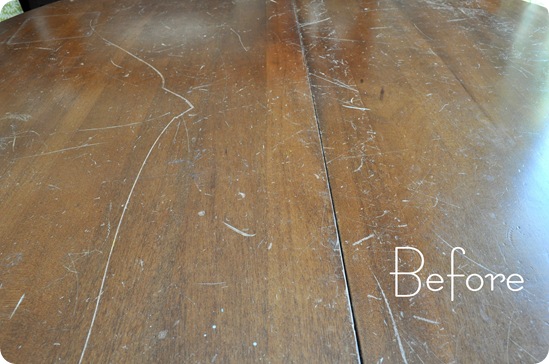
I’ve got to give PB credit, they make a a high quality solid wood table, but over the years it had suffered the typical wear and tear that comes with daily living. Scratches, dents, paint residue, kid crud, you name it, that table had it. After all the damage, I decided the time had come to refinish the surface.
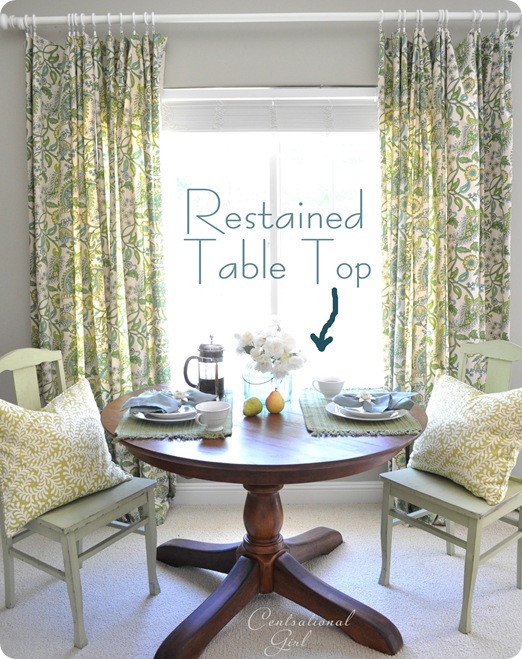
So often, when there’s damage to wood, the first inclination is simply to paint it and I confess I do that all the time. For this table, I thought it would be better to take the time to restore the beauty of the cherry wood and I’m so glad I did. With all the light and bright in this studio, I loved the idea of a classic wood pedestal table grounding the space. Besides, let’s face it. Dark wood pedestal table? Totally timeless.
Here’s a glimpse of some of the damage before . . .
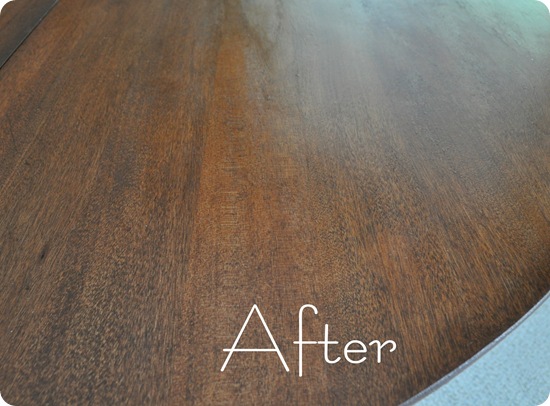
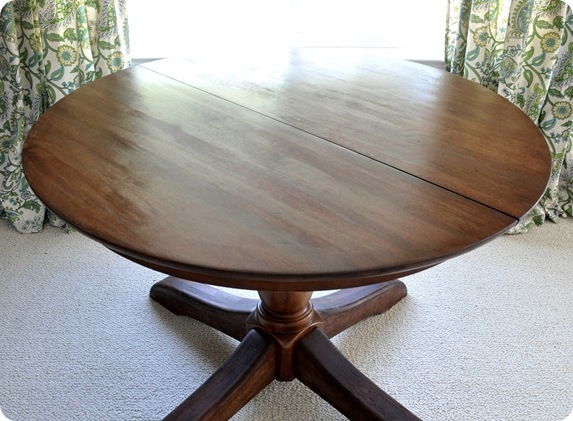
. . . and today !
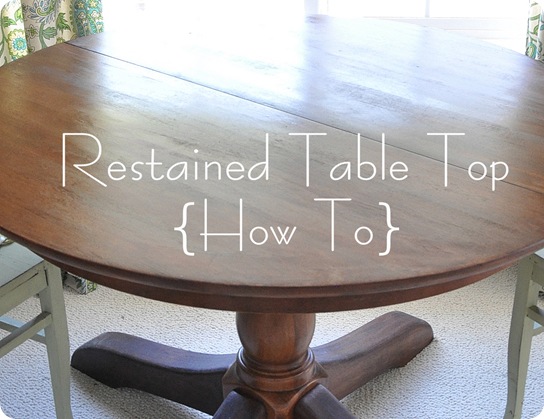
Here’s the skinny on how I restored the surface of this pedestal table in a weekend:
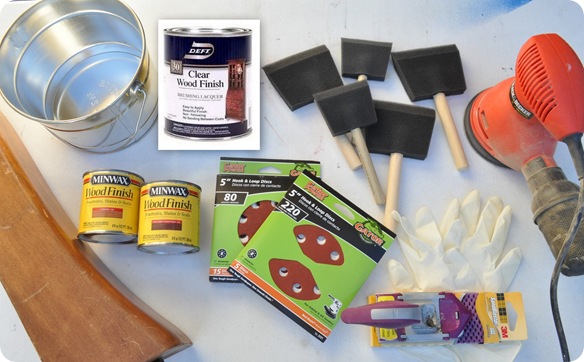
First, arm yourself with your DIY supplies.
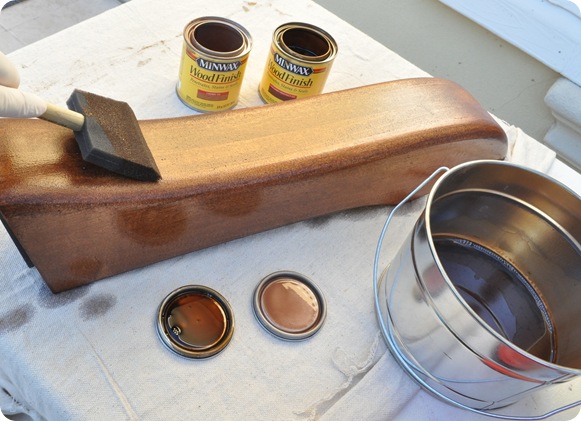
You’ll need 1. stain 2. metal container (especially if you’re mixing stain) 2. sponges or high quality brushes 3. both medium and fine grit sandpaper 4. latex gloves 5. orbital sander 6. sanding wedge or hand sanding tool and 7. protective respirator or mask (not shown) 8. tack cloth (not shown), 8. wood conditioner (optional).
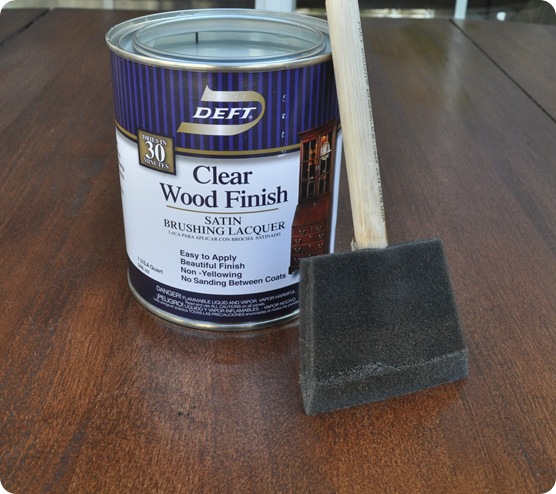
Note, in my original pic of the supplies, I planned on using Minwax Wipe On Poly which I absolutely love for stained furniture, and also used with great success on my staircase makeover. At the last minute (and since this was a tabletop) I substituted non yellowing Deft Clear Wood Finish which my friend Layla also used for her whitewashed dining room table. Deft also states the protectant is “baby safe” but not sure what that means and also “alcohol, fruit juice, and water resistant”. Okay, so I gave it a try.
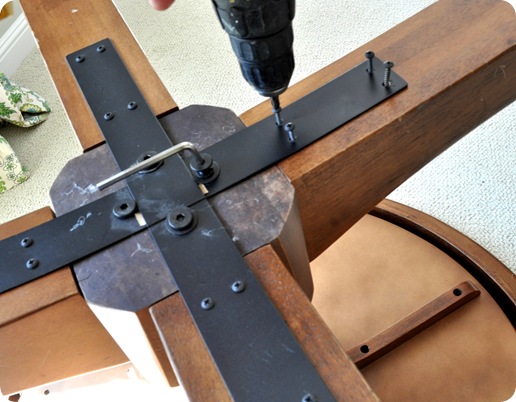
I decided since the pedestal was in perfect condition, I didn’t want to restain that part, only the feet and the top. It’s always best to start with a less conspicuous spot to try to match stain and for me, the scratched up set of feet was the place to begin. I turned the table upside down and popped off the feet to start this adventure.
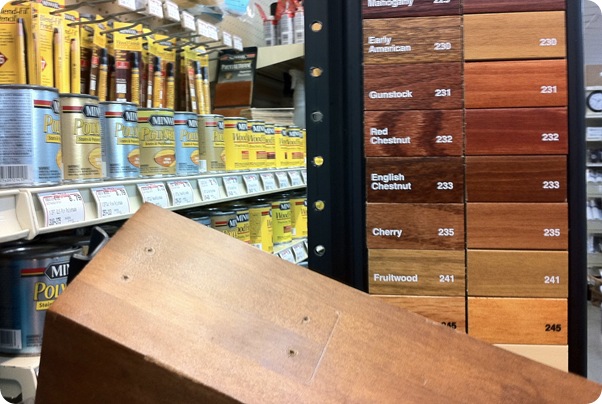
I drove on down to my local True Value with my big ol’ table foot to go hunting for some matching stain. With all the Minwax choices it seemed the ‘Cherry’ was a bit light (despite the pic), and the ‘English Chestnut’ too dark, so I determined a mix of the two would likely give me just what I wanted and grabbed both.
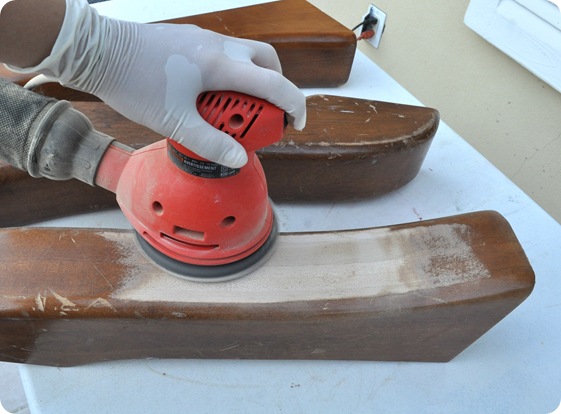
After I found my stain, I started the sanding process using my orbital and 80 medium grit (80) sandpaper to remove the stain and the scratches.
Make sure you use all the necessary safety precautions when sanding including gloves, a mask, and goggles. One of those cheapo respirators you buy in multipacks at home improvement stores should do just fine.
Once all the stain was removed, I wiped the sawdust off with a tack cloth. Next, I mixed two parts ‘Cherry’ to one part ‘English Chestnut’ to arrive at the perfect color stain for the table. I used a new cheapo sponge brushes for each application of stain and always with the grain.
Stain with the grain, stain with the grain, repeat after me, stain with the grain!
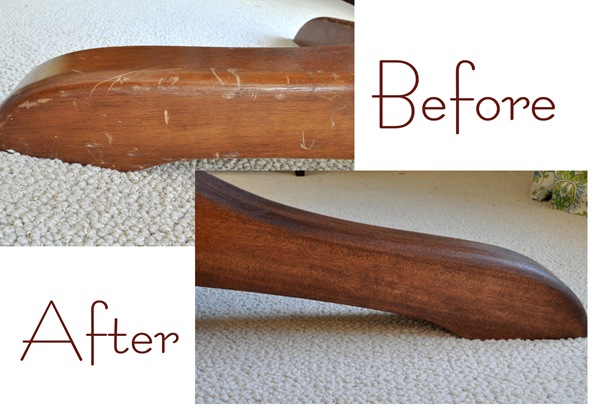
I got lucky and matched the color pretty closely. The feet turned out just a hint darker, but a close enough match to that pedestal, I’m mighty pleased.
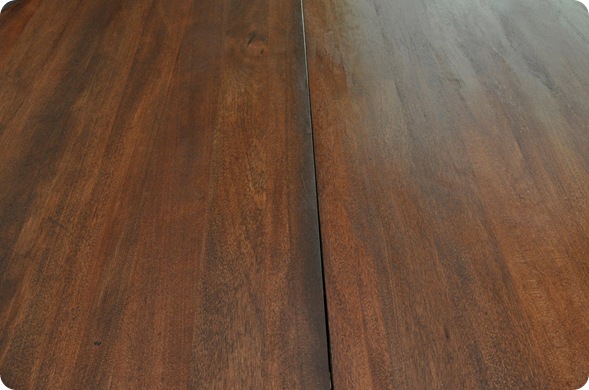
The feet, before and after!
I noticed after the staining, some of the legs had a slightly darker tones in different spots, so I decided to purchase some wood conditioner for the tabletop for more even stain application.
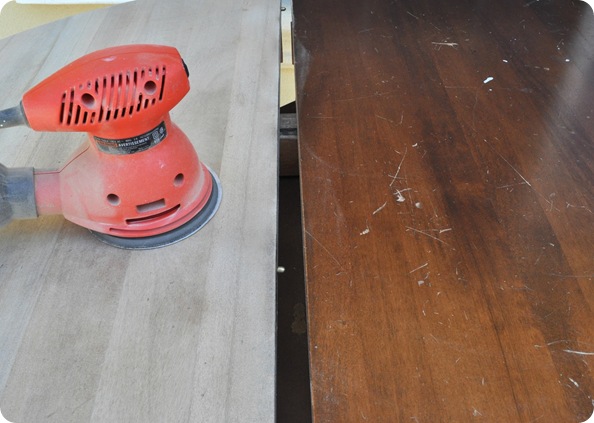
First I sanded the top just like the feet, with medium grit sanding discs attached to my handy orbital. It took about thirty minutes to remove most of the dents and scratches from years of wear and tear. I should state that the table also has a leaf insert which I refinished at the same time.
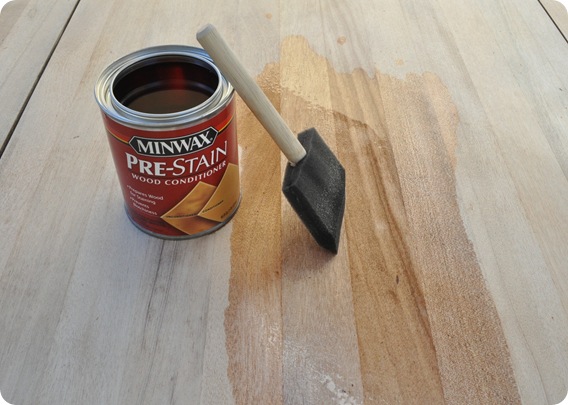
Then I applied the wood conditioner with the grain of the wood to help prevent blotchiness and with another cheapo sponge.
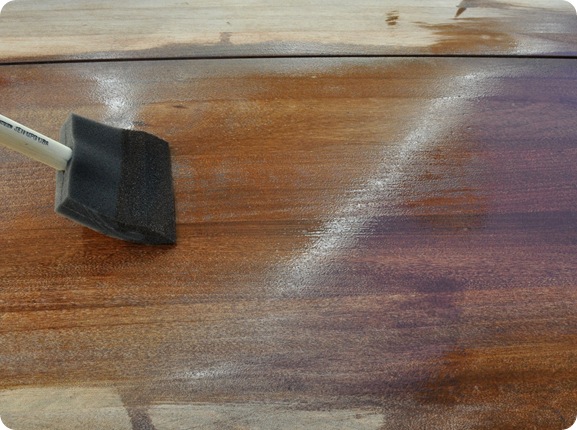
Next came time to stain which I applied and let it sit for five minutes, then wiped away any excess. Raw wood is thirsty wood and loves oil based products like this, so most of the stain was absorbed. After the first coat was dry, I applied a second coat, both with the grain of the wood.
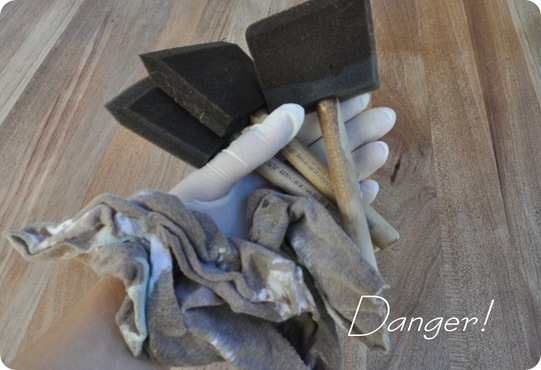
Another important safety precaution: As it indicates on the directions for these products, they are combustible, meaning you cannot leave them out in the heat where they could self ignite, so take every precaution and follow all safety instructions that are clearly marked on these products, and dispose of them properly!
The final step was adding the top protective coat. In between coats I used fine 220 grit sanding discs and also by hand to smooth the surface. I used two coats for my table, but three or four may be a good idea for a surface with a lot of daily use. Make sure you allow sufficient time to dry between coats and before you use the table.
Two coats of protectant later . . .
I have a gorgeous table top, good as new!
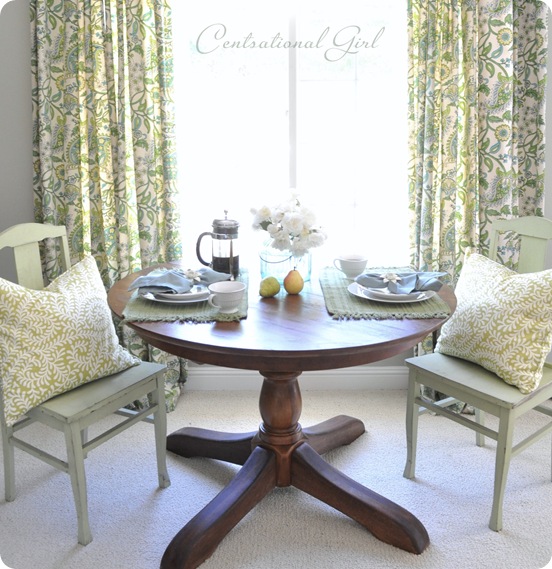
So there it is, the full step by step on how I restored the surface of my old Pottery Barn cherry wood pedestal table!
The paisley print panels are from Pier One, the scramble citrus pillows from Pine Cone Hill, and those are my spring green cottage chairs I painted last year.
I so love the look of painted chairs with a classic wood table to break up the matchy matchy feel, don’t you?
True Value Blog Squad legalese: “I was one of the bloggers selected by True Value to work on the DIY Squad. I have been compensated for my time commitment to the program as well as my writing about my experience. I have also been compensated for the materials needed for my DIY project. However, my opinions are entirely my own and I have not been paid to publish positive comments.”
.



Wow, what a transformation! Thank you for sharing. As always, you have impeccable taste. I love the fabric those drapes are made out of. Can’t wait to see your future projects!
Beautiful job! I would also love to know where you got that fabric/drapes. They are just what I have been looking for. LOVE your blog. It is my favorite blog.
Thanks!
It’s gorgeous! I need to do this to our butcher block table. It is full of scratches and stains. I’m just too scared to try it!
Thanks for sharing! I am about to refinish my table and was hoping to run into something like this!
What a timely post as I am getting ready to refinish the top of my dining room table. Great tutorial!
Getting rid of the caramel pine finish and going with a dark stain.
Chocolate top and vanilla legs… yum!
xoxo Bunny Jean
@ Bunny Jean’s Decor and More! (my MAIN blog)
looks awesome! we have a dark wood table that might benefit from similar table – thanks!
Kate it is a perfect balance. The wood stained Pottery Barn Table turned out beautifully. The painted chairs, fabric curtains, all work so great for your guests!
Come and join my new fashion Giveaway from Fresh Produce!
xoxo
Karena
Art by Karena
Amazing! I didn’t think that was even doable! Great job!
Wow! It’s like a brand new table! Thanks for the tutorial – something I will file away for future reference! Thanks for including the source for the window panels too – that was the first thing I saw and was hoping you’d tell the source. Love them!
Looks like new! You take awesome pictures and do great tutorials! Makes your site so fun to read! Thank you for sharing. I just love your taste in design!
Wow! I have always felt intimidated by staining nice wood pieces. With the instructions you gave, I feel confident I could do this. I just love how it turned out. The room is so inviting. Beautiful, but relaxed enough that I could hang out here and chat with an old friend over coffee. Thanks for the great step-by-step instructions. Bookmarking this one for sure!
Wow! That looks fabulous! Such good intuition to restore it vs paint it!
-Carly @ Createlive
wow! it looks brand new!
What a good job. It looks brand new. I love your curtains. Thanks for the how to.
The table looks great! I learned how to stain this weekend and was really surprised that it was much easier and a lot less intimidating than I thought it would be! It goes on a lot more evenly than I expected.
What a fantastic job! The table top looks brand new. Thanks for sharing your step by step process, very inspiring!
That turned out SO gorgeous!!! I am in the market for a new solid rectangular table…guess I’ll have to check out PB and see if I can come up with one in my price range! Also thanks for the tip on that protectant. I’ve been looking for a durable NON yellowing one forever! I’ll check that out for sure! Also where do you buy it??
Thanks!!
perfect! and so so sweet of you to fix things up before our visit! you know we wouldn’t have minded the scratched table! :)
my antique secretary is on the makeover list for my living room…I’m putting off sanding all the nooks and crannies before restaining it. Any tips?
This is exactly what I needed!! We have a table that’s in desperate need of a restain. Thank You!
Beautiful job! Isn’t fixing things fun?! There’s a certain feeling of accomplishment with the sort of manual labour where you see a result. Love it. ~ K!
Love it! I am in the process right now of redoing my dining room table. It is currently on it’s last coat of poly. I can.not.wait to get it back where it belongs. Check for pics on my blog at http://www.redefiningc.blogspot.com
Carri
What a lovely job you made of the table, I like the fact that the feet are slightly darker as it lends an aged look.
And I too will be saving this tutorial, thanks!
GORGE! Amazing job!
You did a beautiful job on the table! If I was a guest staying in your studio I don’t think I’d want to leave! It’s a lovely space, bright and cheery and beautifully furnished. I have been eyeing a few linens at Pine Cone Hill. Have you been pleased with the quality, Kate? They have gorgeous linens!
it turned out beautifully, I like how you kept it natural :)
I love that you refinished the table versus painting it a new color. You are such an inspiration to me! I’m much more a “thinker” than I am a doer, but I want to change that thanks to you.
This is why I love stained wood….a chance to make something gorgeous again. Love your table!!
I have a gorgeous 60 inch pedestal table that is covered with a cloth since my daughter put a saute pan on it and burnt the finish off. Maybe now after 3 years I can finally try refinishing it. Can’t look any worse, right? Thanks for the thorough directions!
Great job done ! love it..
This is gorgeous! I recently bought an old drop leg table which is perfect for my small dining area but the one thing I’m not fond of is the high gloss finish. You’ve inspired me to refinish it myself. Thank you!
i’m so happy you took the time and sanded/stained. i’m in love with painted furniture but i love the richness of stained wood as well! it looks fabulous! thanks for the tutorial!
ashley
It turned out beautifully Kate, and good to know…we have a similar PB table (still in good shape now, but will file this away for later).
I love picture tutorials! Great redo! PS. thanks for putting the “pier one” find (drapes) at the end…I was thinking as I saw the picture….where did she get those? :)
Great tips and what a beautiful result! I have a solid wood table with a wrought iron base that I’m trying to decide how to revive– paint or refinish? Thanks for the food for thought!
Wow! You are genius…I was getting tired just reading the post! Great inspiration- thanks!
Hi, so it’d be okay to use a water-based Poly as the final coat (I bought the same one you used in this [http://www.centsationalgirl.com/2011/07/my-bamboo-is-peacock-blue/] post)?
How should I dispose of my rags? They are sitting in my basement now. Oops!
THanks for all your advice, here’s what I’ve been up to per your inspiration –http://alliferg.blogspot.com/2011/08/table-for-two.html.
Beautiful table. Thanks again for more great tips and tutorial.
You did a beautiful job!
I am so glad you posted this! We have a similar table and I have been trying to decide what to do with it – refinish the whole thing, refinish the top and paint the bottom white or black, etc. I love the dark stain with the light chairs, I think I found my direction! Thanks
Hi Kate! The table turned out lovely, as with everyone of your transformations. I am in love with those paisley print panels…
Beautiful!
Wow! You never cease to amaze me! Great job…it looks brand new!
I have a table that needs refinishing. Yours turned out beautifully! However, mine is stained on top and painted on bottom. Any idea if I could sand the paint off and stain it? You are such an inspiration!
Gorgeous! I’ll definitely reference this post the next time I re-stain something. Super helpful!
Holy toledo that looks GREAT!
I LOVE THIS!! You did such an awesome job! I will be saving this how-to so I can reference it later my 18 month old twins have completely destroyed my entertainment center – the kids have chewed the wood it looks awful – it looks like some sort of animal has attacked it -so once they are older I may try to fix it OR I may just buy a new one. My husband threatens to give this to them when they get married!! :) Have a great day!
You’ll get my vote for leaving some furniture unpainted every time. Your table IS timeless and does add warmth to the space. What a beautiful refinishing job. She does it all!
Camille
Looks fabulous!! You’ve expanded my Craigslist search to include tables to have been “loved”. ;)
Beautiful job! And thank you for another fabulous tutorial! I have a mid century modern wood dresser that has been through a lot and is just waiting for me to bring it back to life. Armed with your great information I think I am ready to get started!
Great job restaining, but really, I just love that little nook! I totally agree with you – the painted chairs and dark stain table look fab together!
What a beautiful job you did! It’s always nice when quality wood gets restored rather than painted.
Are the curtain panels only 84″ or is that all that’s left on Pier1? I don’t know how I missed those–I’ve been by 3x looking for curtains for my breakfast nook! :)
I wonder how the restaining would work on a crappy oak table… Paint the legs black and try to stain the top a warm cherry-ish? Or would it just look beat?
Brand new! How messy did it get with the power sanding?? Possible for lowly apartment-dwellers to do similar inside?
It turned absolutely gorgeous! Congrats! And I love the painted chairs with the solid wood table too. :)
Wow, the table looks just like new! You did an awesome job! Have you ever posted a full tour of your guest space? It looks awesome, I’d love to see it all!
You always think of everything for each blog you do. I really enjoy your attention to detail!
I think it is so great that you continue to do DIY projects ONE STEP ahead of me! It seems I have the same “to do” list as you! First, your front door transformation, and now this Pottery Barn Table. I have a Pine Pottery Barn table that I bought from the classifieds. The leaves in the table do not match (since one of the leaves was never used) and it has started to turn that “pine orange” color. I am excited to try some of your tips to get a streamlined look. Thanks so much! You wouldn’t happen to have “design and hang collage on wall above steep staircase” as your next to do list item, would you?
I have that exact same table!
I love that you stained the wood on this one. I love a painted piece of furniture too, but kudos to you for seeing the potential with the wood. It truly does anchor the room. Great DIY!
OK, that transformation is truly amazing! I made a HUGE boo-boo last month by ironing my table cloth while on my pedestal table. There was a pad in between so I figured it’d be OK. Not so much. I ruined the top BIG TIME. I assumed I’d have to pay big bucks to get it re-finished, but now I am thinking I can do it for nothing! Thanks for the inspiration!
Kerri
A Pop of Pretty (www.apopofpretty.com)
Great instructions!! If someone can’t follow these, they probably can’t read. Well done.
wow..this came out beautiful!! I have a coffee table and end table that I would love to try this on. They are both very light wood and I would love to stain them a darker walnut color. Is this possible or do you have to try to stick to around the same color stain as the original?? My first instinct was to paint them, but I really want to avoid that if i can. If you can’t tell, I am new to this!
A-MAZING! Wow! Terrific job.
Hey Deanne, you can stain anything darker as long as you get down to the raw wood. With intricate detail, that is more difficult and time consuming, sometimes requiring varnish strippers, smaller sanding tools, and a lot of patience.
That looks wonderful! I always use a pre-conditioner when I stain, you just never know how the wood will really take the stain and that just eliminates unevenness. I have to do this to my kitchen table, but I have grooves running alont the top that are really just crumb catchers. Stupid me falling for the look and not the practicality of it. I want to fill the grooves first so I can have a solid surface when I re-stain it. It is going to be a challenge, so it always goes on the back burner on my to-do list.
Kate, it looks great! Great job matching the stain!
thank you so much for posting this! My mom recently gave me her gigantic old wooden table, she’s had it since long before she had any kids, so it’s gone through a lot of abuse. It’s gorgeous but needs to be restained, now I know exactly how to get it done!
It looks lovely!
Did I miss the wall color? Is it another Camouflage job?:)
GLORIOUSLY BEAUTIMOUS. ;)
Just gorgeous, it looks brand new! Thanks for always sharing the how-to. my bookmarks are full of your tutorials!
this whole post, from the photos to the instructions…ROCKS, really inspirational and you set the bar high for us all to make sure our posts are as beautiful and thorough as yours. really good work, and oh, YES! the table is gorgeous!!!What a nice facelift you gave her!
Great job, Kate! :-D Love your pics too…PURRRRTY!
Layla
(Thank you for the sweet shout out too!)
I love you for this post! Getting ready to tackle our kitchen table and finding the right color stain is my biggest obstacle right now…I may have to start mixing my own as well! :)
We have a small kids table from Ikea that is just stained. I have been using an orbital sander to try to take the finish off so that I can redo it but it is taking FOREVER to remove. Is that normal for it to be so difficult to sand something down to fresh wood (60 grit)? I am thinking about getting some “green” varnish/paint remover to try to speed up this process. Just wondering if this is the norm or if the orbital should be able to get this done efficiently.
Thanks for all the info. I love checking out the site. My MIL had a pedestal table and covered it with glass to protect the underside also it wiped clean. Not sure if that’s a good tip but it worked great at protecting the top.
ARe these the curtains???
http://www.pier1.com/Catalog/HomeTextiles/tabid/980/CategoryId/146/ProductId/32681/ProductName/Paisley-Print-Gardenia-Window-Panel/language/en-US/Default.aspx
And how did you hang them?
They are lovely!
And the table.. will be doing this soon
Same curtains yes, and they are hung on as rod pocket panels!
Kate
What was the estimated cost of this project? I would love to do something like this.
Thanks!
-Kacee
Hi Kacee, since I already had the tools, the cost was for conditioner, stain, and top coat – I’ll say around $25?
Kate
WOW! Fantastic! Well worth $25! It looks wonderful! Great job!
Thanks Kate!
-Kacee
Nice job of refinishing. Did you take into consideration if the Deft finish was heat resistant? I tried Deft several years ago and I liked how the finish went on, dried quickly, left a great finish, but if anything hot was on the wood for a moment, as a mug, the finish left an indentation.
Hi Joanne, I haven’t had that experience yet, but I’ll certainly keep an eye out for it!
Kate
Love the happy face on your sander. I don’t think mine has one.
Hi Kate,
I did everything you said, and now I have lifting of the surface!! :( So I went onto the Deft website, it says not to use over varnish or poly….or anything that dries via the oxidizing process. Did you have any issues after this post? I’m so bummed!! Now I have to strip everything AGAIN, sand AGAIN, and start over from square one!!! :(
Hi Becky, so sorry you had that experience, the top of my table is still looking great after using the Deft over the stain, so I’m unsure why you’re having that issue but at this point I’d sand down and use Minwax Polyurethane over the top.
Kate
Great instructions! I’m mid project and was looking for info while trying to decide if I should use a wood conditioner or not. This has really been helpful and I’m sure with some extra inspiration from your blog, my opium table will be looking fab in no time!
Thanks for this post and tutorial. I found it through Pinterest. It gave me the information and courage to refinish our antique dining table that has been in my husband’s family for decades. It still has some “character stains” that show through the new finish, (that’s ok, it’s an old table) but overall it looks fantastic!
OMG! Amazing!!!!!! Thanks for the step by step on how to do it properly! It’s crazy how it looks brand new now!!
Thanks for the post! Your step by step process is Fabulous!!! So I am mid project and have a few others going on as well. My husband decided to go outside in the garage and start sanding a dresser thinking the table was dry by this morning. We stained it last night before we went to bed. I must admit I live in Mississippi so the huidity is horrible. I realized this morning that my table is still sticky. I wiped off all of the excess stain last night and followed your directions carefully. Since he sanded the dresser there is just a little bit of dust on the table and I am wondering if I need to sand it before my next coat of stain or not. I plan to sand between clear coats but I don’t want to get to that step and the dust particles still there. So my question is, do I sand now before my second coat of stain or wait until the clear coat???
Hi Candace, I’d use fine steel wool to get any specs out before proceeding to clear coat!
Kate
Hi Kate!
I know this is an old post, but I’m restaining a beautiful cherry dining table I bought on Craigslist for $75. I thought about painting it, but like you, I love how a dark wood table grounds a room. I also love the look of painted chairs with a wood table. I’m staining our table red mahogany to match another table we have in our living room. Anyway, you always have such informative posts, I knew I’d get some good tips from you when your post came up in my google search.
Thanks for the information and helpful tips! Your table looks great!!!
Loribeth
What a blessing it was for me to find your website! I have the same exact Pottery Barn table and couldn’t believe how well mine turned out with the help of your instruction. Thank you for everything being so detailed, especially the stain mixture! Can’t wait for my next project!
Hey Kate… just a quick thanks. People always seems to want a stain sample and I don’t always have one on hand without going to the trouble and expense of creating one. Your photography and close ups are so helpful. This is exactly the color my client wanted and I just knew I could check out your site and find something. Your taste is always exactly what I need… AND for some reason I never thought to mix stain. It was a “hit my head with the palm of my hand moment!” Brilliant! Anyway… thanks… going to your site is like being able to ask your boss a question even when you don’t have one. So helpful! Thanks, Ally
Wonderful Ally, thank you for sharing!!!
Kate
I am so inspired! i have a table just like this in my ktichen. I had it before we bought the house, it doesnt match the kitchen and it has some scracthes. i was going to do away with it, but i think i may just refinish it and while i am at make it match the wood in the kitchen!!! Thanks for sharing
hello- Just sanded down and restained an old desk, based on your instructions here, including buying the Deft Clear Finish, but now, the night before I am to apply it, I am reading horror stories about runs and applying with lathes, and uneven surfaces- oh my! Scared I will run all my hard work, but I know I need to protect it…right? Do you have any advice? is it easier than it sounds? I definitely want a “natural” looking finish, (like it seems to be in your pictures). Anything you are liking more lately? Appreciate any comments you have. Beautiful work you did, great blog!
Laura
Laura, you can use wax instead, you’ll get a more subtle matte finish with a soft glow but you won’t have to worry about streaks. BTW my table still looks great! We use it all the time and the surface has held up well – Minwax also offers a Polycrylic you could use in the place of Deft.
Kate
Kate,
Great tutorial! My question is, how long after staining did you let it cure?
Thanks!
Very wonderful job. Look like new.
Looks great! I have a dining room table that my great-grandfather made and it is in desperately needs to be re-stained. Maybe now I’ll have the nerve to try it using your tips. Thanks for sharing!