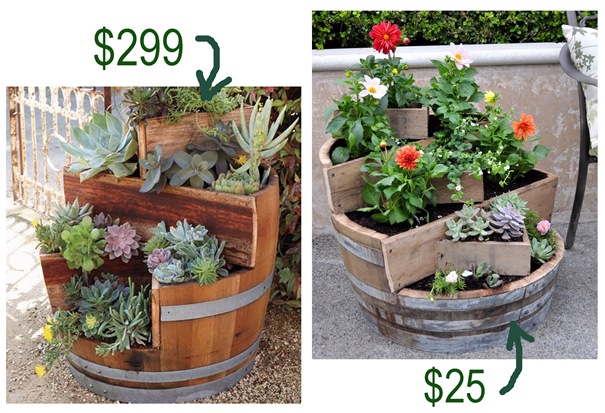
I know this happens to you. You see something in a catalog or online and you think to yourself, “I bet I could make that for less money” or “I think I could pull off a similar version, but give it my own twist”. That’s just what happened when I spied the tiered recycled wine barrel planter in the Napa Style catalog for $299.
As I mentioned yesterday, wine barrels are readily accessible where I’m from, and we can find them for as little as $20 a half barrel. (If you’re local, make a stop at Mission ACE on Highway 12, they’ll hook you up!)
After we scored a few half barrels last week from our favorite source, the mister and I decided to build our own rustic planter, and for much less than the Napa Style version. Like, $274 dollars less.
Napa Style barrel planter, $299.
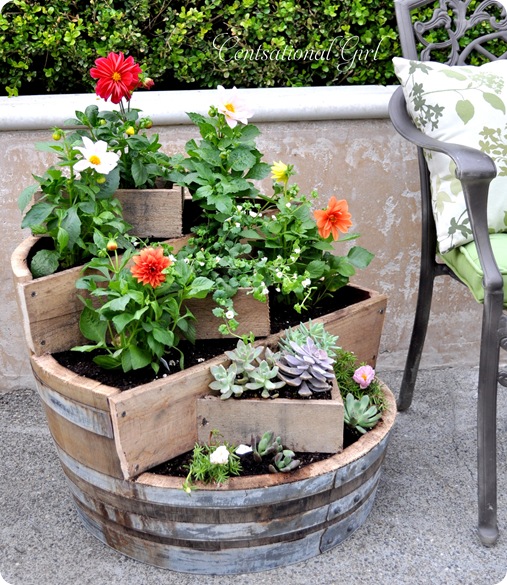
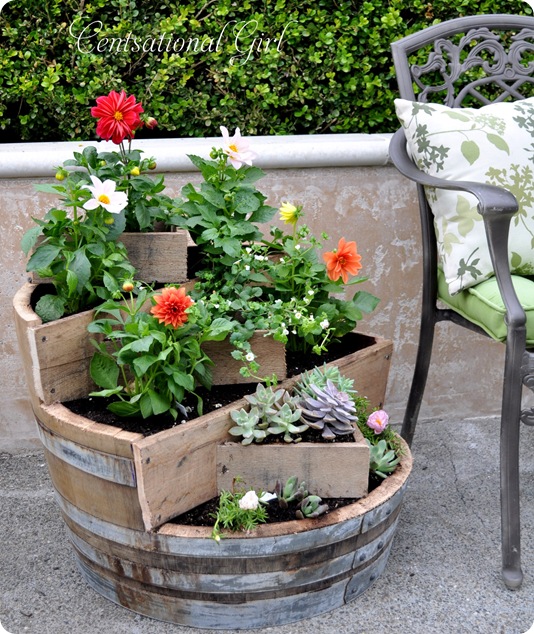
CG barrel planter, $25.
Wine barrels make fantastic planters season after season, and this version is an interesting variation on the ordinary half barrel planter. It makes a great conversation piece too, people are bound to ask “Where did you find that?”
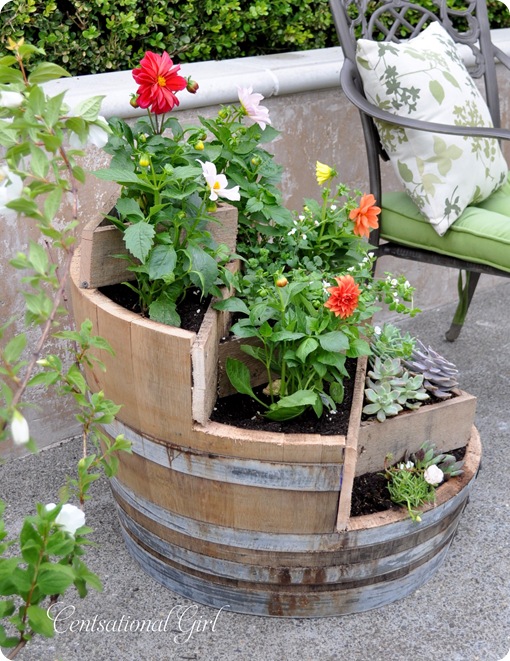
My design is different than the NS version which has 4 tiers and 6 planting areas. I reworked the raised triangles to create 6 tiers and 9 separate planting zones.
I planted a variety of succulents and perennials, but you know this planter would also be great for growing strawberries!
If you can get your hands on a local seller of used wine barrels near you (or order one online from the link below), these are the basic steps for recreating this unique wine barrel planter.
How to Make a Tiered Recycled Wine Barrel Planter:
What You’ll Need: Half wine barrel; 2 strips of wood ½” x 6” x approx. 26”; 7 strips of wood ½” x 4” x 10 – 12” (length varies with mitered corners), jig saw; compound miter saw; power screwdriver & drill bit for holes; measuring tape; wood screws; twine (optional).
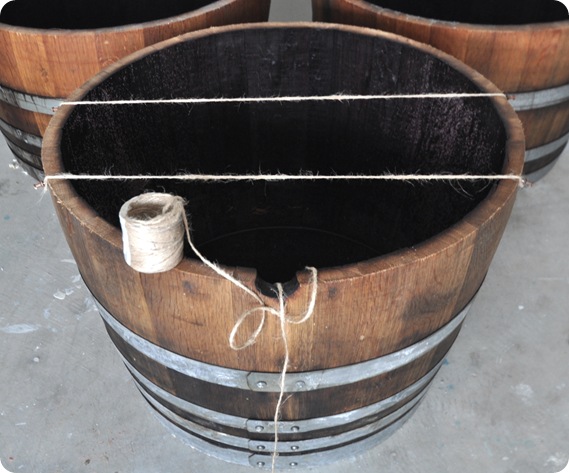
Step One: Divide the barrel into thirds with a measuring tape, then mark where you’ll cut the barrel to create the three main tiers. I used twine to help me visualize how the barrel would look split into three levels before I drew my markings on the side of the barrel.
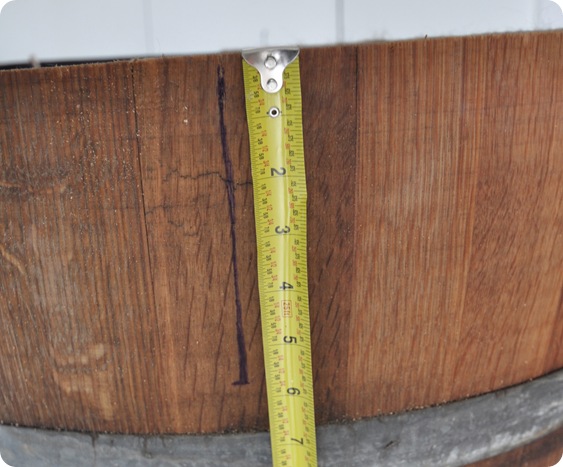
Step Two: Measure the drop in the front tier where you’ll cut (12” down) and the second tier behind it (6” down) and mark areas to cut.
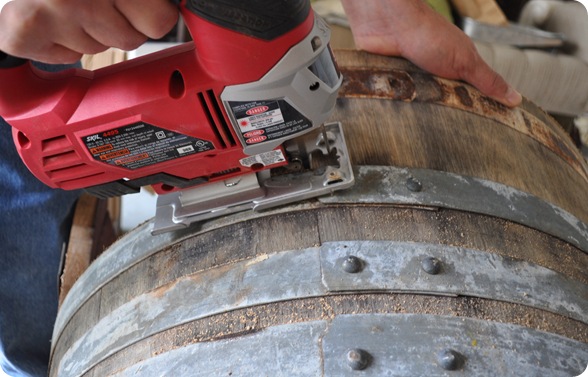
Step Three: Use a traditional blade on a jig saw to carefully cut through the wood staves.
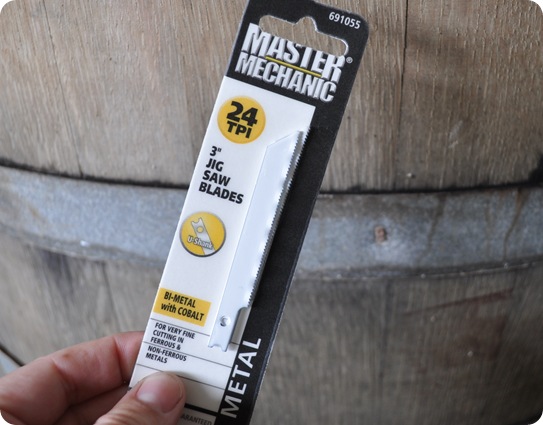
For the metal band, you’ll need a special blade. I found this set of metal blades at my local True Value Hardware store for $2.39. Detach wood blade and attach metal blade for the sheet metal band cuts.
Before you cut, double check the stability of your metal band on your barrel, since band stability varies from barrel to barrel depending on where it’s created. The band on the barrel we used was stabilized by nails driven into the band every 6” during the fabrication (or cooperage) of the barrel, so even after the cuts were made, the metal band stayed intact.
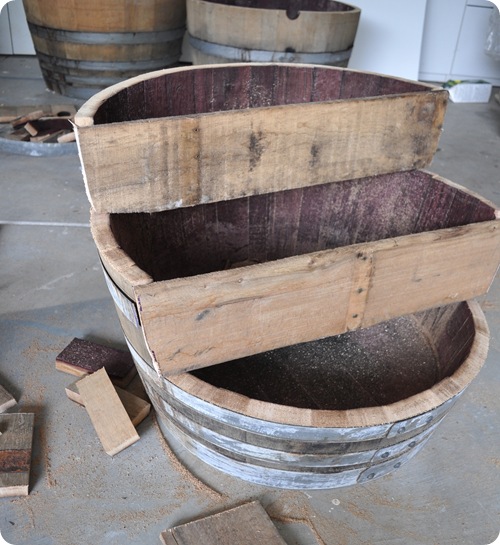
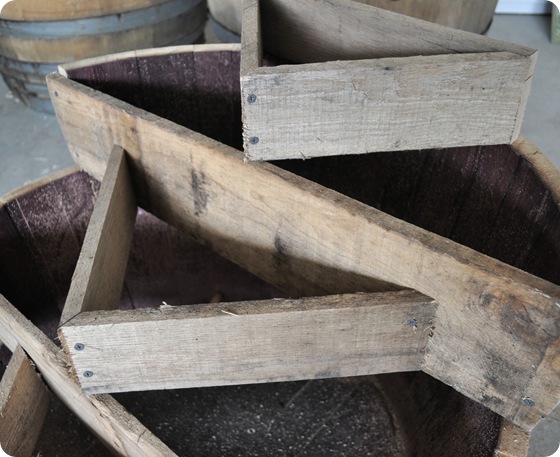
Step Four: Once you’ve made your vertical cuts, measure the distance across the barrel (approx. 26”) and trim your wood to match the curvature of the barrel. Attach your ½” x 6” x 26” board with wood screws as shown.
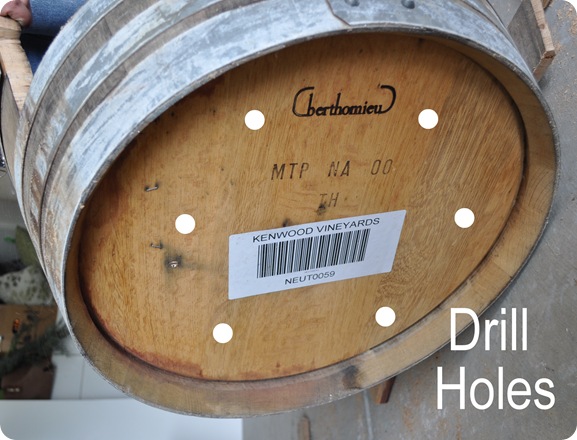
Step Five: Drill drainage holes in the bottom, two for each of the main tiers. I forgot to take an actual pic, but you get the idea!
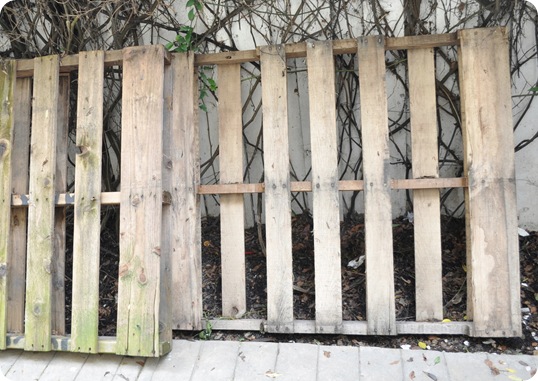
To create the six tiers, I used salvaged wood from these pallets sitting in my side yard which worked perfectly and they were free! The larger boards were used for the main tiers, and the smaller boards were used to form the triangle tiers.
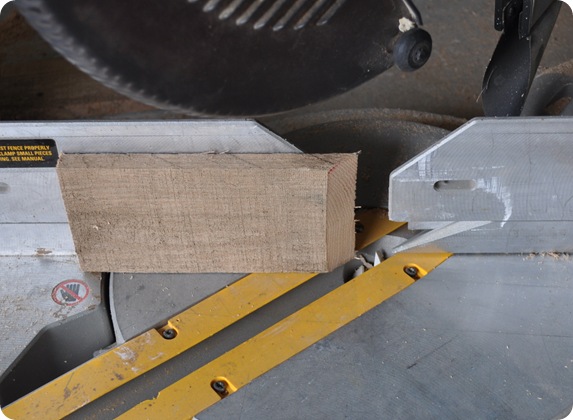
Step Six: Once your main tiers are set (above), create the triangles with angled cuts on a compound miter saw.
Attach your triangles together with wood screws, them secure them to the main three tiers with additional screws to form the raised triangle tiers.
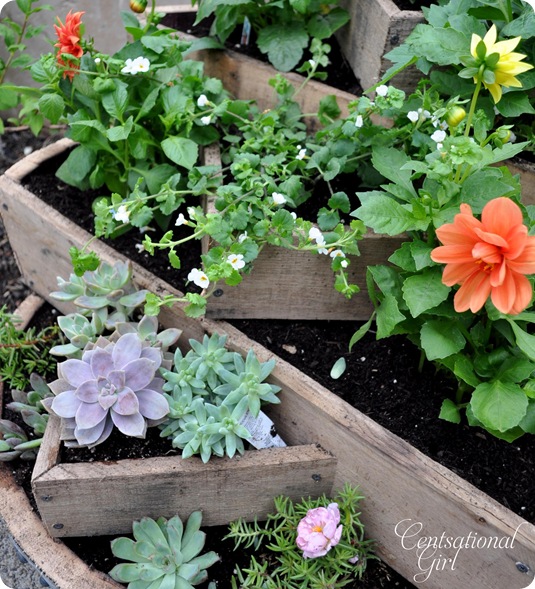
Fill your planter with soil (it holds 2 cubic feet) and add your favorite plants!
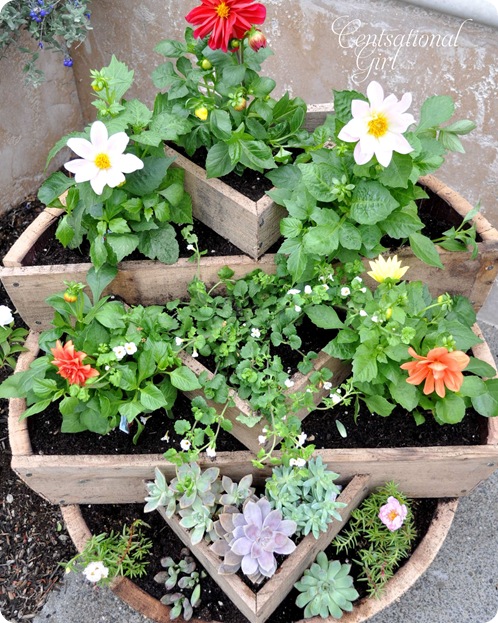
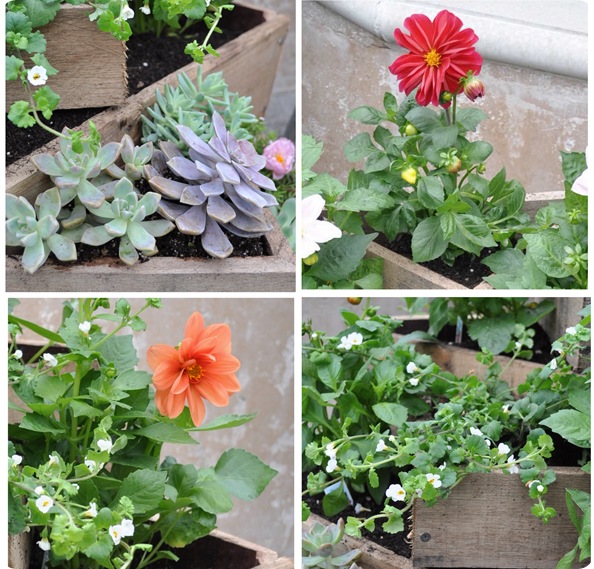
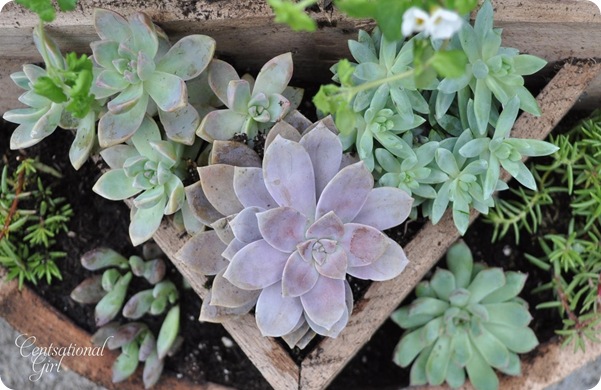
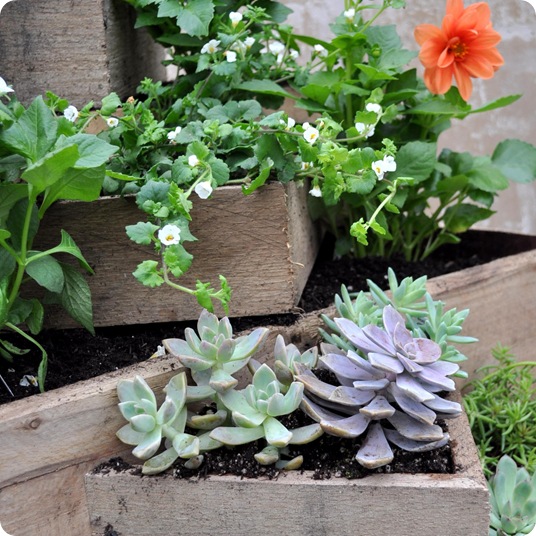
I chose succulents for the more shallow bottom tiers . . .
Trailing ‘Bacopa’ for the center . . .
And bright dahlias for the top tiers.
This planter is rustic and eclectic, and blends with the the style of our yard, plus it will make such a great conversation piece on our patio!
If you live near a winery, give them a call, or do some research and find out if and when barrels are for sale in your area. If you want to purchase a barrel online, I tracked down a source on Amazon. You can purchase a used Napa Valley wine barrel for $85 from Wine Barrel Creations* which will make two planters.
We’re lucky that we can get our hands on a half barrel for less than most folks, but if you do some research, or even purchase from the seller above, you can certainly create your own version of this rustic planter for your yard, and for much less than the Napa Style version, in just a few hours. Nice.
True Value Blog Squad legalese: “I was one of the bloggers selected by True Value to work on the DIY Squad. I have been compensated for my time commitment to the program as well as my writing about my experience. I have also been compensated for the materials needed for my DIY project. However, my opinions are entirely my own and I have not been paid to publish positive comments.”
*affiliate link

I love this!
Love this! ‘Tis the season for rotating barrels and phasing out old ones, so call your local wineries and they’ll likely give you a whole barrel for free or even the same as you could buy a half barrel from the guys who sell them already cut!
Absolutely gorgeous! What a perfect addition to your backyard. Enjoy!
LOVE LOVE LOVE it! I planning on making a couple of wine barrel tables and planters for my back yard! Can’t wait, especially after seeing your recent wine barrel posts!
Oh, I love yours better! You did a great job and what a deal! I love it!
I am so glad the tutorial was so detailed! I am a dunce when it comes to following stuff so this is good.
Wow, Kate, this is another one of those DIYs where I like the self-made piece much better than the store bought one! I think your planter turned out nicer than the catalog one. Excellent job, and it is going to be a really gorgeous conversation piece in your yard!
Best,
Kimberly
Gorgeous!! The inspired piece is much better than the inspiration piece.
Personally, I prefer what’s IN the barrel, but this is a clever us of an empty. You did an amazing job! Where did you get the barrel?
I would love to know what city this Ace is in.:)
I like your version so much better than the original one you used as inspiration!
Vinyards are popping up all over the country side where I live, there didn’t used to be any about 10 years ago and now there are several. So I might just be in luck and be able to score me some wine barrels too one day.
Thanks for the inspiration and the instructions!
Love the planter. I’m gonna put this project on my garden project list. Thanks for sharing!
Such a fantastic idea! And what a difference in price!! XX
Beautiful Job Kate! Yours turned out just as nice as the one from the store!
I bet it looks beautiful in your yard.
Have a nice day.
Susan
wow, this is so inspiring. i have a huge winebarrel in my yard and have been thinking about what to do with it for years. maybe i´ll give it a try! need to talk my hubby in to helping :-)
thanks!
Love it!
What a great idea, your wine barrel planter is beautiiful.
OK, this is genius!! I wish my hubby was handy and would cut this for me. I would, but I don’t know if I am able to handle the cutting without loosing a leg!
LOVE IT!!
Love this idea…I’m definitely going to have to try this..Beautiful!
Kate! Yours honestly looks better – I love the aged look! Aren’t you thrilled to have reproduced that at a fraction of the cost?! Great job!
-Trish
oh yes! I see why you were filled with glee!
These are quite amazing.
Rashon aka Mr. Goodwill Hunting
I NEED ONE OF THESE!!!!!!!!!!!!!!!!! :) In. LOVE!!!!! ;)
Great project, Kate and I love that you popped in some succulents! Thanks for sharing!
Stunning and clever, as always. The plants you chose really look gorgeous, too.
Yours actually looks better than the original! I love it. Too bad I don’t live anywhere near wine country….
Wow, wow, wow! You could totally sell these.
It turned out wonderfully, Kate! I love the mixture of plants you used. We had some wine barrel planters when I was growing up, but your new twist on the idea is fabulous!
Stunning!!! I want one!!! Now to find a wine barrel in my town!
it looks great. i do like the stain on the Napa Style planter.
Love it! Gonna hit up the winery (not even 1/2 a mile from us) and see what I can score!!
Wow, those are awesome! Nice job…thanks for sharing. :)
I LOVE this…I think yours looks even better than theirs! The flowers you planted are beautiful:)I want to find some wine barrels now! NapaStyle has such amazing things… I enjoyed the store SO much on our trip to Yountville. I have my own little inspired project from Napastyle too! http://thegatheringplacedesign.blogspot.com/2010/07/napastyle-inspired-makeover.html Have a great week!
Um…GORGEOUS. My local (awesome) new Raleys grocery store has a ton of wine barrels and I am having hubby ON that planter this weekend. He has been wanting wine barrels for our yard for ages! Thanks for the great tutorial.
Ya done done it again, Kate!! Amazing project! And I can’t believe you made it for so cheap! Love it.
Honestly? I like yours much better! wow!
Love this! Your wine barrel planter looks even better than your inspiration! I love how it has 9 separate planting areas. Thanks for sharing.
I’m sending this to my parents for their next garden project :)
Love the idea and planter! It’s so cool!
This is such a beautiful way to showcase your flowers! PLUS..$299 vs $25 sounds great to me! Thank you for always including so many pictures in your tutorials
This is fabulous! I wonder where I can find a wine barrel in Dallas? Hmm…
Gorgeous! Love the plantings that you chose!
OH MY I love this!! You did such an amazing job and your tutorial is *marvelous*! I have wine barrel envy right about now. I just got a wooden wine crate to do a container garden and you have just inspired me to do more :-)
gorgeous! amazing! LOVE the plants you chose! brilliant idea! love your blog!! :)
This is cute as heck. We made a very similar raised bed for herbs this spring. I hope that you don’t mind if I link to a photo of it. (http://www.akeepingofdays.com/2011/06/temperatures-soar-humans-hibernate/)
I love that you used moss roses and succulents in the mix. Soooo pretty and two of my favorite types of plants.
Great job Kate! I love succulents mixed with flowers myself!
This is Awwwesome! Thanks so much for sharing :o)
This is fantastic! I love the re-use of wine barrels- they can be used for so many diy’s to bring in a rustic look. Well done!
Love your project. Just so you know there are those of us in the world who see a picture online or in a catalog and think, “Oh I hope Centsational Girl wants to make this and then post about it!”
LOVE this! We found our half wine barrels for $25 in – oh, I think it was Atascadero? Near Paso Robles somewhere. We used six of them for a veggie garden (atrocious moles and gophers plus deer and poor quality decomposed granite soil made a traditional garden impossible). The remaining two are home to an olive tree and a garden hose! Wine barrels make the most fantastic planters. I love the extremely organic feel of your home made planter! Must try!
Looks great! I may have to round up some here.. I think it would be good to do some strawberries in too..
Ha! Too kind Leslie, thanks!
Mom in High Heels, I prefer the juice too!! But what a fun way to reuse the barrel when it’s no longer good for winemaking, fun!
xo
Kate
I must say that I just love your blog and your ideas are so creative. You are quite talented and I enjoy every post. Have been a reader for a few months, but never commented before. Figured it was time I said hello! Also, love the tips on painting furniture…. something I am hoping to delve more into on my own at home!
Gorgeous! What an awesome job you guys did. And thank you for all of the detailed directions to DIY it.
Kate- I love it! Wine barrels are a little more expensive here in Oklahoma, but that planter is so neat! I hope to visit wine country someday!
Good job! I’m local and have seen these around but never wanted to spring for one. Maybe I’ll try my hand at making one. I think it would be perfect for herbs right outside the kitchen door.
That looks awesome! Love the plants too
It looks AMAZING!!!! I love how u showed the expensive one vs the roll-up-your-sleeves-with-I-can-do-it-attitude one :)
Woohoo girl; looks amazing! I like your version a ton better than the other and not just because it is way cheaper in cost. It’s far more rustic and looks like you have had it and it’s been a part of your garden forever.
Just beautiful!!
I actually like yours better!
You clever girl! This is just beautiful. . . and just the right price!
We’re big BBC fans, and my boys especially love Top Gear. One of the Top Gear’s stars, James May, has now made a couple of series of shows about wines–have you seen them? In the current series, he and his wine expert companion are traveling throughout California learning about CA wines. I think of you every time I see the show!
Love it and I love how you show people how to make beautiful things at affordable prices!
I’ve never seen one like this and I really like the look. I’ve seen them often with just the half barrel, but never all the “layers” and that is so much better! You did a great job with this project!
Fantastic!!! LOVE!!
I swear – is there anything you CAN’T do!!?? I have been reading your blog for about six months now and I have never been so captivated in all of my life! I’m sure you hear this all the time, but you are just so incredibly talented. And I’m always so impressed at how quickly you post one amazing DIY project after another. Thank you! For such an amazing blog. I have been inspired again and again.
And I think your cheaper version is WAY cuter than the expensive one!
Oh these are so great. I wonder what hubby is going to think when he comes home and i have cut up his barrels. lol Thanks for showing us how to do this.
Kat
Call me cheap but I really like things practical. In the past, I used to buy things I like in Pottery Barn collections. Because most of them are expensive, I sometimes use up my savings. But since I got into DIY, I was able to save money.
Just last week, I found this stunning lamp decor and chandelier online. But they cost more than $500. What I did is research some DIY steps here in centsationalgirl and some decor sites. The result? I saved almost $300.
You are amazing!
Kate
LOVE IT – and BTW – YOUR $25 version is BETTER!!! HA
Squish some cascading petunias in the corners –
Lovely
I love your version more than the expensive one. Your certainly creative and inspiring!
I love the wine barrel planter idea. However, my wife, Wendy, might be tempted to order the one from Napa Style simply because she is in love with Michael Chiarello. No joke, we ate at Bottega last year while he was working. The entire meal all she could do was stare at him :-) He took our check after the meal and I think she almost passed out.
We are very jealous of where you live, hopefully we will be able to own a place out that way, but until then we just need to bring a little of wine country inspired ideas home with us. So far we’ve built wine barrel stave candle holders (http://www.oldtownhome.com/2011/6/8/Let-There-Be-Light-Wine-Barrel-Turned-Candle-Holder/index.aspx) but this post and your previous post have inspired me to look into more complex construction. Might need to try a smaller version of a chandelier for our yet to be built wine bar area. We shall see :-) thanks for the inspiration!
That is so awesome! I love planters, I do them myself. Too bad I live so far away from wine country!! :)
What a neat idea! And how awesome did it turn out! Sending over right now to a friend who loves wine barrels and using them as planters. Great inspiration ;).
I had to blink a few times when I read $299 for the barrel. $25 and your barrel is a lot nicer. Jeesh, $299, what were they thinking!
Forgot to add…please let me know where to place the order for the $25 barrel. :0
I love, love, love this idea! I am going to try it and I’ll let you know how it turns out.
You are so creative. Thanks for the ideas.
Oh, sweet jeebs! Kate, this is so beautiful! Gah, we dream of large outdoor spaces someday, but for our now, our tiny city patio will work. This was SO pinned!
I love this. I love the Napa Style catalog, but wouldn’t have spent the money on this either. Now if only I were good with woodworking…
Wow, Kate! This is fabulous. I love your version. My mom would adore this for our backyard. Maybe I’ll try to tackle it…with my dad’s help (:
Amazing idea, I think I’ll try it too!
Great job and excellent step by step instructions. You have changed the everyday wine barrel planter into a creative art project. To see some of the 30 different items I make from wine barrels visit my site http://www.winewoodcreations.com
Robert
Love what you made. Great idea. I am always inspired by hand crafted items.
have to find another source for the the wine barrel…the shipping is over $100. Great idea though.
Hey Susan, I think they raised their rates after I linked to them, you’ve reminded me I should remove it! check your local nurseries for half barrels, they often carry them.
Kate
very creative-and it looks really nice too…
You’ve outdone yourself, sis. Awesome.
My husband made me two of these. They are awesome,love all the neighbors stopping to check them out. Thanks for the idea.
Amazing idea! I live in Indiana I make homeade wine and have extra barrells and I am going to start my planter today thanks to you!!
very pretty! i like it